Tuesday, March 17, 2015

High Tea with Marie

It's tea time! Alpha Stamps Marie in Wonderland kit is full to the brim with tasty sweets, outrageously poofy panniers, tea sets, and Marie of course! Seeing the cakes and teacups on the Marie Takes Tea collage sheet made me eager to set up a tiny tea party of my own, and invite three of my most favorite ladies for a cuppa. 


I started by making tea party place settings with a fun twist. Lots of my paper projects tend to be interactive and I thought it would be great to have articulated Maries to play around with while daintily sipping your tea. The paper dolls were made by cutting out three separate pieces of the same image from the Marie Takes Tea collage sheet, punching holes with a tapestry needle through the shoulders, upper arms, and forearms, and then attaching them together with Metallic Mini Brads.


I covered the back of a die cut chipboard panniers dress with paper from the Harmony 6x6 paper pad, inked the edges, and then glued it to the back of the poseable Marie. Marie's front was decorated with Diamond Stickles, Goldenrod SticklesStickles dry glitter, and tiny adhesive gems. Lots of those scrumptious cakes and teacups were cut from the same Marie Takes Tea collage sheet and I glued the short ends of a sliver of paper to the back so Marie could hold her cake and eat it too! Plus, it's fun to put cookies on her head.

We couldn't have Marie toppling over during tea (it's not THAT kind of party!), so the stand not only keeps her upright but also holds a little secret that my tea party guests receive as a thank you gift.


I glued a length of 1/8" drapey ribbon to the lid of a tiny paper mache box (covered in the luscious Harmony paper) and glued that to the back of Marie. The top edge of the lid was left unglued so my guests' name cards could be slipped down between the pannier and the lid. A strip of white Dresden border held the vellum name card in place. The rest of the box was tied to the lid and tiny brass feet were added to the bottom.


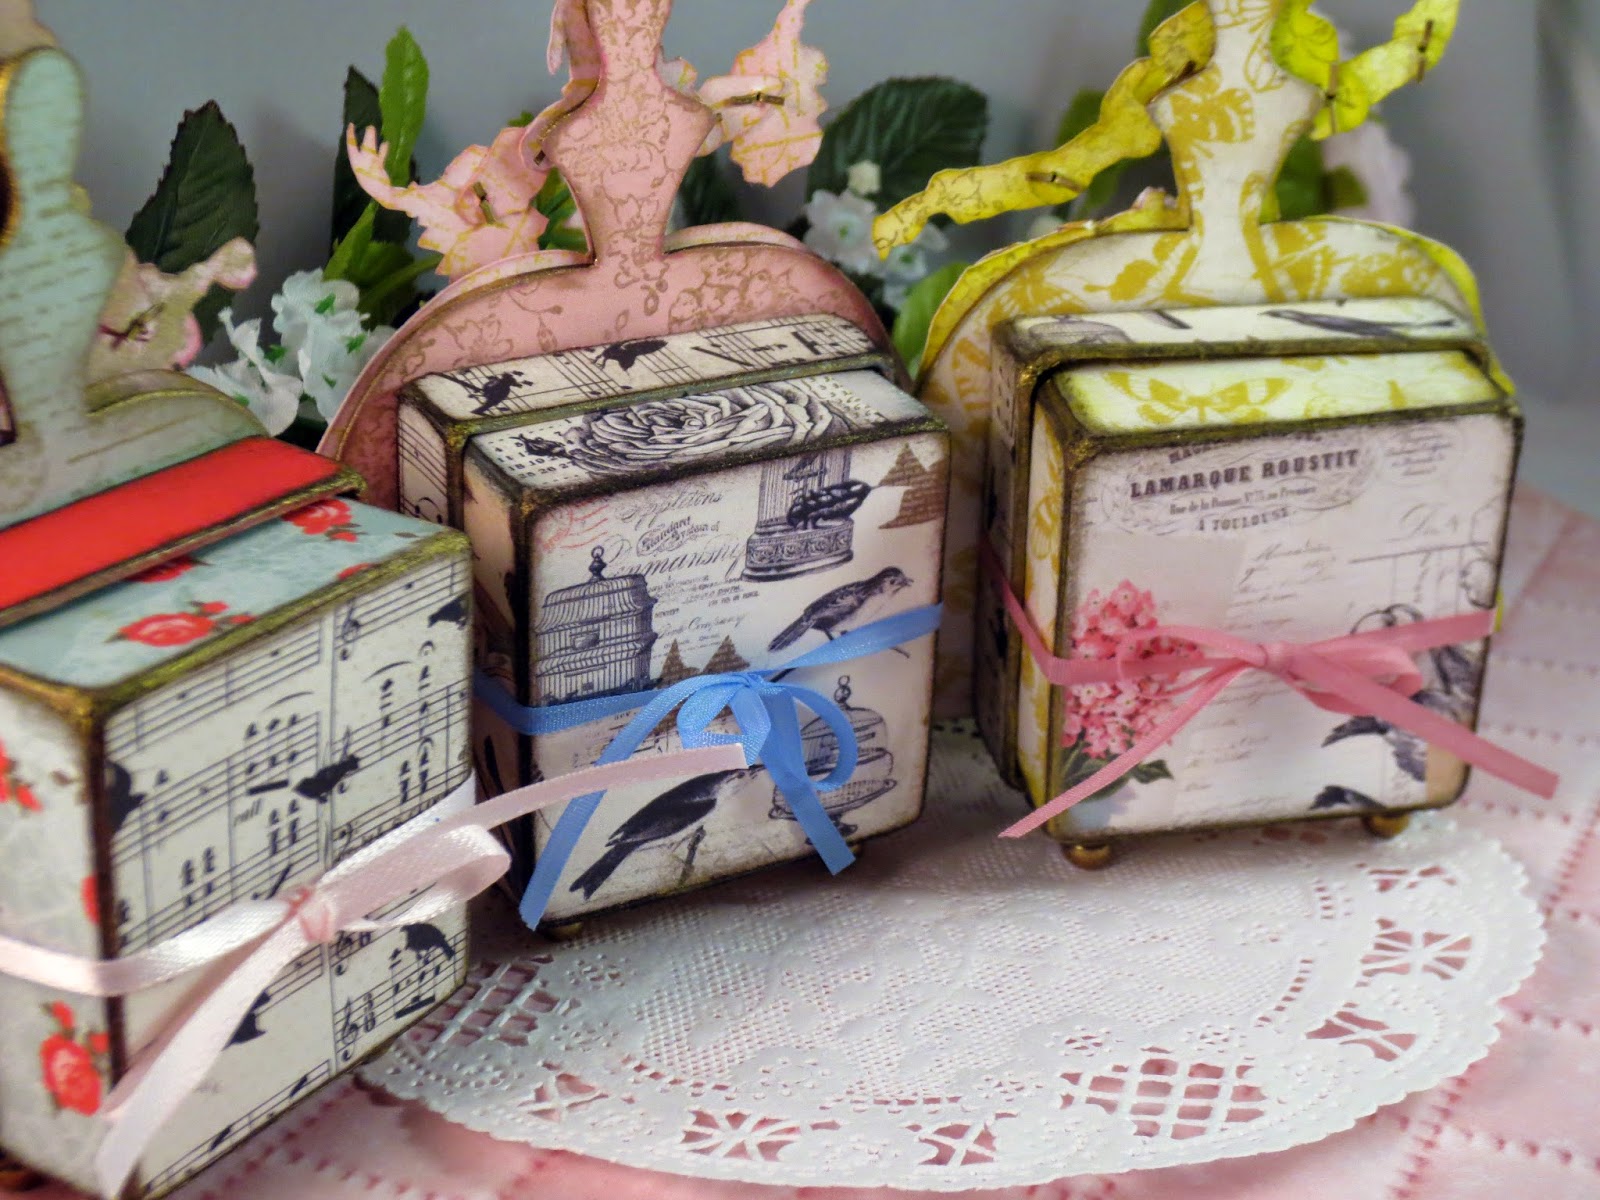
So what's inside the box? 


Ooo la la!


Here's a quickie tutorial on how I made the Marie charm necklaces. First, off with her head!!! Using a 1" circle punch, cut out a noggin from the  Marie Takes Tea collage sheet.


Adhere the image to a 1" brass pendant using a dab of Glossy Accents. 


Add Glossy Accents around the perimeter of the image, then fill in the center.


It is difficult to see in this picture, but I colored the backgrounds of the images in coordinating Copic markers.

Add an acrylic flower or other decoration and sprinkle on a few micro beads before the Glossy Accents dries. Once dry, attach a brass tea set charm to the bottom and loop a length of drapey ribbon to the top. Viola! 

Our tea got cold because we were too busy posing Marie.


More tea?


Something royally funny must've been said.


Materials List:

Marie Takes Tea Collage Sheet
Harmony 6x6 paper pad
Tiny Paper Mache Box set
Die-Cut Chipboard Panniers Dress
1/8" Drapey Ribbon
1 Inch Brass Pendants
White Dresden Border
Raw Brass Box Feet- rounded
Metallic Mini Brads
Brass Tea Set charms
Diamond Stickles
Christmas Red Stickles
Stickles Dry Fine Glitter - Lagoon
1mm Micro Beads Pink Pearl
1mm Micro Beads Turquoise Pearl
1mm Micro Pearls - Purple Pearl
Acrylic Flowers in Tin

I also made my own memento using an 18th Century Chipboard Shoe and some aqua blue flower stamen.


Sunday, March 15, 2015

Tin of the Month Club

Some time last year I was given a set of 12 teensy tins that a couple of friends had picked up, and set them on the craft table when I came home. And there they sat. Fast forward to January, when I see that one of those friends began a Tin of the Month Club; a themed tin decorated for each month of the year. Brilliant, right? I hopped over to my other pal's website and she had begun making these great little tins, too! Well, they are just the funnest things ever so I asked if I could join the club.

January's Tin:


And then February: 


Finally, March:


Go HERE to see rackycoo's tins and HERE to see cackle's!

Tuesday, March 10, 2015

Make Your Own Mandrake

The past two weeks have been busy with a tea party project (I'll be posting that soon), a side project (which will be posted before that), and some wardrobe sewing for a few American Girl dolls (which I won't post because the dolls' hair is in a constant untamable "wind-tunnel" state). Anyone have any tips on smoothing out the 'dos?

Anyway, I thought I'd share a tutorial on making your own polymer clay mandrake ornament for all those Harry Potter fans out there. It is a relatively quick project so let's get started!


Materials:
Polymer clay, mini terra cotta pot, tacky glue, 22 gauge brown cloth stem wire, railroad landscape material in brown, antiquing fluid or brown acrylic paint, toothpick, stylus, or any other sculpting tools, plastic leaves, small styrofoam ball, wool roving or twine (optional), and earmuffs.


Condition clay and roll into a cylinder, then twist ends in opposite directions.


Using an xacto knife, make a slit for the mouth then shape the bottom lip with a sculpting tool. 

Make eyes with a stylus then add small clay snakes to form brows. 

 Smooth brows and add small ball of clay for nose. Add indentions for nostrils then smooth out the nose.


Twist three small clay snakes for the arms and the top of head. Smooth onto the body then add texture with the xacto and stylus. Use a toothpick to make a hole in the top of head so you can add the plant later. If you'd like, you can also make holes in the hands to add root fibers with the wool roving. Bake your clay accordingly.


Time to paint! Slather your mandrake with antiquing fluid or watered down acrylic paint, wiping off excess until you're happy with the results.
Smash the styrofoam ball until it fits inside the pot, pushing it a little ways under the edge of the pot. Glue in place. Add paint to your pot if you want a dirty kind of look. Take the stem wire and twist it around the pot, then wrap short end around long end of wire. Determine how long you need to make the hanger then twist wire around a paintbrush to make a loop. Attach remaining wire end to the other side.


Paint top of styrofoam ball brown, then glue fake landscape material around edge of pot. Glue plant to top of mandrake and add wool roving to hands, then glue into pot. Now you've got your own Mandragora! Don't forget your earmuffs.


Pretty fun, huh?