I needed a gift to take to a friend and found I had a tiny diorama box from Alpha Stamps. It was the perfect size for an ornament with a snowy scene inside. The Home for the Holidays Clear Stamp Set fit exactly inside of the diorama box. The stamp set has several houses, a fence, trees and more trees, and even a tiny Santa and his sleigh. Cute!
I layered the scene inside similar to a tunnel book to make it a bit more interesting then covered everything in pounds of Winter Snow Glitter Mix and a bit of dimensional snow.
To make the layers inside the ornament, four pieces of watercolor paper were cut the same width as the diorama box and twice as long. Any thick paper would work, I just chose it because all of the images are colored with watercolor pencils after they were stamped.
I began folding the paper beginning with the foreground (which is also the background, which willl hopefully make sense with the photos). That piece fits the back of the box and is folded to fit along the bottom of the box, then folded one more time for the foreground's "snow bank". For the next layer, I stamped a Christmas tree on one side, folded the paper as before, then stamped background trees on the other side. This method was continued for four layers before I trimmed around the house and all of those teensy weensy trees. The images were colored, glittered, and stacked together with adhesive foam dots in between.
All of that fit snuggly inside the diorama box. Covered it in paper, added some tiny white snowflake buttons, snippets of a silver juniper pick, and a hanger, and poof! Instant gift.
Happy Holidays!
Holiday crafting is happening all over my craft space and my most recent finished thing is a festive cake decorating scene using Alpha Stamps' new Small Display Tray with Handles. This tray is adorable! It is roughly the size of an Altoids tin, 3 3/4" x 2 1/4" or so, which means plenty of room for all sorts of miniature things. I thought the buttons in the Christmas Miniatures set would be nice as cake decoration, so I went from there.
The gingerbread man, snowman, and tree that is on the front of the tray are three of the buttons in the Christmas Miniatures button set...there's also a reindeer, mitten, and sleigh!
I managed to cram a cake, an icing spatula, metal mixing bowl (oooh, I love that bowl), spatula, a vintage mixing bowl, two jars of candies, a plate of gingerbread men, an icing bag, more cookies, AND an entire tree on that itty bitty tray. The icing spatula (the metal one on the tray) was made by trimming a strip of metal off a tealight holder, bending it to shape, then adding a polymer clay handle. I added two silver dots with a Sharpie after it was baked. The yellow spatula is simply a short length of flat toothpick with a polymer clay end; I sandwiched the toothpick between two thin sheets of clay then cut off the excess and baked it for a few minutes.
To make the icing bag, I cut out a triangle shape from plain paper and folded it just as you would with a regular sized parchment triangle if you were making an icing decorating bag. I glued the ends together, stuffed a bit of clay inside, then scrunched the end closed. To make the decorator tip, color the end with a silver Sharpie. Let's make a cake, shall we?
For the cake itself, I used clay that either I had messed up by rolling it on a not-so-clean surface or my kids had used and did the same thing. This part won't show so it doesn't matter if your clay has picked up bits of whatever or has been mixed with other clay and is a sickening grey color. Roll into a cake-like shape. Bake accordingly. Mine was 15 minutes in a 265 degree oven but yours may vary depending on your specific clay.
Once cooled, frost your cake. The frosting is white polymer clay mixed with enough translucent liquid clay to make it spreadable. It seemed to be about a 50/50 ratio.
I cut slices from a Polymer Clay Red Swirl Peppermint Cane and stuck them into the frosting along the bottom. Since I wasn't sure about the safety or flammability of baking the gingerbread button, I cut the shank off the back and pressed the button into the top of the cake, making a depression in the frosting. The button was removed and the cake was baked a second time. If you can't chop off the shank of a button you want to use, omit the first baking of the cake. That way you can press the button into the frosting and the cake, making a nice indention for the shank. Once the cake is cooled, the button will sit flat on the top of the cake.
I made a fondant version too, and it begins the same way as the first, with a cake shape from waste clay. In the fondant color, cut out a thin strip that's slightly taller than your cake, as well as a circle of fondant that's the same size as the cake.
Encircle the cake with the strip of fondant and fold the edge over onto the top of the cake. Add the fondant circle and smooth the edges. You could just forget about all that and go straight to rolling out a cake shape in the fondant color but where's the fun in that? Plus, I have lots of this-used-to-be-white clay and wanted to use it somehow, so that's what I did. Bake your cake.
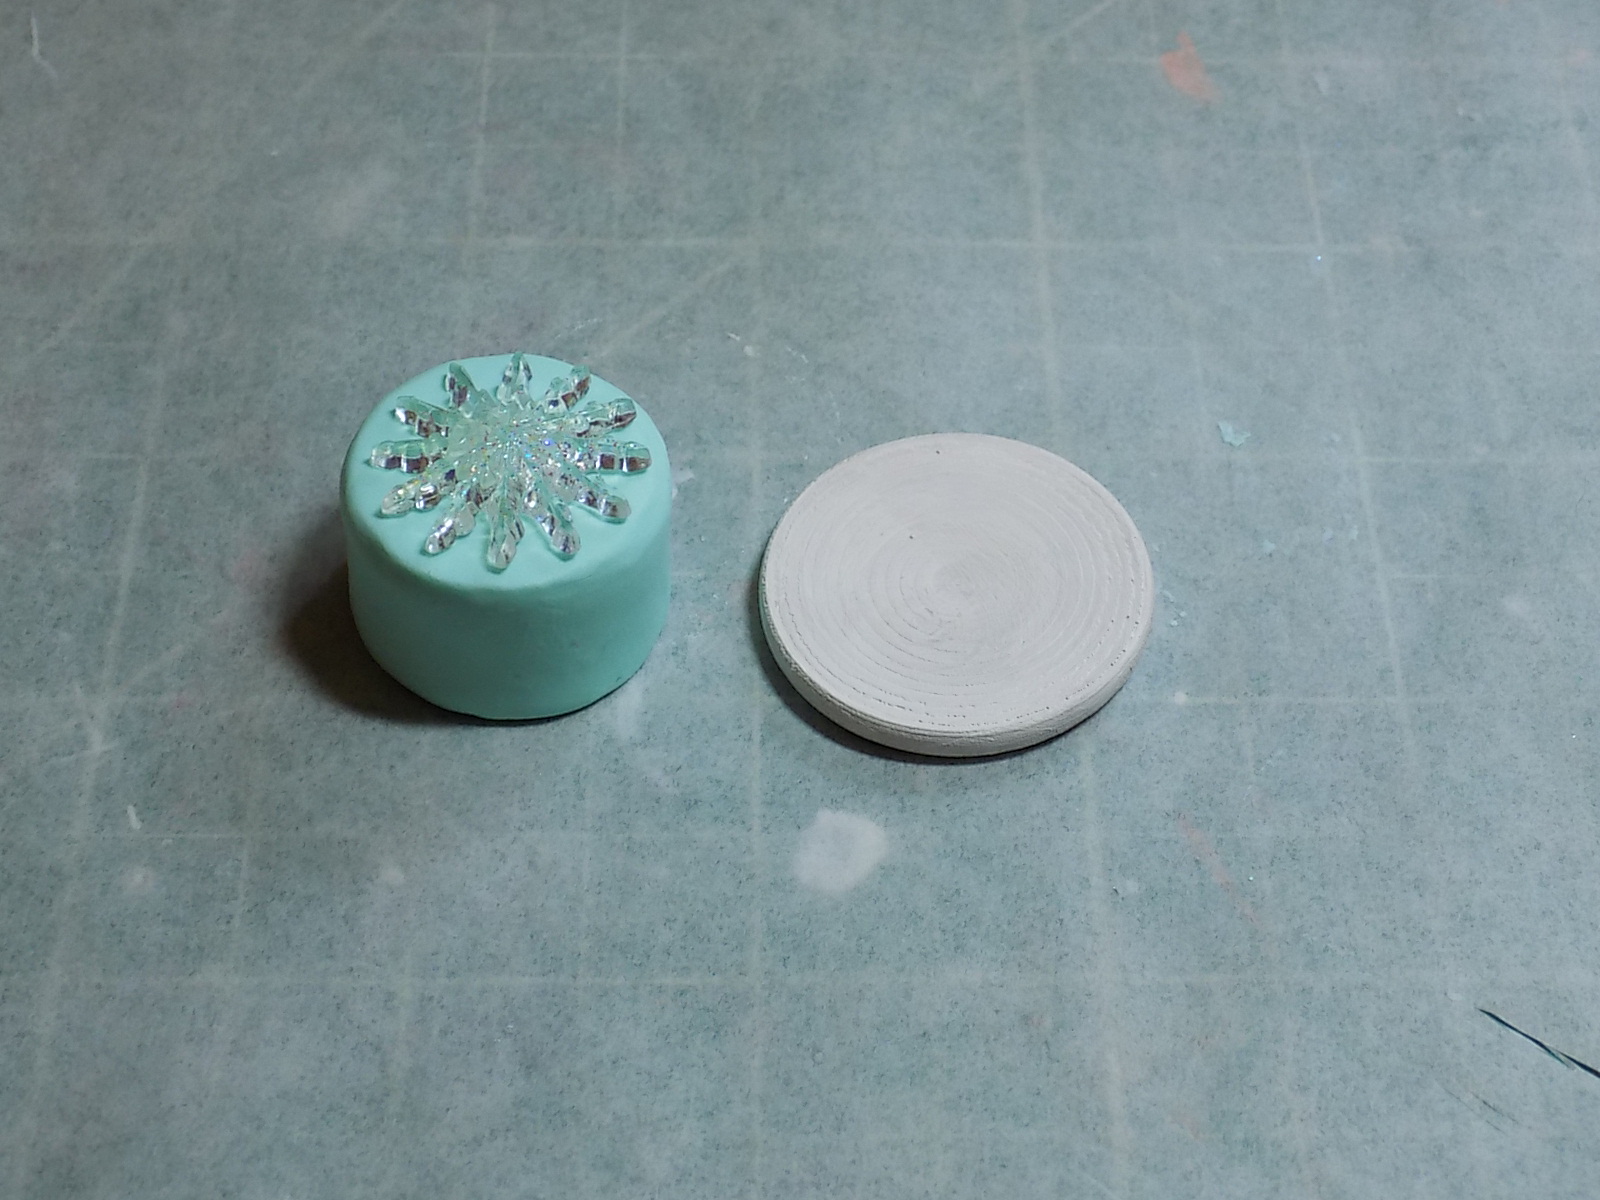
I put a Flat Back Clear Iridescent Snowflake on top, glued it to a wooden disk painted white, then added Fluffy Winter Snow along the bottom.
The first cake I made turned out too large but it's still kind of charming.
And there you have it. Happy Holidays!
Supply List can be found HERE.
My Christmas wishes were answered with this month's kit at Alpha Stamps, a kit that is chock full of mid century goodness and oodles of rosy cheeked Santas and snowmen. I'm in love with all of the vintage images like Frosty here:
I added tiny ric rac and baker's twine on the ornaments plus a few pom poms for good measure. Santa's giant red bow came out of a 1970's Christmas craft kit. He also has a glittered dingbat on his ornament.
One of my daughters chose this sweet kitty face for the last ornament and even though you can't tell, her collar is fuzzy with white flocking powder and her hat with red.
I'm off to go pull out the color wheel and all my boxes of Shiny Brite ornaments. Happy holiday crafting to you!
Supply List is Ho Ho HERE.
Now that Halloween has passed, it is time to kick it into high gear and prepare for the holiday season. But before diving in the Christmas spirit, I took some time to assemble a miniature hutch celebrating Autumn and all of its glorious colors.
How fun is that buffet?? It comes unfinished from Alpha Stamps so it can be painted or stained any color you'd like. In fact, many of the items in the scene came from Alpha Stamps, making short work of a finished project. I made the paper banner, the cornucopia, a bunch of crepe paper flowers, painted a bowl, and four polymer clay squash. That's it!
The buffet has four functioning drawers to hold bits and pieces. I'd like to think that is where the squirrels have stashed their bounty (after they tossed the silverware, of course).
Under the buffet hides a hedgehog and a gnome in an acorn cap bowl. There's also a rustic metal bucket filled with golden apples, a couple of pumpkins, and polymer clay squash in a wire basket. The squash were shaped and a hole was poked in the top so after baking I could add a tiny length of toothpick for the stem. They are odd squash but that's what they look like in my head.
I followed a really great tutorial on how to weave a miniature cornucopia, and even though it came out a little wonky, I was pleasantly surprised with the results. The bowl on the top right received a coat of paint and a wash of antiquing fluid before being stuffed with fall foliage.
This sweet metal urn came from my minis stash and it worked well as a planter. Here's a quickie tutorial for the flowers. It is too easy, really.
Cut a long, thin strip of crepe paper then make tiny cuts along one long edge.
Dip the end of a piece of wire into glue and wrap strip around end, adding a dab of glue as needed.
Cut out a circle of green crepe paper and poke a hole in center.
Add a bit of glue to underside of flower and slide circle to cover the glue.
Roll circle around bottom of flower.
Fluff out the flower with a toothpick or needle and repeat. I believe the photos alone would have worked as a sufficient tutorial, it is that simple.
Thanks for viewing and happy November to you!
Supply List is HERE.