Saturday, December 17, 2016

Naughty or Nice Shaker Ornaments

Alpha Stamps has these great chipboard ornaments with a shallow plastic dome over the front so you can easily create shaker bauble. Fill them with microbeads, sequins, confetti, or any other thin decoration, add a paper image to the back, paint the front, and then you have a quick, lovely Christmas present for someone special. 


Because I like to remind my children of the importance of being nice, my ornaments are adorned with the jolly St. Nick on one side and the child-gobbling Krampus on the other. If my kids happen to forget their manners, I have them turn one of the St. Nick ornies over to reveal Krampus, and they really do not like that side. The utensils in one of the ornaments probably has something to do with that.


Luckily, they are mostly well-behaved and we get to enjoy the merry side more often. 


Hope your holidays are joyous!

My supply list is HERE!

Sunday, December 4, 2016

Anything From the Trolley, Dears?

I participated in a Harry Potter Holidays Swap over on Craftster and after rummaging through my stash, I came across an ancient tea cart kit that screamed Honeydukes Trolley. Researching the different kinds of sweets that were going to go on the cart lead me to an amazing Honeydukes Trolley on 19th Day Miniatures. The artist, Tara, had used the very same tea cart I had, and because I wasn't capable of envisioning a better version, I chose to replicate her paint job for my cart. I love those colors!


Most of the candies are made from polymer clay, like the chocolate frogs, pumpkin pasties, cauldron cakes, swirly lollipops, fizzing whizbees, chocolate wands, gummy snakes, Bertie Bott's beans, sherbet lemon drops, licorice wands, and white chocolate owls. The heart shaped and pink swirled candies were cut from pre-made polymer clay canes, and the sugar quills and Drooble's gum are plastic beads. All of the jars, bottles, and pots are from Alpha Stamps, and you can find the tea cart there, too! 


Look at the doofy chocolate frogs! They must have had a newly employed wizard at the chocolate factory the day those were made! However, it looks much better than my attempt at hand sculpting one, which turned out looking more like a rabbit pellet with eyeballs. I used some EasyMold Silicone Putty and a Lego toad to make a mold, and was satisfied (mostly) with the results. The white chocolate owls were made the same way, and I liked how they came out much better.


Hope your holidays are magical!

Saturday, December 3, 2016

Mini Silhouette House

Alpha Stamps has a new House Room Box with four tiny rooms to decorate. How cool is that? The best part is it the deer silhouette that fits over the top portion of the house. You can glue a snippet of tissue paper or vellum between the silhouette and the spacer piece then add an LED tealight to the attic of the house. Everything is better when it glows.


 My brain couldn't get passed "silhouette" so I continued the theme and chopped several of the Ornament Layers away from the frames, painted them black, then glued them in the rooms of the house. The little girl on the stairs is my favorite because she is shadowed behind the lit tree. Creating the tree is as easy as pie, and it took about 5 minutes. After painting my tree black, I cut out a section of thin plastic (mine is toy packaging) and glued it to the back of the tree. I colored the ornaments and tinsel with Sharpies. That's it. 


Taking pictures this week has not made me jolly at all, but here's my attempt at showing how the silhouette cut outs are glued in the cubbies.


Fuzzy Santa

To keep the Deer Silhouette in place, I trimmed two dowels, turned the house on its back, then placed the dowels in the bottom corners of the attic. Place a dab of glue on the ends of the dowels and then set the deer silhouette in place, pressing it into the glue a little. Let dry. That was my lazy solution for attaching the attic. 


This Mini House would look really cute all decked out for Christmas. Happy crafting!

Supply List: Mini House Room Box w/4 Cubbies
Deer Attic Silhouette 
Christmas Delivery 6x6 Paper Pad
White Suede Paper
Dimensional Snow Writer
Diamond Stickles
Fairy Candle Ornament Layers
Flying Sleigh Ornament Layers
Ice Skaters Ornament Layers
Stairs Christmas Morning Ornament Layers
Mini String of Fairy Lights
Tea Light


Wednesday, November 30, 2016

Holiday Sweets Hutch

Hellooooo December! Can you believe it? It is already time to decorate the tree, wrap presents, and bake delicious things. 

I cooked up a sweet little Christmas Hutch for Alpha Stamps and set it in a mini scene. It is sort of like a market stall, but using a smaller hutch instead. The cabinet is a Kitchen Cabinet kit that I assembled and painted, but this Mini Oak Hutch or Mini Walnut Hutch would save some construction time. 


Nothing says Christmas like a Samoyed

There's a lot to look at, isn't there? Haha! Every time I thought I was finished, I saw an empty spot that needed something... The shelves are crammed with glass bottles and jars filled with candies and jams. There is a bowl of lemon drops near a chicken dish, a cookie sheet of gingerbread men, heart shaped sugar cookies, chocolate sandwich cookies, and a classic Yule Log. The glass balls near the gingerbread sleigh are actually ornaments that are filled with microbeads. My intentions were to hang them on the garland but then I got the cutest cookie cutters on the planet! I fashioned little hooks from wire, glued a snippet of sewing thread in a loop on the back of the cookie cutter, then hung them from the hook. They are my favorite part of the entire project. 


My second most-liked things are those adorable (and so small) resin snowmen with their happy little faces. Next to those is a tiny pine tree topped by a star and adorned with candy ornaments. It has a painted brown bead cap as a stand. The trunk fit perfectly into the bead's hole and when things like that work out I feel like a winner. There are more glass jars of candy sticks and canes, a plate of creme puffs, Christmas pudding on a cake stand, lollipops, gingerbread hearts, a cup of cocoa, and some more confections shoved back in there. 

The drawer of the hutch opens to reveal, guess what? Yep, another place to put more tiny things! Inside the drawer are tags, stamps, and labels, buttons, star decorations, a tin soldier, a pewter dish, an old clock, and a pencil. Necessary stuff of course.


The hutch has a slide-y out-y bit (is it a prep area? A kneading board? I have no idea) that I used as a gift wrapping station. The flour bin holds all the gift wrap and ribbon, so it is all nice and tidy.


Two doors hide pre-wrapped gifts, for those in a real hurry, and two spools of ribbon on a holder.


The dainty pot is kind of a fave, too. It started out terra cotta colored but with a little paint and glitter, it fit nicely between the pudding and the lollies. There is a longer pot in that set also, and I painted it the same way and filled it with gingerbread hearts there to the left of the lollipops. Most of the cakes and candies I made from polymer clay, but the round suckers are made from hot glue and colored with Sharpies. 


Another of those fantastic cookie cutters! Also snowflake charms that have been painted with Enamel Accents and sprinkled with glitter and snowmen made from two pearl beads and a sequin base.


See those creme puffs? They are really painted wooden beads! I stuck one on a toothpick, painted it a nice golden brown color, then dabbed some Liquid Pearl paint on the top. While the Liquid Pearl was still wet, sprinkle on a bit of glitter, and you are done. I wish the real things were that easy to make.


Here's a wonderfully blurry pic of a gingerbread bread house that sits on the top of the hutch. The roofs of both houses are removable so an LED balloon light can be popped in there. 


The windows of the gingerbread house are stupid small. And very fragile. The best way to remove the windows from the frame, that I have found, is to use a stupid sharp thin cutter blade. I cut the frame away from the windows in sections and then removed any remnant pieces from the frames.


To add them to the house, slather a thin bit of glue on the inside of the window frame, and using tweezers, position the window. While the glue is still wet, you can adjust the window from the front. I cut pieces of orange vellum and glued it to the inside, over the windows, so you can't see the LED light inside. 


And finally, here are a few of the treats I made from polymer clay and hot glue.


For a comprehensive list of supplies, please check it out HERE. Happy Holidays!

Wednesday, November 2, 2016

Autumn Throne for a Fairy

Autumn is at long last here. The weather is cool and crisp, the wind blows gentle breezes, and the creatures scurry around, preparing for the upcoming winter. It is the perfect time to be exploring outdoors and collecting leaves, twigs, and acorns to place on a Nature table. I love this time of year!

I put together a tiny 1:12 scale Fancy Chair for Alpha Stamps and turned it into a wee Autumn Throne for a woodland fairy. The chair's seat has a comfy moss cushion and the top is decorated with twigs and a copper acorn. This must be the Queen's throne as I see a tiny scepter!


The fairies are getting ready for winter too, collecting berries and nuts in their acorn cap bowls. I sat quietly for some time, hoping to catch a glimpse of a fluttering sprite, but no such luck. 


The scepter can be made in about five minutes and this is how it's done:

Materials:
Rustic Miniature Broom
Pumpkin Pod
Copper Acorn Charm

Gently slide the handle out of the broom's bristles and set the tied bristles aside. (They form the twiggy back of the throne!) Using an xacto knife, carefully cut a small rectangular shape into the top of the pumpkin. Turn the pumpkin over and cut a small hole in the bottom. Add some glue to the inside of the pumpkin and push the ring of the acorn charm through the rectangular hole. Push the broom's handle into the hole in the bottom of your pumpkin and then you have a nature-y scepter fit for a Queen.

Here's the supplies I used to make my Autumn Throne, and if you'll excuse me I have a fairy to look out for. 


Wednesday, October 26, 2016

Halloween Clock with Spooky Spinning Fun!

I love Hallowe'en and I love mechanical paper toys so imagine my excitement when Alpha Stamps sent me the Victorian Furniture Chipboard Set that includes a cool grandfather clock and the Halloween Clock Spinners collage sheet. I was over the moon!


Eeeeek! All of this vintage-y goodness makes me giddy. Here are a few more pictures, and then I'll show you how to make your own, (it is so easy, it's scary.)


Did you see that? The Halloween Clock Spinners collage sheet (oh how I love thee!) has lots of images that will work with the grandfather clock and I had a frightfully good time changing out the rotating part. So fun! Here is the same clock with a different image added.


Ready to make your own? Great! Here's what you need:


Excuse my funky pictures. Most of my crafting happens in the dead of night and I live in a bat cave.

1. Chipboard Grandfather Clock from Victorian Furniture Chipboard Set - Grandfather Clock
2. Images from Halloween Clock Spinners collage sheet
3. Image from Halloween Clock Faces collage sheet (not shown)
3. Miniature brad. 

First, paint your clock. I wanted a vintage Dennison/Beistle look so I started by painting the entire clock orange and let it dry. The next step is simple. Load your brush with a little black acrylic paint and begin painting over the orange, a little at a time. After you have a small section of the clock painted black, take a large tapestry needle or toothpick and drag it over the wet black paint. It will expose the orange underneath and look super neat. Repeat until you've finished the clock.


I have already glued a clock face on the clock, but you can see the how I painted the clock in that picture. The door was glued to a piece of spider web card stock and the same paper was used in the center of the clock.


Then I took my trusty bone folder and creased the hinges of the door, then glued just that itty bitty hinge part to the clock. I poked a hole in the circular pumpkin image (see above) and also in the witch and owl piece, threaded a brad through the hole in the clock and then the images, and called it a day! Not really. I cut out all the spinning parts on the collage sheet and tried them all out. Who wouldn't?


You can also use a smaller spinning part, in this case the full moon face, and can change out the image inside the clock. Like a cute little trick-or-treater.


Or a classic black cat.


The possibilities are endless! I went with a teensy articulated Red Devil from the Halloween Jumping Jacks collage sheet but I'm sure you can find something perfect to hide inside your clock! 


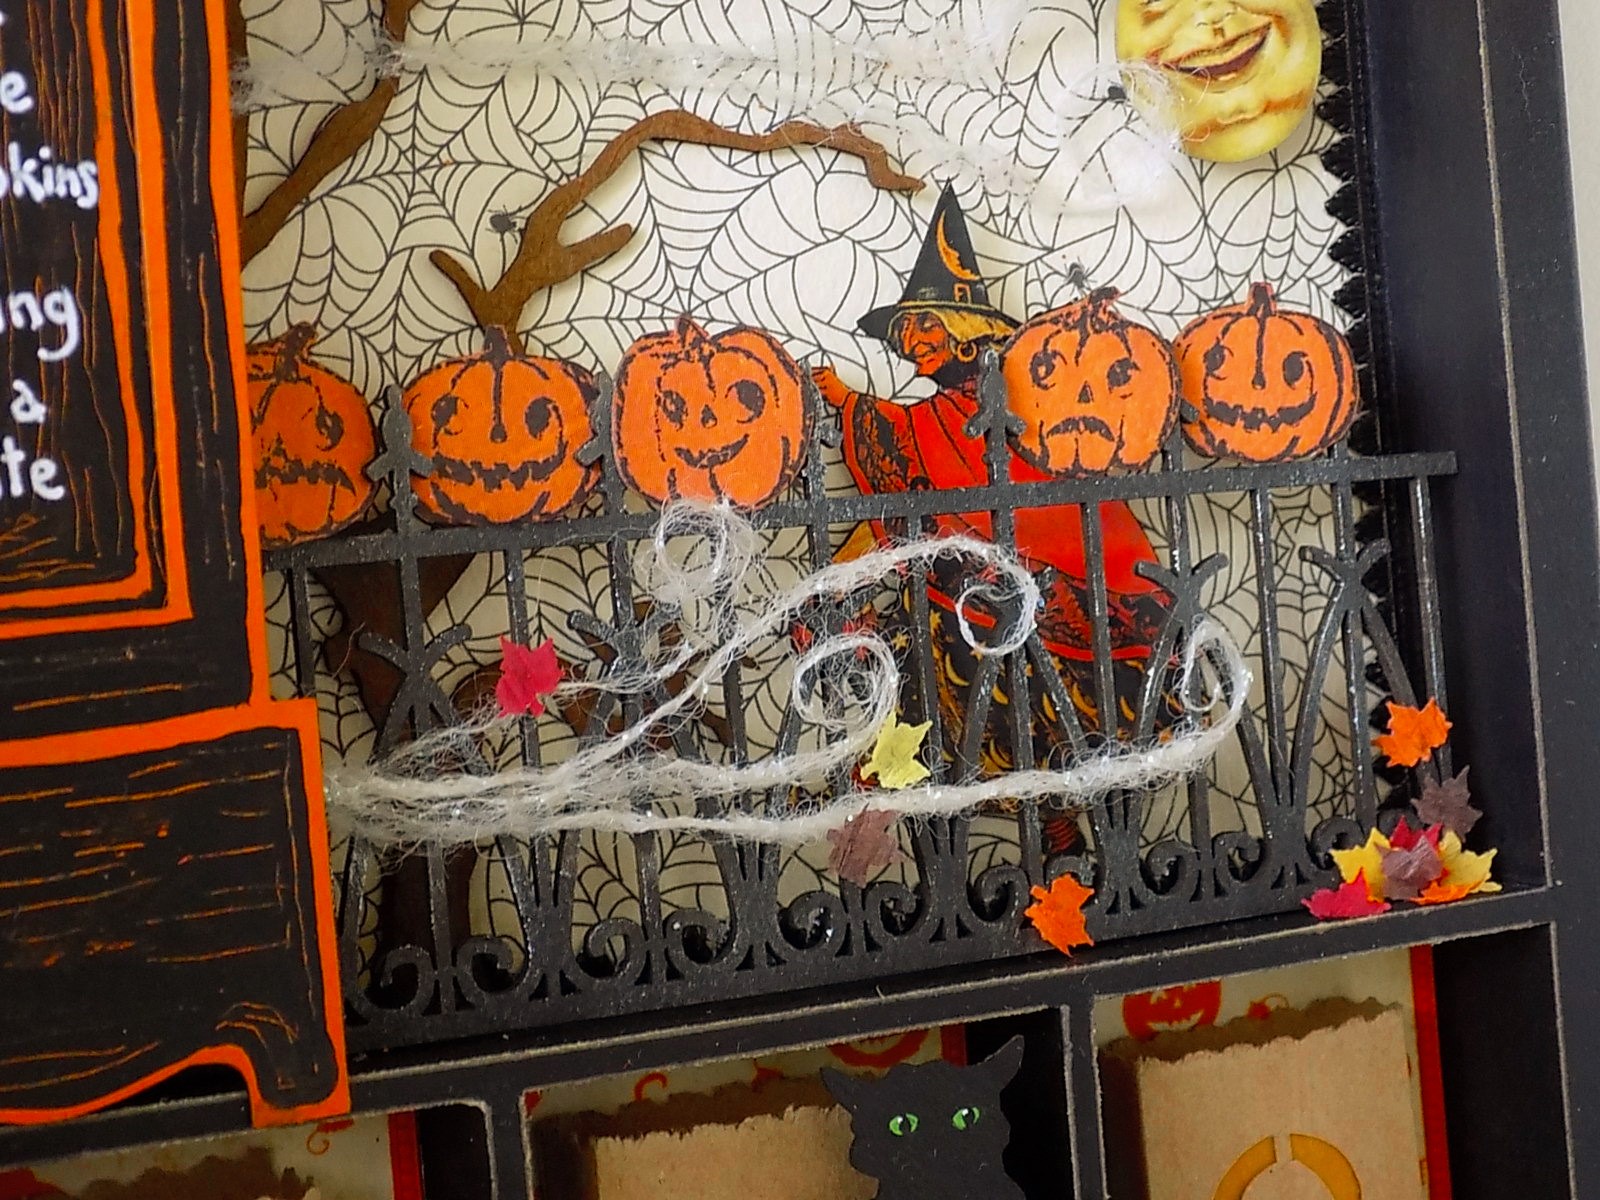
While I was feeling all vintage Hallowe'enie, I kept on crafting and assembled a little shadowbox to hang on the wall. 

Five little pumpkins, sitting on a gate.
The first one says, "Oh my it's getting late."
The second one says, "There's witches in the air."
The third one says, "But we don't care!"
The fourth one says, "Let's run and run and run!"
The fifth one says, "Let's have some fun!"
Then oooooo went the wind and OUT went the light!
Five little pumpkins rolled out of sight!


The BOO bags were scissored from a real paper bag and I cut out the letters and backed them with orange vellum. The intention was to illuminate the bags but I haven't gotten around to looking for small enough battery operated lights. I used wool roving for the wind, shaping it with my hands and then covering the wispy pieces with a glue/water mixture, then letting it dry. The leaves were punched from really nice crepe paper!


Isn't this kitty the greatest? She's part of the Creepy Critters Shapes set and decided to make an appearance on the shadowbox.


Hope everyone's Hallowe'en is happy!


Spinning Clock and Five Little Pumpkins Shadowbox supply list can be found right HERE.