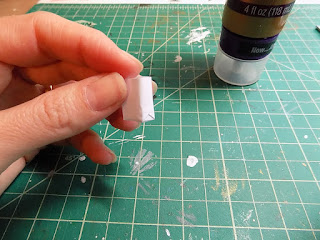
First, the paper bag. You'll need a rectangle of paper, glue, and something to wrap the paper around (like the end of a sketching pencil, a length of rectangular balsa wood, or the handle of a wooden spatula). Wrap the paper around the end, fold the paper on both sides as if wrapping a present, then add a dab of glue. Pinch top together, then roll paper down.
The spice rack is made from basswood trim. Decide what length you wish your rack to be and cut two pieces to that size. Cut a third piece that is slightly shorter for the base. Finally, cut two itty bitty ridiculously small side pieces. Don't saw off your fingertips.
Glue back piece to base and add side pieces. Let dry.
Wrap a bit of sandpaper around a thin dowel and sand sections along one long edge. The spice jars will rest in the recess.
Glue front piece to rack. Paint as desired.
The tiny spice jars are actually dollhouse baby food jars (with removable lids!) that came from Alpha Stamps. They will hold a fairy sized amount of something and are just too cute.
And lastly, here are the peaches in a jar. You need polymer clay in orange, yellow, and translucent, a ball end stylus, chalk pastels, tiny glass jar with cork top, Ice Resin, scrap of fabric, and string.
Mix the three colors of clay together. Pinch off tiny amounts and roll into balls, then flatten one side. Make an indention with the stylus.
Brush the insides of the peaches with red-orange pastel dust. Bake at 265 degrees for a nanosecond. Seriously. My first batch was scorched beyond recognition because I fed the cat in between putting them in the oven and taking them out. At least the cat was happy.
Spend 20 minutes meticulously arranging the peaches in the jar with a toothpick and then fill the jar with the mixed ICE Resin. Realize all of that arranging was fruitless (haha) because tiny air bubbles collected in the dimples of the peaches and spend another twenty minutes poking around at all of the bubbles with a stick pin, thus ruining the arrangement. Add cork and snip off top.
Place a circle of fabric on top, wrap a string around to hold it in place, then admire your mini handiwork! Happy miniature making!


No comments:
Post a Comment