Alpha Stamps is ringing in the new year with a sweet Snow White kit that includes Fairy Tale Frames Inserts for Altoid tins. I fell in love with the scalloped insert frames from earlier this year, erm...last year, and was excited to see more.
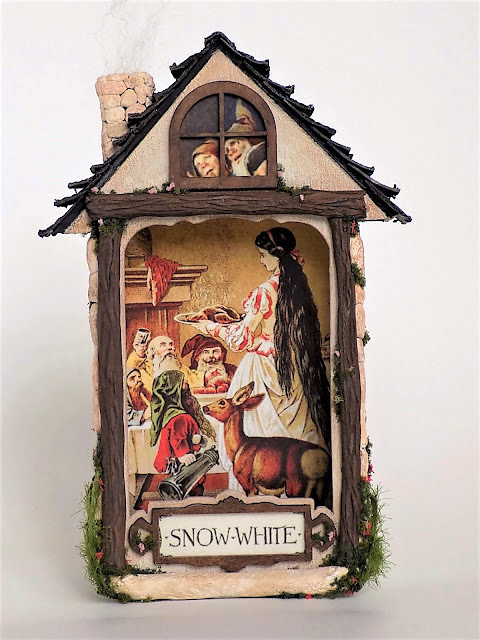
I used an image from the Snow White with the Dwarves collage sheet and the blank tin from the kit to construct the Dwarfs' wee cottage, which has to be a much more pleasant place than a Prince's boring old castle. Plus, tiny houses are the way to go.
The entire cottage is made from just three things: the tin, cardboard, and Creative Paperclay. The stones and wood beams are sculpted from the paper clay and the roof pieces and tiles are cut from cardboard. Super easy!
You can see here how the roof is cut, but I'll show you how to do it in a sec. Adding clump foliage in the spaces between the stones adds a bit of charm.
There's a plume of smoke coming from the chimney, which is simply a tuft of wool roving stuffed in the top. I wonder what those two dwarfs see?
Want to build your own cottage? Let's get to it! For the roof, all you need is a blank Altoid tin, and both heavyweight and lightweight cardboard.
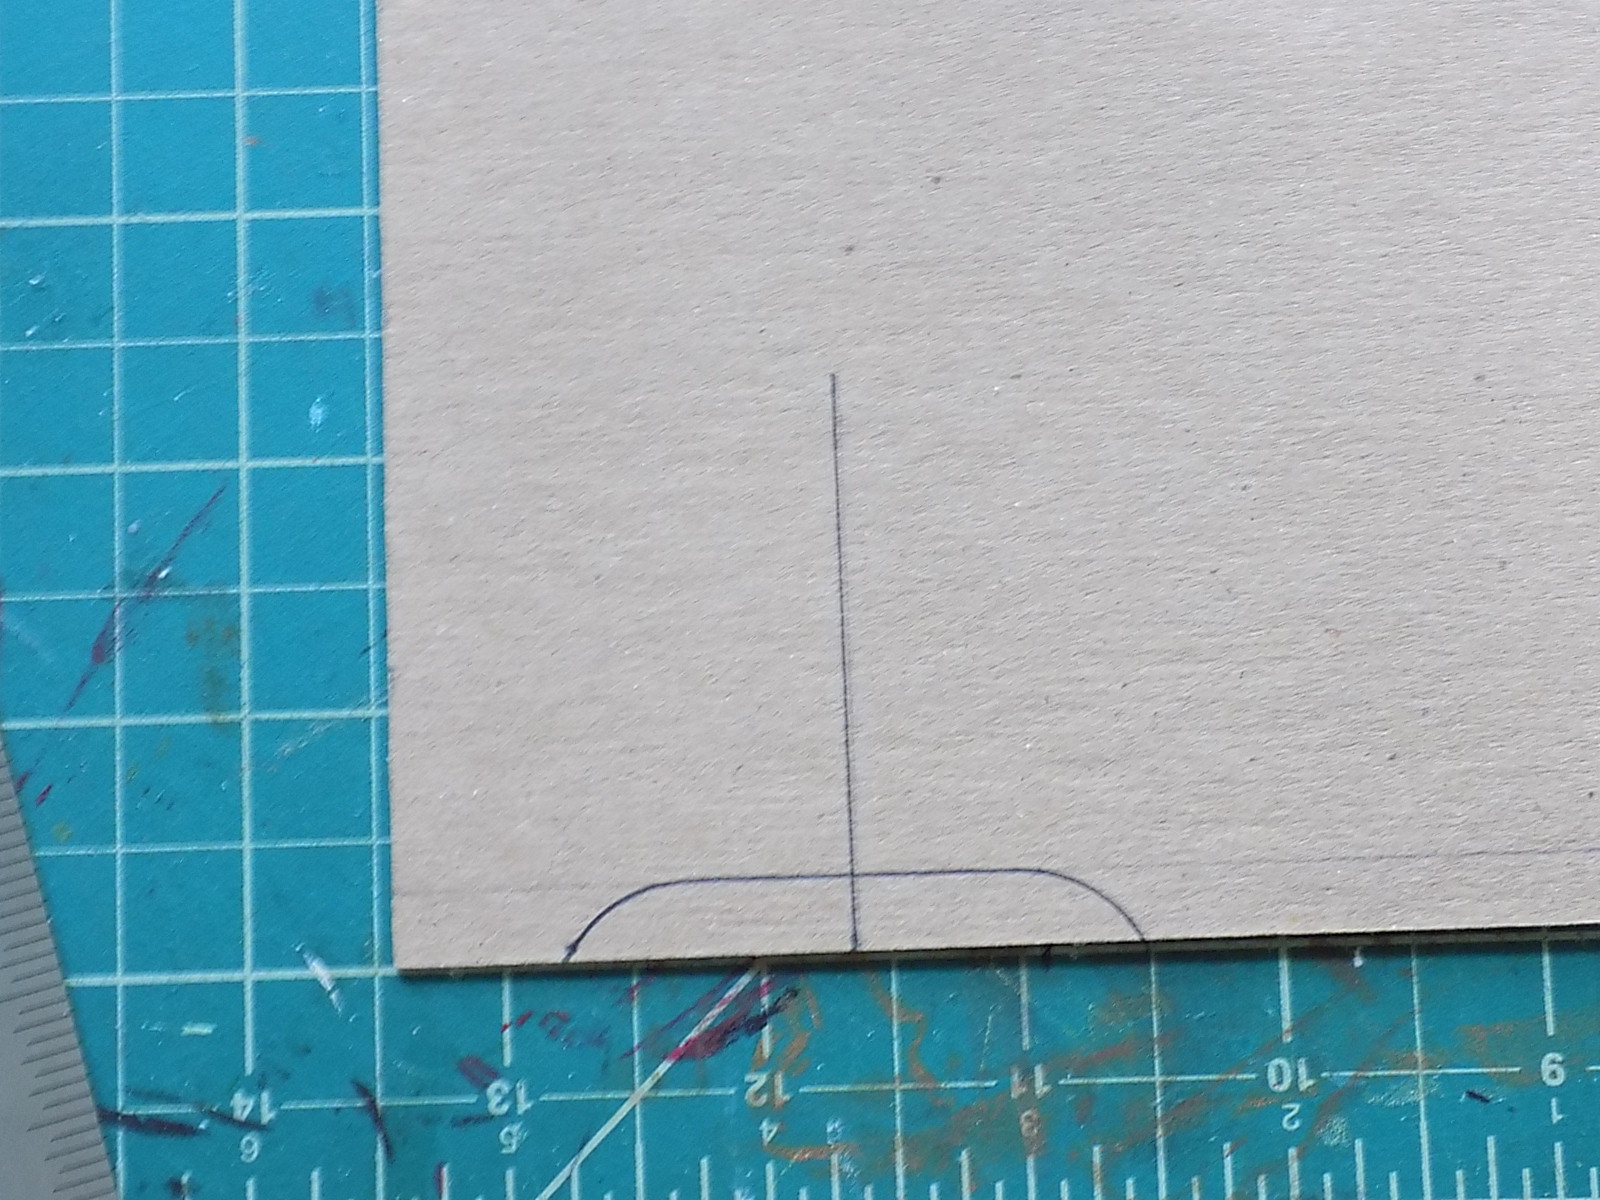
Trace around the top of the tin onto the heavyweight cardboard.
Mark the center of the tracing and make a straight line upward, like this.
Measure an equal distance from either side of the curved mark. Draw a diagonal line from that point to the vertical line and repeat for the other side. Did that make sense? I think it's better to say, "Trace around the tin's top part and make a triangle." Do this twice and those will be the gables.
Cut out. Obviously.
For the stones you will need Creative Paperclay, a toothbrush, and a pointy tool of some sort. Also your tin. I wasn't sure if the paper clay would stay put after it dried on the tin, so I covered the tin in paper first, then sanded the paper a little, and the added tacky glue to the paper before sticking the stones on the sides. That is most likely over-doing it, but I didn't want to put all this work in only to have all the stones fall off. I can tell you that mine are stuck tight!
To make the stones, roll bits of clay into ball shapes and smash them on the paper-covered, glue-slathered tin. Use the tool to shape the clay, and then pounce the toothbrush over the stones to add texture. The tool can also be used to crease lines on the stones. I left a space at the top of the tin to accommodate the gable and roof pieces. When the clay dries, outline all of the stones with white paint, smooshing paint between the crevices to cover the paper underneath.
After painting the stones, fill in the space at the back of the tin with more clay stones, and while the clay is still wet, push a gable into it. Glue the other gable piece to front of house and let the whole thing dry. (Not that it is necessary, but I glued a skinny dowel in between the two gable pieces at the peak for added stability)
Measure the length and width of one side of your gable and cut two pieces for the roof from heavyweight cardboard. Cut the ends off at an angle so they'll fit snugly together. Glue in place. Almost there!
 |
| The disaster that is my creative space. Is that a half sewn Niffler back there??? |
To make the roof tiles, cut strips from lightweight cardboard. Make them slightly wider than your roof. Cut each strip into three sections and distress the edges. Glue to roof. Paint when dry.
I added the Fairy Tale Frame insert, covered the edges of the tin in more paper clay, then sculpted it to resemble wooden beams. Everything was painted, a cute little window was glued in place, and finally clump foliage was glued in the cracks of some of the stones.
Hope your 2017 is a crafty one!
GO HERE to see the supplies used!