Showing posts with label alice. Show all posts

Saturday, January 15, 2022

Alice is in the House

 I was straightening up my craft area recently when I came across all of the lovely Alice Through the Looking Glass paper pads from Alpha Stamps. How could I have forgotten about them? They're so pretty! The discovery of the paper pads lead to digging around in the chipboard drawer, pulling out little shadowboxes and houses, then shuffling through the miniatures for a teapot, and heaving the 2" thick hanging file full of Alice collage sheets onto the table. So much for cleaning...

The results? Cute little interchangeable shadowboxes with all of the Alice paper!


The boxes and houses were covered with paper from the 6x6, 8x8, and Backgrounds 8x8 pads. I was careful about which sections to use because I thought of eleven more projects to make while flipping through the pads. Hmm, maybe I need more paper.


The accessories inside the shadowboxes are mostly chipboard pieces, like the chair from the Tiny Chipboard Alice Props, and bronze charms:


The table on the right is really a Tiny Metal Bird Bath. The top was removed and a disk of chipboard was put in its place. The teal tray came from the White Plastic Mini Serving Dish Set. I sanded it a bit and painted it with craft paint. There's more chipboard pieces and bronze charms here and there, plus a wee mouse! Both the Grass & Mushroom Border - 6 Inch and 3D Chipboard Tree - 3 Inch were chopped to fit. 


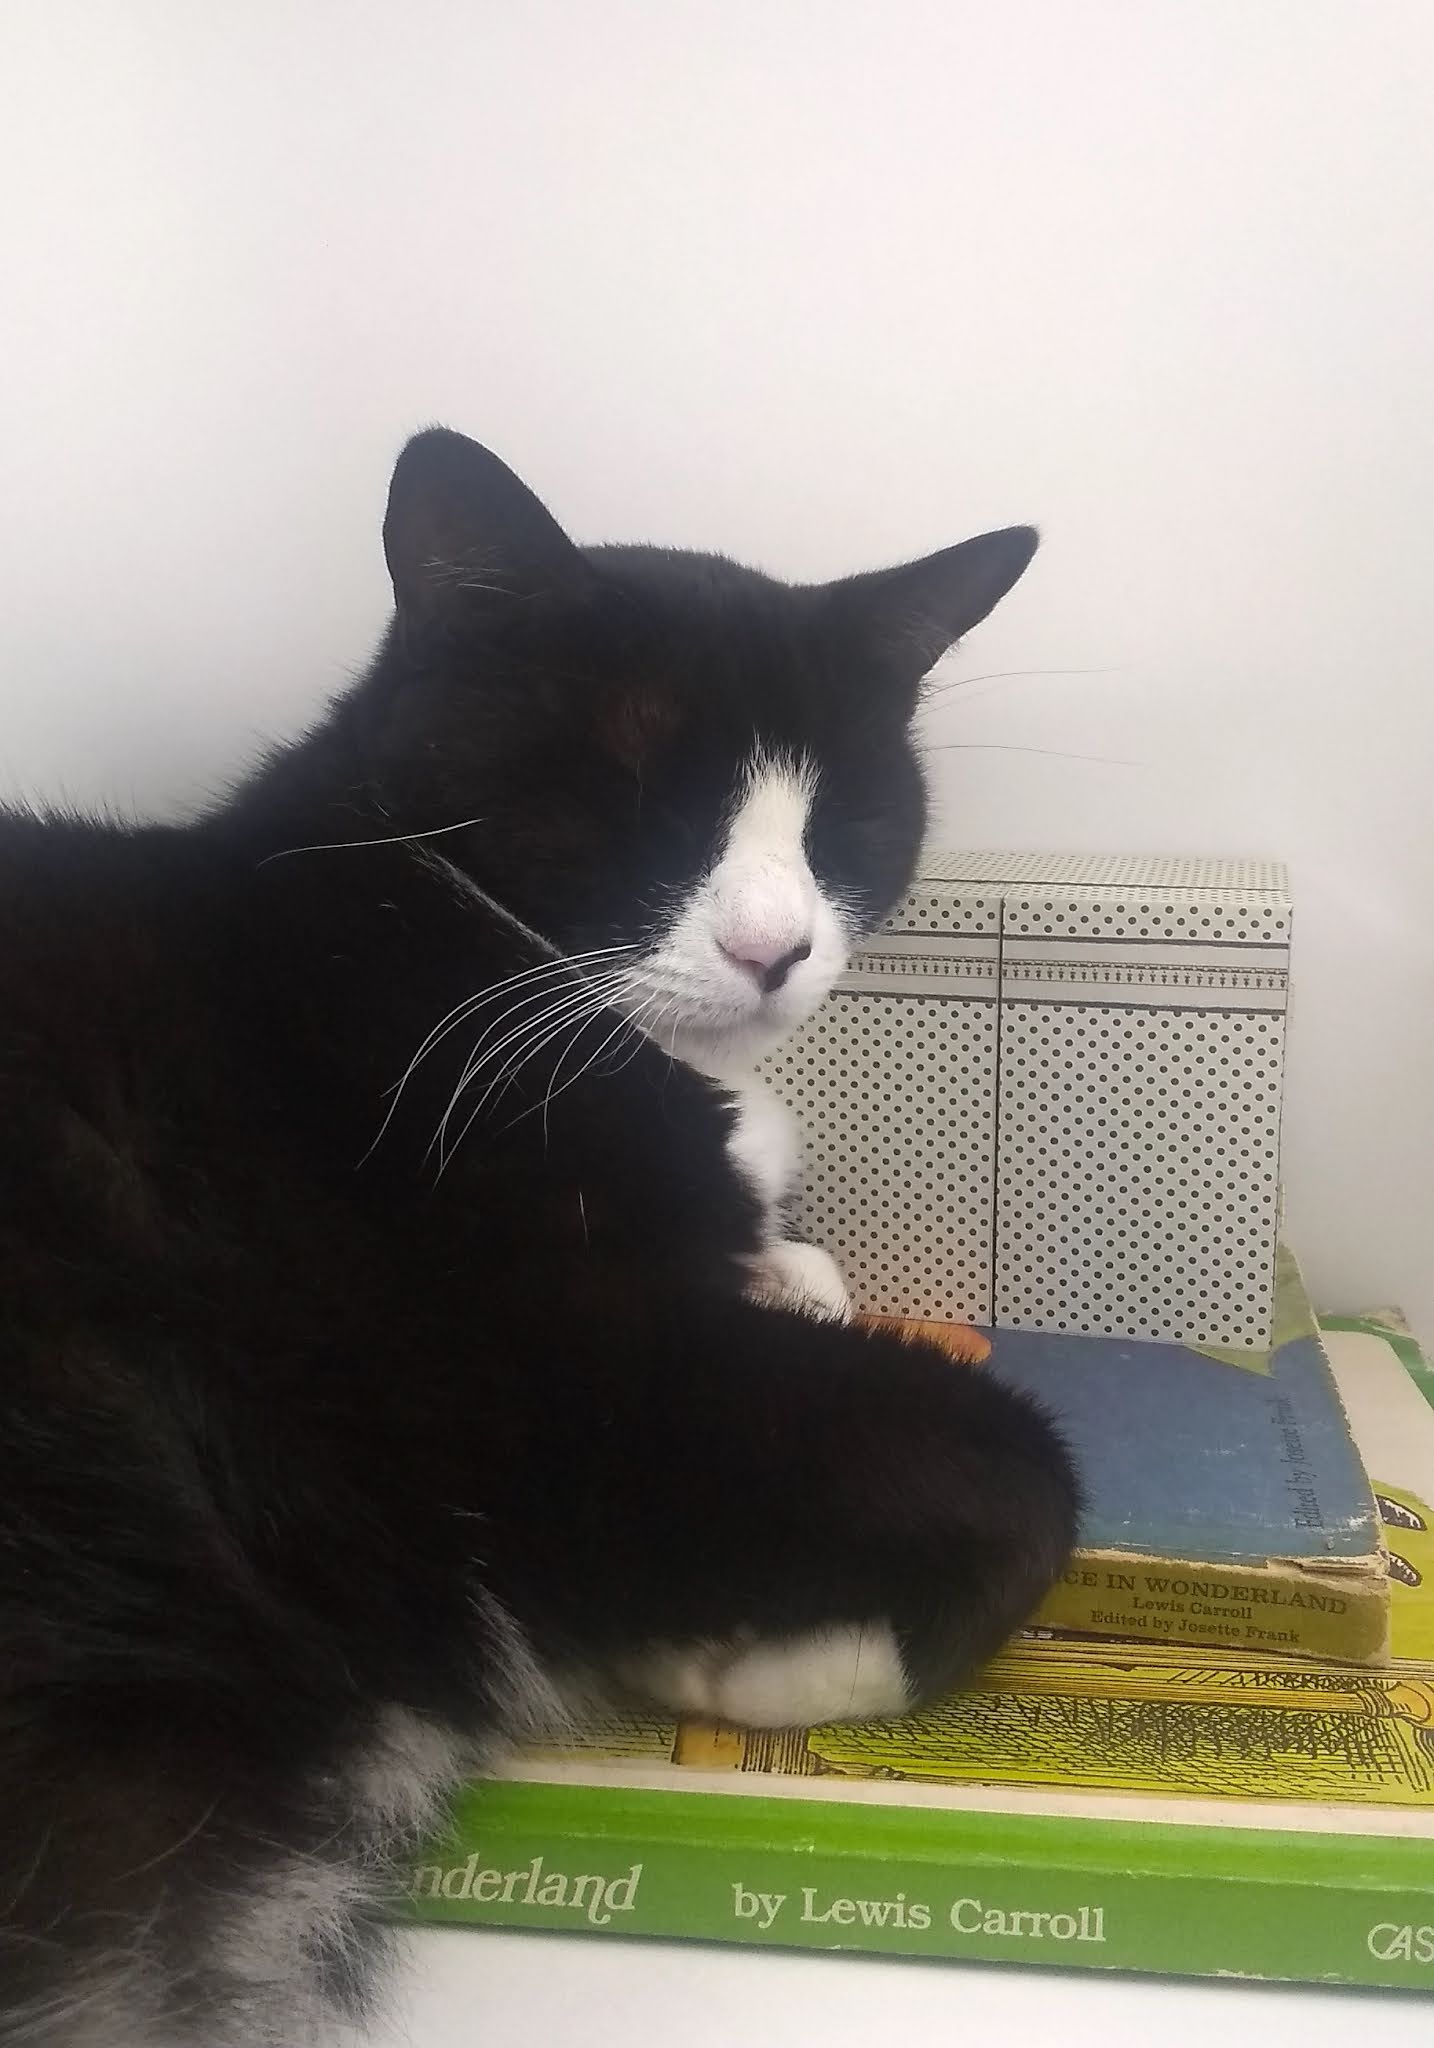
The houses and boxes aren't attached so they can be rearranged or live separately. My daughter had claimed the larger shadowbox with Cheshire Cat, but she changed her mind when I mentioned that one also had her and her twin in it. Guess I get to keep all of them to enjoy (and the paper does look better when it is used vs left untouched on a shelf, unless you are the cat that had been sleeping on it).


"i will knock that over later"

All of the goodies are HERE!

Now go get crafty!!


Wednesday, July 21, 2021

Chasing the White Rabbit Half Scale Theatre

I love little things. I also love Alice in Wonderland. But what I really love is little Alice things! 

The Half Scale Theatre Cabinet w Facade - Deep from Alpha Stamps is a perfect size for miniature things whether they are Alice or not. The theatre is approximately 3-1/2" tall x 4-1/4" wide and 2-1/2" deep when the doors are closed. That's pretty small! I could see a Halloween scene inside - tiny tombstones and creepy trees or maybe a pumpkin patch with a scarecrow? 

Halloween will have to wait a bit longer because this deep theatre is all about Alice.


I started by painting the theatre edges black, then papering the entire thing using the Alice 8x8 Paper Pad. One of the sheets in the set has a collection of frames that happened to fit nicely inside the doors of the theatre. The rest of the paper is perfectly wonderful.


On the left is Alice herself with a key in her hand, curious as to where the White Rabbit could be going! Something else that worked out with this project was the size of the doors from The Garden Of Books Chipboard Set of Doors. After painting it with diluted ink, I added paper hinges to the back of the door and stuck it right in the center. The checkerboard flooring from the Tiny Alice Wallpaper Prints collage sheet was glued in at an upward angle to cover the gap between the door bottom and theatre floor. The same thing was done on the other side.


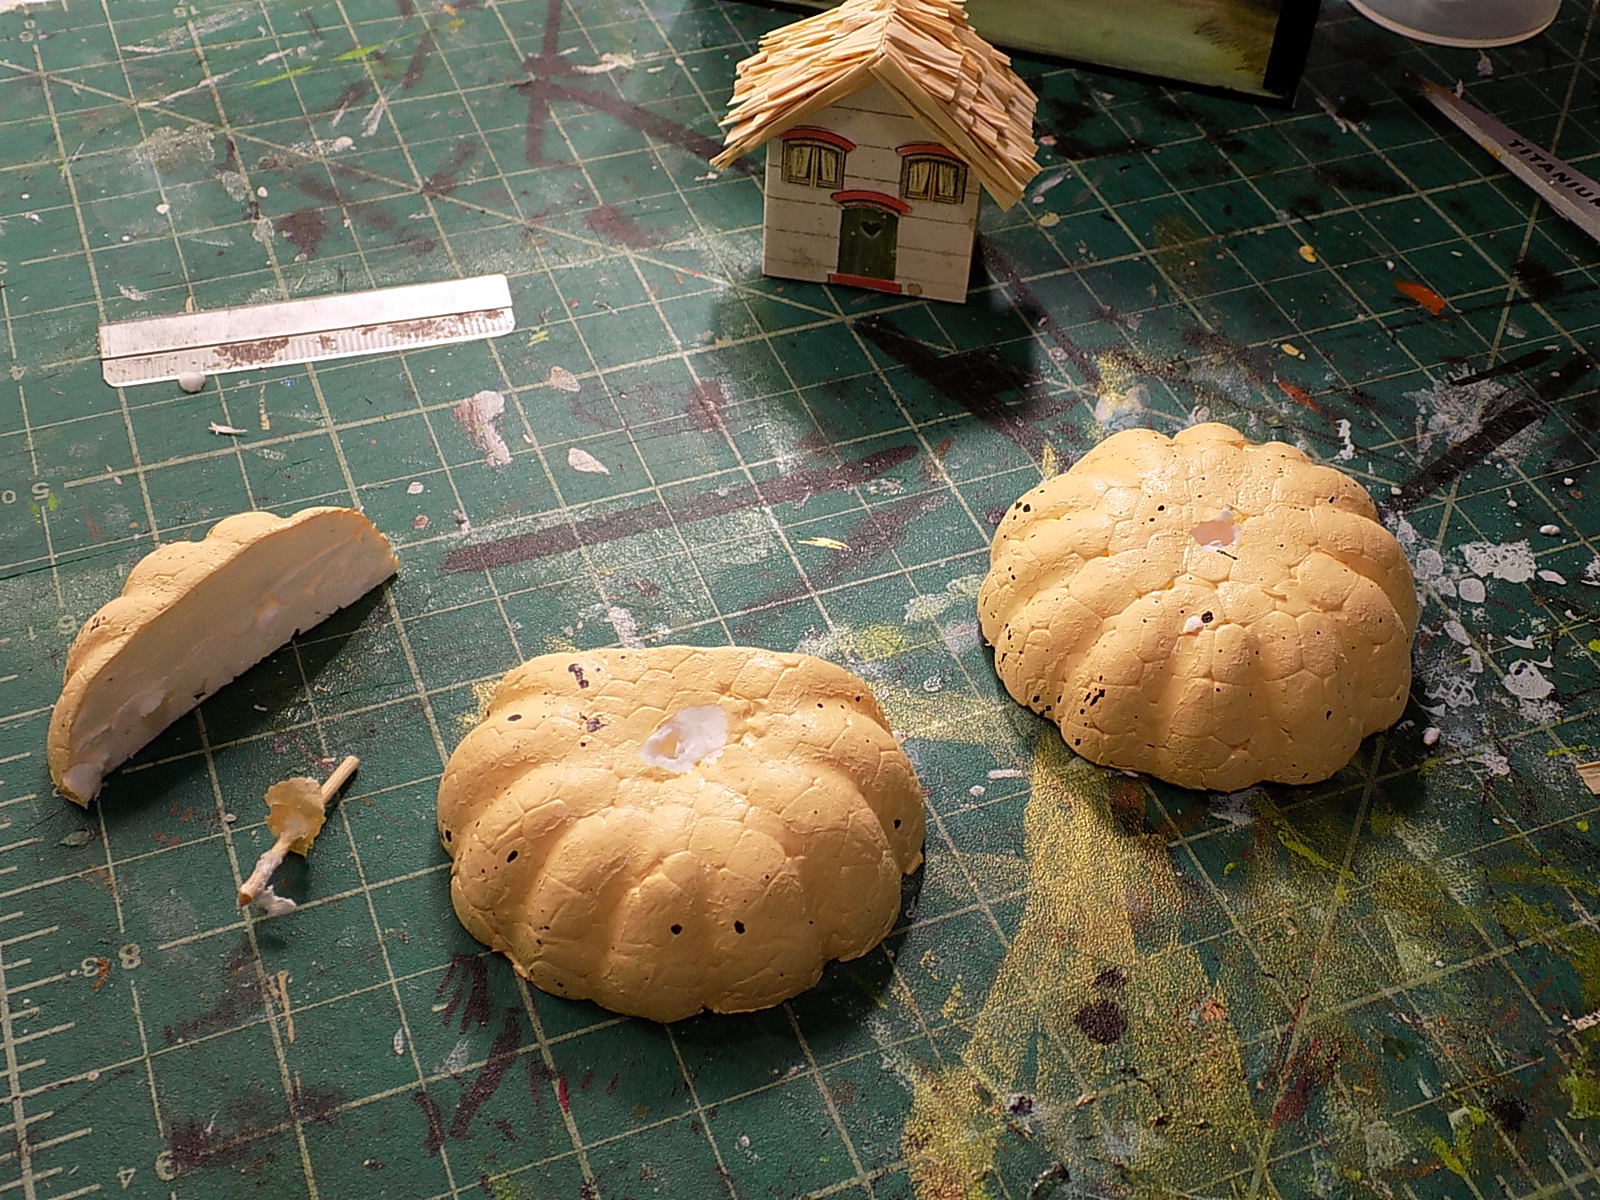
The center portion of the theatre was devoted to the White Rabbit's cottage mostly because it is one of my favorite parts of the book. I chopped up a Creepy Tree - 5 Inch to fit inside and used bits of Variegated Green Vines for leaves and bushes. The cottage is a Little Bird House chipboard kit with collage sheet windows and door, raffia roof, and wooden step. The "hill" used to be a foam pumpkin, but it was an easy transformation. 


To make the hill, cut your foam pumpkin in half. Measure and cut part of the pumpkin off so it fits inside the center of the theatre. Remove the stem.


Paint the hill and slather it in glue, then sprinkle on Green Turf Grass. Tamp the grass and add more if needed. It helps to use lots of glue! Once dry, glue the cottage on top. 


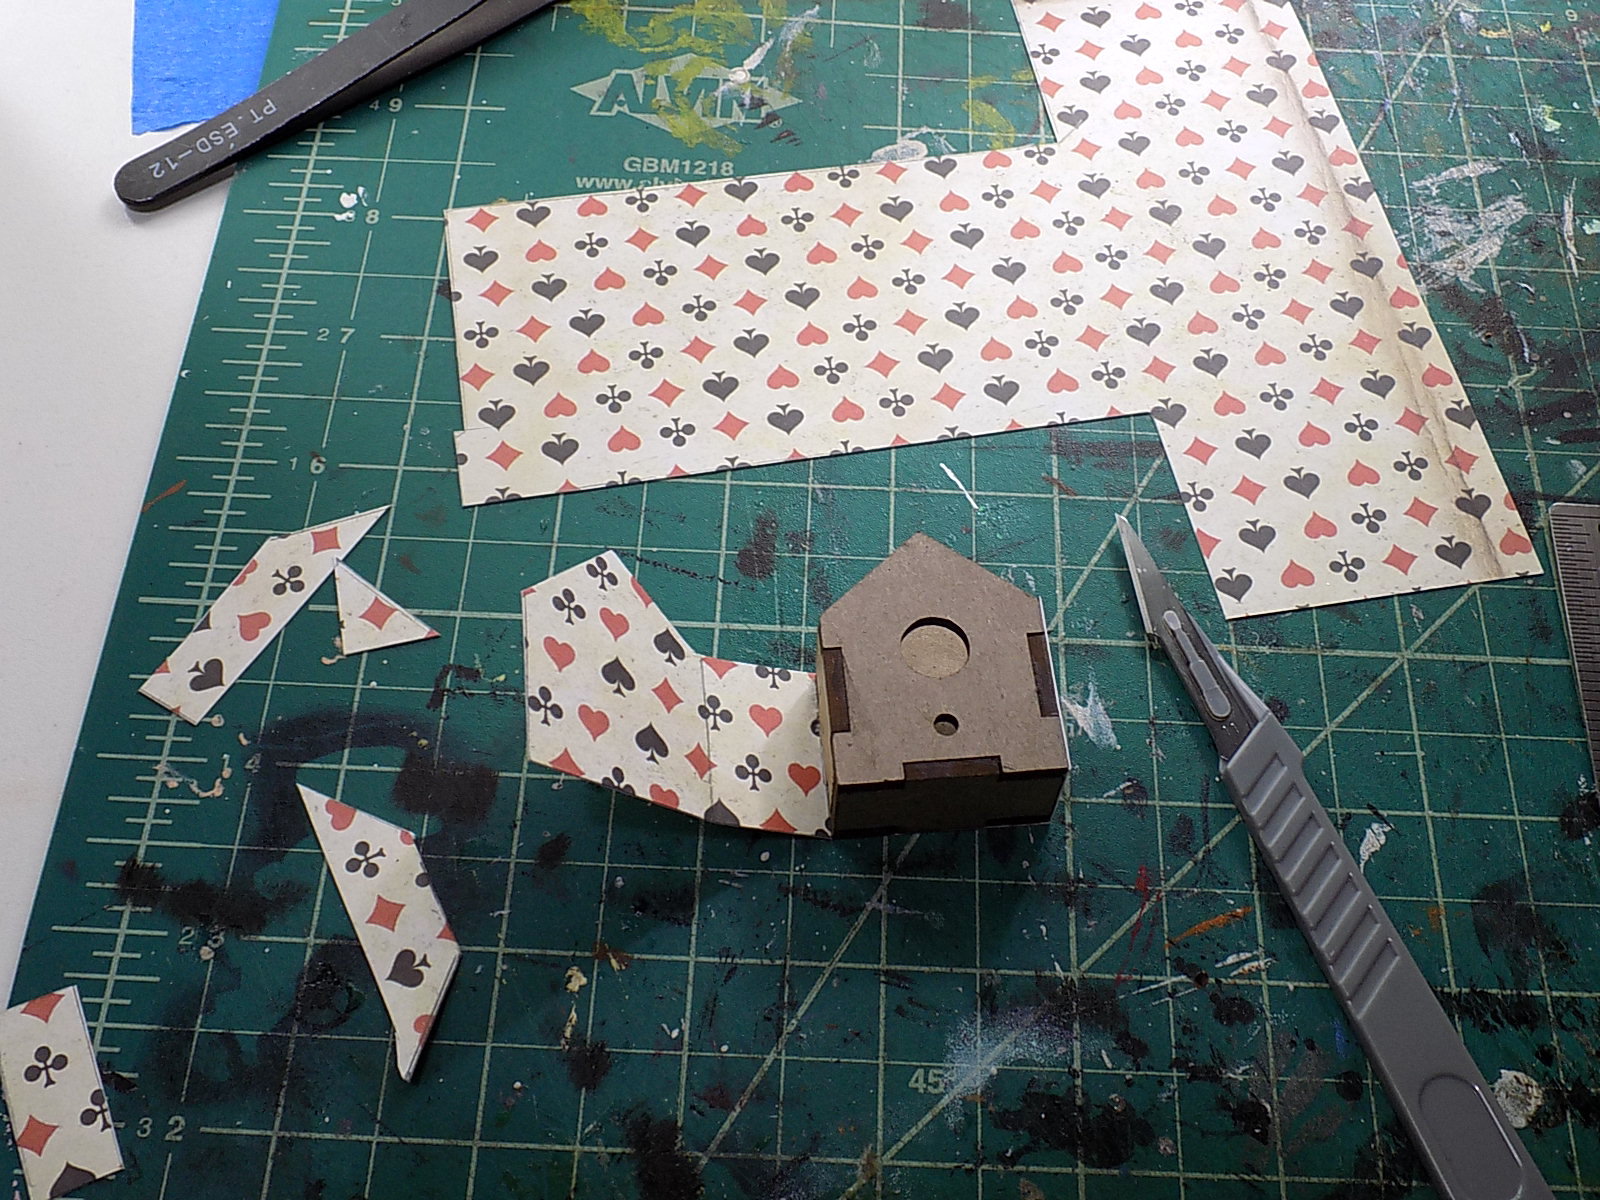
I also like to make things as simple as possible, so oftentimes I choose to wrap 3D chipboard kits with paper vs gluing and cutting each side individually. For the cottage, I cut a length of paper the height of the chipboard and glued one side down. Cut off any overhanging paper (the peak of the roof in this case). Roll the chipboard to the left and crease the paper along the fold. Add glue to the side and adhere it to the paper. Cut off excess. Repeat. 

Okay, story time. The outside of my theatre is basic and maybe a bit dull, however, there were plans to decorate it, too:


Those plans were thwarted by the disastrous effects of old, cheap paper glaze and my Alice collage image. Sigh. See the blue? Yeah, it's not supposed to be blue. In the end, I told myself the theatre doors would be open all the time anyway, so it wasn't that big of a disappointment.


And, lastly, I nearly always forget to take a photo for scale. Luckily, Chief Operating Officer Minicus Moo takes her job seriously.


Hope you enjoyed the miniature theatre, now go glue stuff to stuff!

Don't forget you can go HERE where you'll see the supplies used in the Chasing the White Rabbit Theatre (cat not included).

Wednesday, April 21, 2021

Wonderland Mini Album

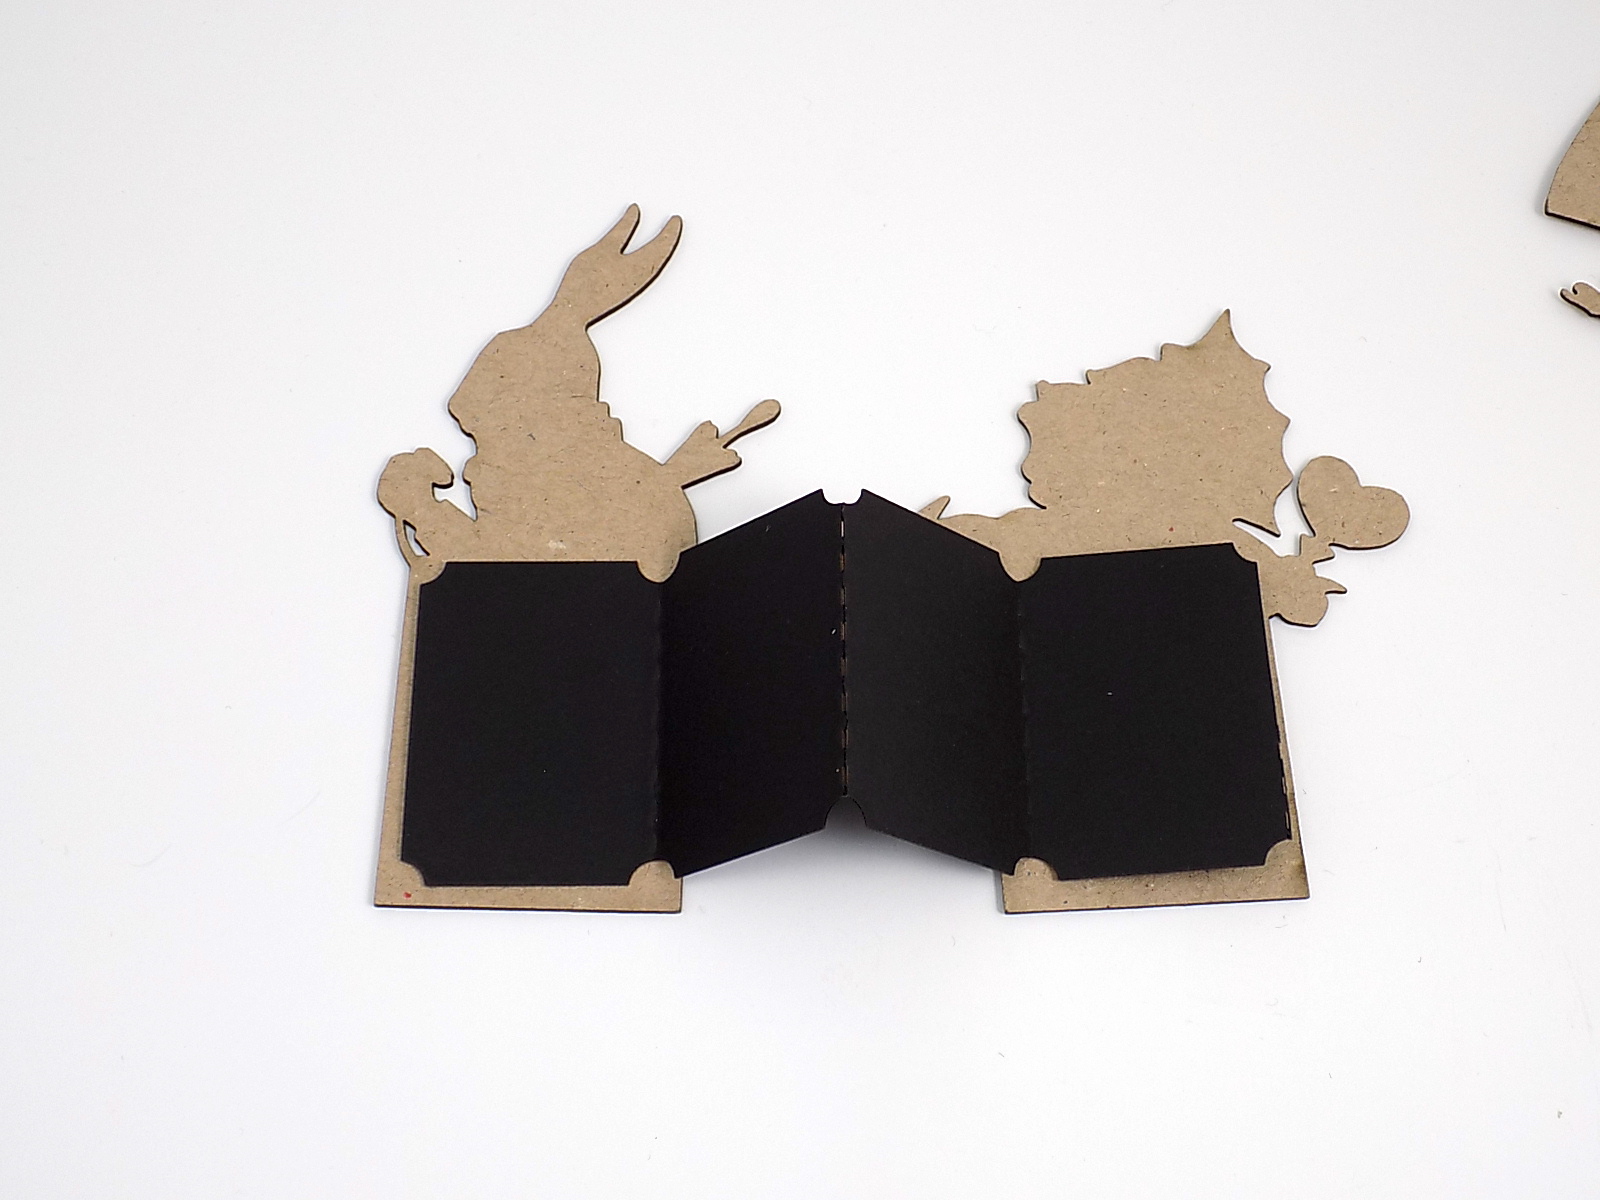
 I recently received my April The Mad Hatter's Tea Party Kit along with an amazing set of Ticket Journal Alice Covers from Alpha Stamps! YAY, ALICE! Originally, I had planned on making something with the super cute matchbox facade and matchbox niche (I love those things) but kept coming back to the ticket journal covers. I added a Matchbox Ticket Journal - Tan in between the covers and made a mini book. Mini books are nice, too.


I dabbed pink, blue, white, and gold paint onto the Ticket Journal Covers, and when they were dry, stamped them on the fronts and backs with various stamps. 

Assembling the book is easy peasy.

Choose the order of the characters for your book. The White Rabbit is my Front Cover, Red Queen is the Center, and The Mad Hatter is the Back Cover. Cut the matchbox ticket journal so you have two sections of four pages, like so (I used the TAN matchbox ticket journal in the book, not black):


Attach one end to the back of the Front Cover and the other end to the front of the Middle.


Turn the Middle over and attach the other section to the back, then the other end to the front of the Back Cover. It's really quite simple, just ridiculous to explain!


Use the leftover segment of the matchbox ticket journal as a template to cover the pages. This entire project was begun because I wanted to use the glorious Alice's Tea Party 6x6 paper, so I traced around my template onto the Alice paper, cut the pages out, and used a paper hole punch to cut out the corner notches. 


After that, all you need to do is decorate! Add a few pockets, cut out the tags from the Alice paper if you wish...


Use stickers, chipboard cutouts like the ones found on the Tiny Chipboard Alice Props set,


Then glue a length of ribbon to the front cover, add an image, flowers, charms, whatever you want, and poof! You have a mini album. 

If you're curious to see the supply list, GO HERE.

Now go create!

Wednesday, April 22, 2020

Wonderland is Better

I've expressed my love for all of the niche shrines from Alpha Stamps before, but I'm going to repeat myself. I love those things! I've gotten my hands on quite a few of them, and the newest one is just as enjoyable. Especially if it's Alice or Hallowe'en themed! Both of those ideas would work well with the potion bottle shape of the new niche shrine. I went with Alice and am saving Hallowe'en for another project.


The shrine was covered with Alice Herself Scrapbook Paper and the images are from the new Drink Me collage sheet. I love that collage sheet as much as all of the niche shrines; choosing an Alice for the inside was nearly impossible. 


I decided to squish Alice inside the niche and added the White Rabbit to the outside. Alice has stacked adhesive pop dots behind her to place her a bit closer, and there is also a small sliver of pop dot behind the Rabbit's fan. On the uncut image of Alice and the Rabbit, the fan is drawn over Alice's hair, so I used a duplicate of the same image to cut out the fan and put it where I wanted. 


Another great thing about this shrine is the separate shaped chipboard blanks in case you want to have the shrine stand alone vs using the included hanger. I papered the bottle shape and glued it to the back of the niche portion of the shrine. I had considered using another bottle blank and hinge it to the front like a book, so you could open it to reveal a little scene inside. Maybe next time!

The tree (which I failed to take pictures of during construction) is made from four cloth covered florist stems that were twisted together for the trunk and separated at the top to create branches. Brown crepe paper was twisted around the wires and glued together with watered down Tacky Glue. The blossoms were punched from pink tissue paper using a Bellflower Mini Punch and glued on to the tree. 


Not too much was done to the back - a simple Altoids Insert Vignette frames another Alice from the Drink Me collage sheet, and the hearts were punched from a Heart Mini Punch. Now to work on that Hallowe'en project...

Happy crafting!

Supply List can be found RIGHT HERE!

Saturday, February 22, 2020

A Few Alice Shrines

I've been thinking about Alice, wondering what kind of project to do, when two very Wonderland-like niche shrines from Alpha Stamps arrived in my mailbox!

The first, called Little Niche Shrine - Pocket Watch, reminded me of Alice's encounter with the White Rabbit, so of course that's what I turned it into. The shrine was painted black and gold, and I stamped a bunch of numbers onto Aged Parchment Scrapbook Paper before gluing it to the front. Details were added with a Micron or gold paint pen. It was finished off with a few collage sheet images, paper roses, and a chipboard flourish. 


The second niche shrine is shaped like a top hat (is it a magician's? a ringmaster's? some dapper dancing dude's? Could be anyone's!) With Alice on the brain, I made the Mad Hatter's chapeau with a little surprise inside. I used the Niche Shrine - Top Hat but added a Chipboard Top Hat Blank to the front. The outside is a tad boring, but when the flap is folded down, a scene appears inside. 


Inside the shrine is the sleeping Dormouse, the Cheshire Cat, a stack of teacups, and a pouring teapot. (Psst, the "tea" is hot glue colored with a brown marker.)


The fun parts are the two pop-ups of Alice and the Mad Hatter. Pop-ups like these are incredibly simple to create. Here's how I made the Pop-Up Tea Time shrine.


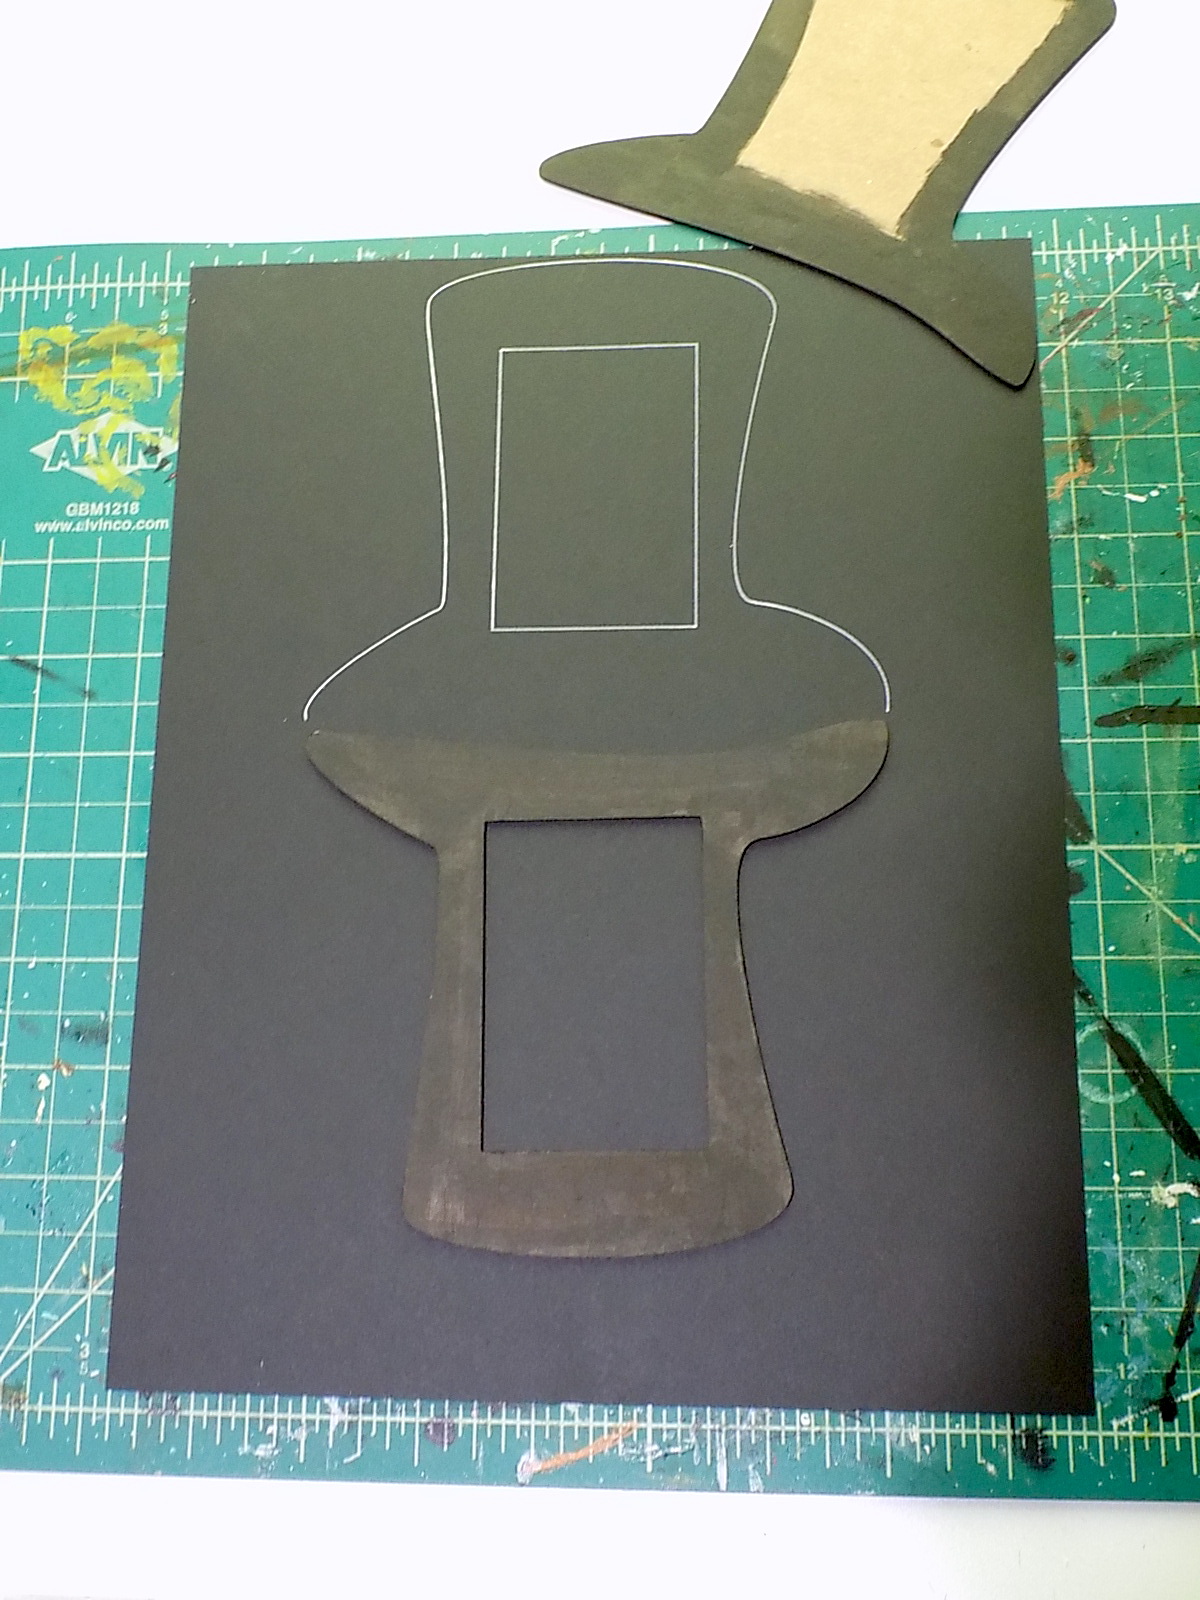
Paint the shrine front and Chipboard Top Hat Blank. Trace around one of the pieces onto black cardstock, then fold the piece over and trace around again. Cut out. Trace around just the shrine front on a second piece of cardstock. This will later be used as the outside cover.


With a pencil, mark the center where the fold will be.


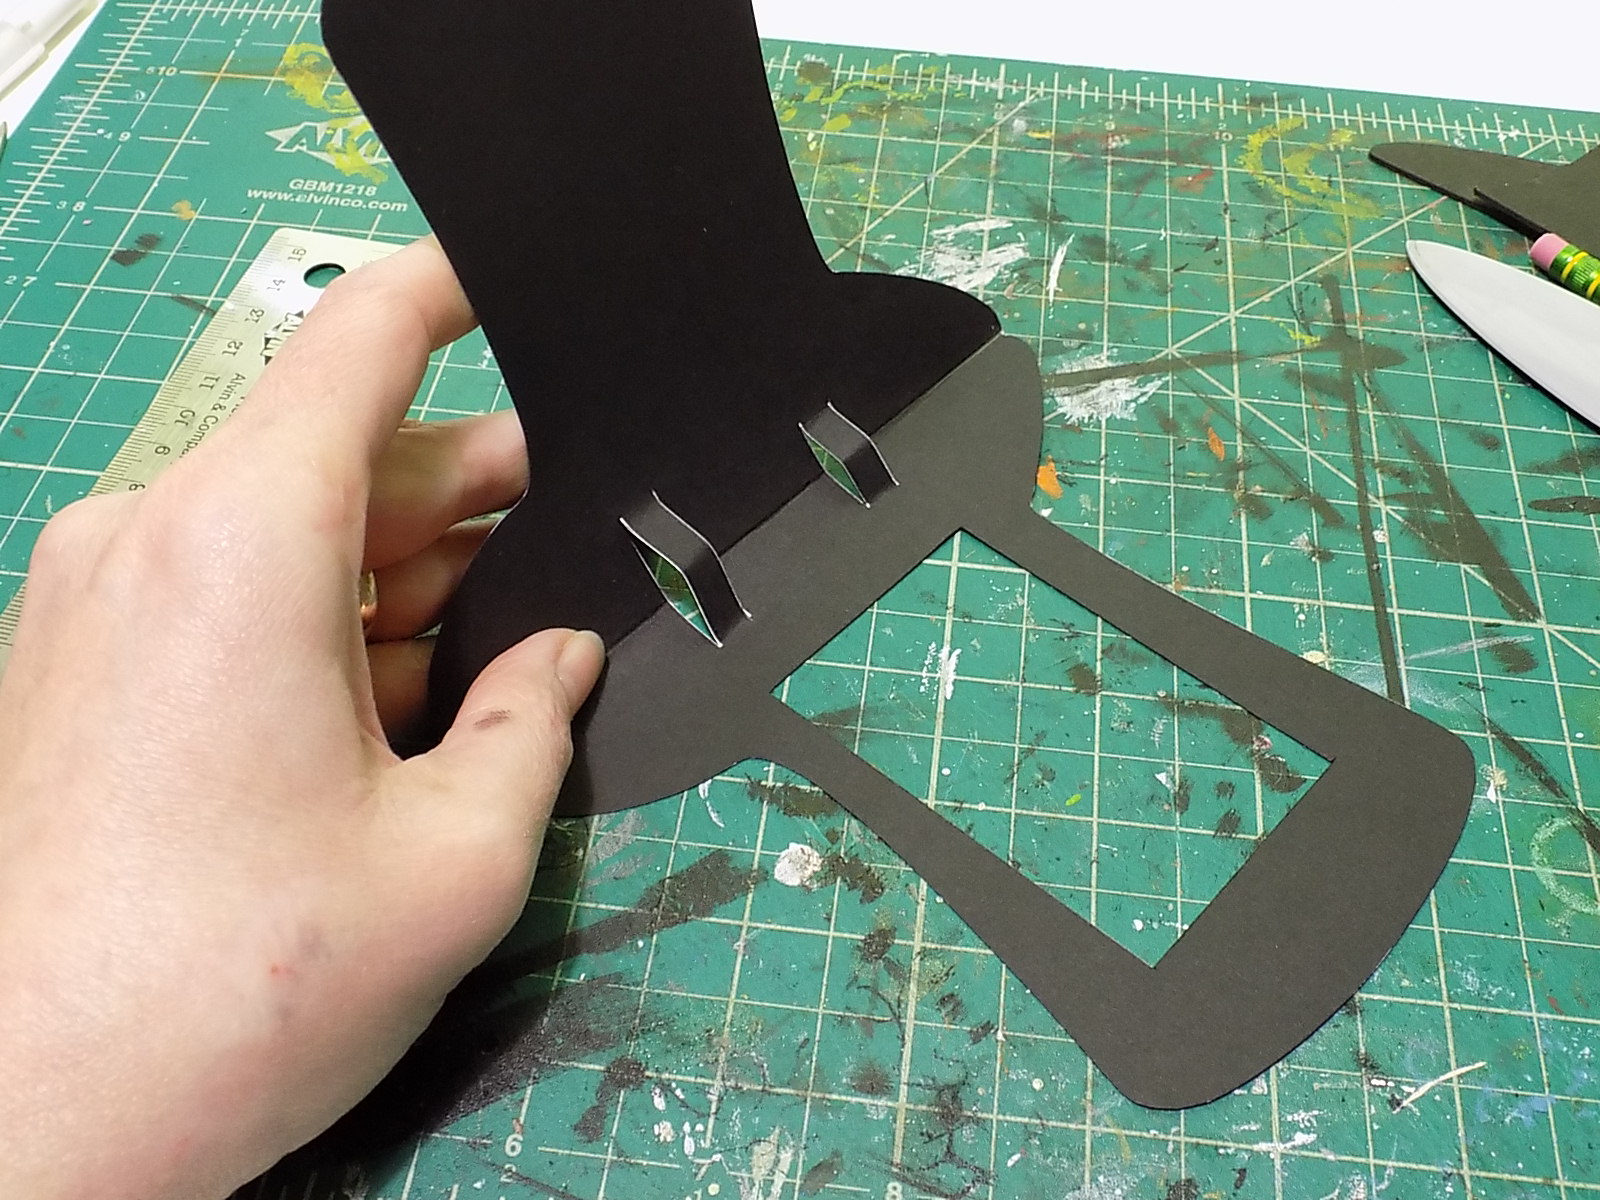
Mark two lines for each pop-up. I wanted the Hatter to be further away from the shrine, so made longer lines on the right side.


Trace over the fold line with a bone folder, but skip over the pop-up lines. Erase the pencil line.


Cut the pop-up lines, then fold the card in half. You'll have to pull out the pop-ups as you fold. Crease the fold with the bone folder.


Cut a rectangle of cardstock to cover the opening of the pop-ups, fold it in half, and glue to back of piece.


Glue a magnet along the top of each chipboard hat piece, then glue the pieces to the matching sides of the cardstock, sandwiching the magnets between the paper and chipboard. I forgot to take a photo of that, whoops. Thin magnets would work just fine, but all I had were chonky ones, resulting in the paper wrinkling where it covered the magnets.


Remember that second hat you traced around? Good. Cut out the shape like so, leaving the bottom of the paper attached. Glue the niche to the back of the shrine.


Slide the paper over the niche and glue in place.


Flip the entire thing over, then fold the entire thing onto the other side of the cardstock. Trace around the hat again. So much tracing.


Cut around the shape and glue in place. I glued baker's twine around the edges of the hat to cover the layers, but it really isn't necessary. And done!


Happy that I managed to complete a few Alice projects, and now it's time for a cup of tea.

Go HERE to see the supply list for the I'm Late! project and HERE for the Pop-Up Tea Time supply list.