I'd like to say I have managed to complete my To Do list for the week and then had time to make some art. Well, the To Do list is only half-way finished and I scrapped the rest so I could get to the making art part. It's not like the laundry is going anywhere.
Spending an afternoon creating something is a great stress-reliever. I can focus on a project, even for an hour or two, and I'm happier afterward. When I decide to ditch the dishes and craft a little thing, I am grateful to have a stash of monthly kits from Alpha Stamps. I know I can pick one up and have it finished before too long, feel like I've accomplished something rewarding, and still have time to feed people. But who cares about all of that, let's see some art!


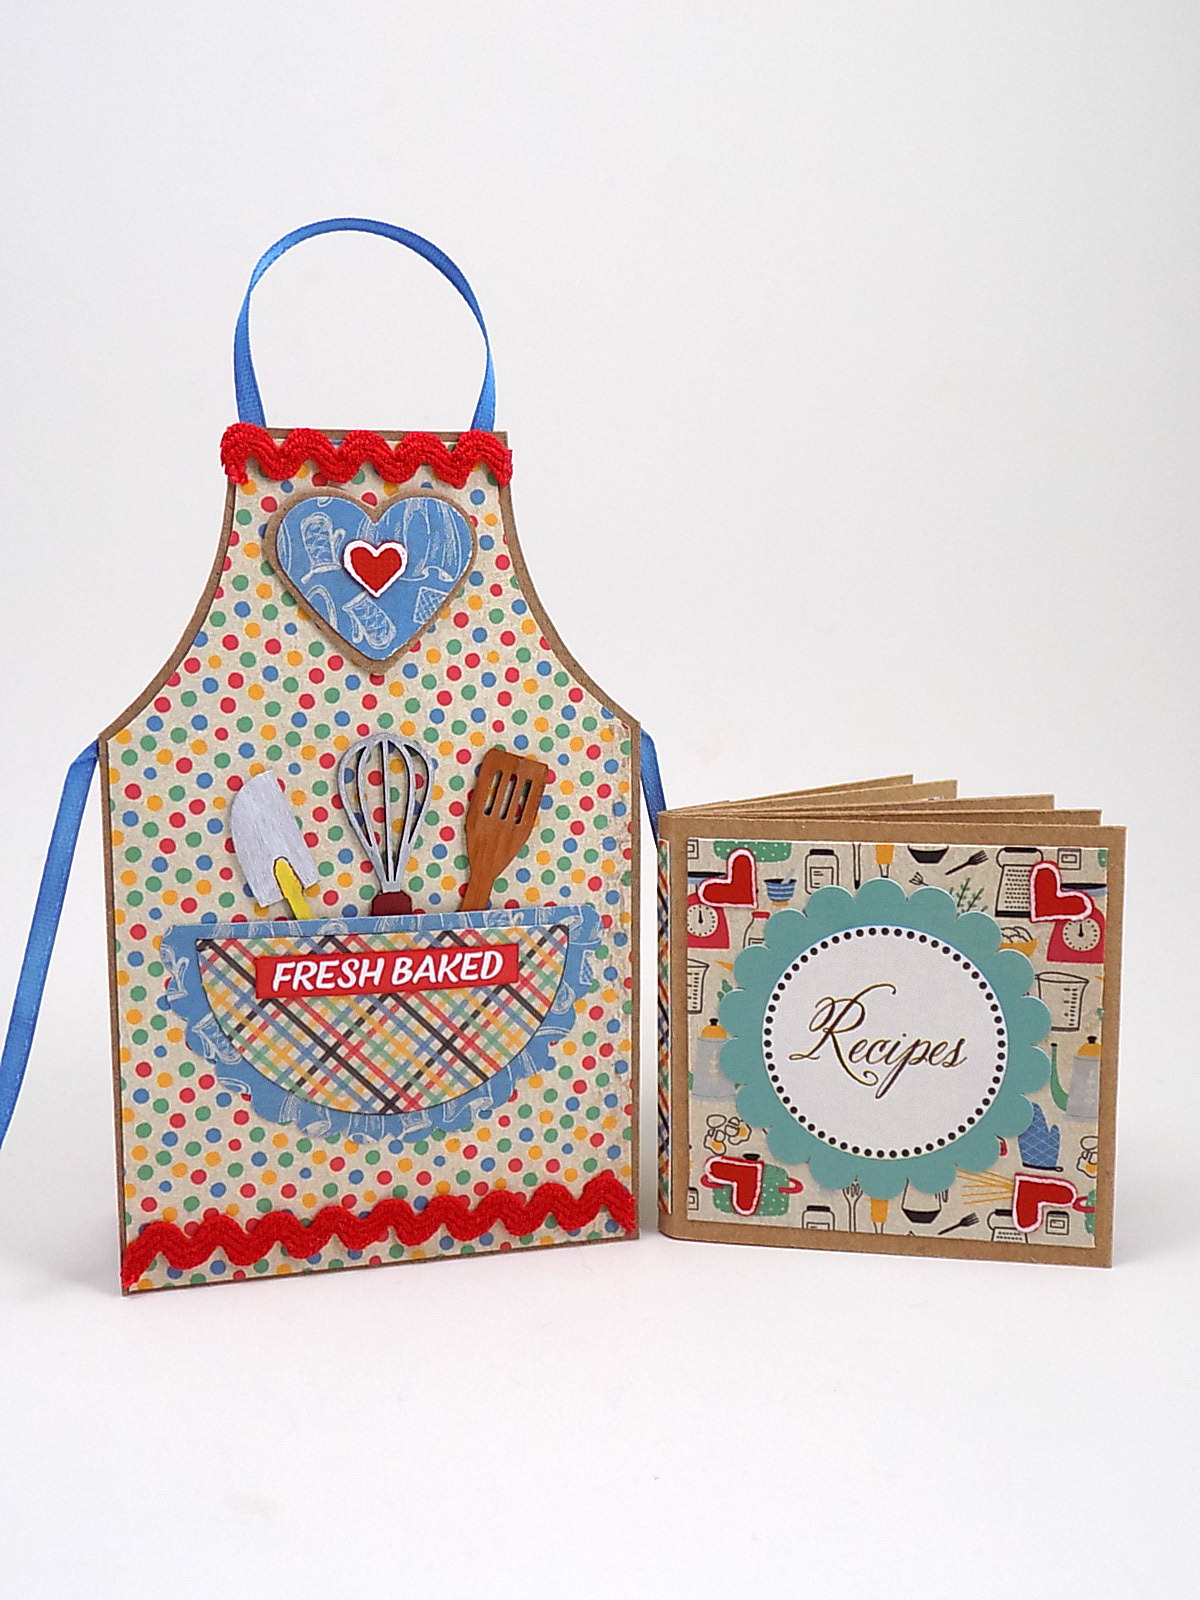
Here's how to make the book:
Materials -
12x12 Kraft paper for the book
Scrapbook papers for the pages and pockets
Collage sheets
Stickers, embellishments, double-sided tape or glue
1. Cut two lengths of kraft paper 2 1/4" x 12. Score paper every 2 1/4" along the length of the strip. Repeat for the other strip. There will be a small flap left at the end; score 1/4" from the previous score mark on both small flaps.
2. Cut (6) 2" squares for the left-side pages of the book, the front cover, and back cover.
3. Cut (4) 2" x 3" rectangles for the right-side pages. Score at 2" and fold. This will make a pocket to hold the recipe card. Trim the top of the pocket with decorative scissors.
4. Cut out collage sheet images.
5. Don't count the number of pockets and squares in the photo because it lies.


6. Accordion fold the two strips of kraft paper and slide the two pages without the small flaps over one another. Use double sided tape to hold the pages together. I also added tape inside each page, but it isn't necessary.

7. Add double sided tape to one small flap, wrap it around the book pages, and adhere it to the cover.

8. Originally, I had planned on using the other small flap as a way to keep the book completely closed. You can do this by gluing additional pieces of kraft or scrapbook paper to the flap to make it a tad longer, then add tiny magnets to the flap and book cover. I chose to chop off the extra flap because the cat was demanding dinner and did not care about the aesthetics of my book.
9. Add the pockets, page covers, and whatever else you want to your new book. Don't forget the ric rac!
Now I feel ready to knock out that To Do list (with a smile on my face). Happy crafting!
GO HERE to see the supplies used and HERE if you are in need of a quick happy project.