Yesterday, right in the middle of doing eleventy thousand things, I had this brilliant idea to drop everything, ignore people, sit down, and make something. You know, as one does when one's To Do is two pages long.
It started with this fabulous Wood Plant Stand with Drawer from Alpha Stamps. This thing's been untouched for a little while now, mostly because I had so many different plans for it. Would it be a display shelf for a bakery, loaded with bread? Storage shelves for mini art supplies? A kitchen shelf for cookbooks and pots and pans? It eventually turned into what it's meant to be: a plant stand. With a bit of spooky sprinkled here and there. :D
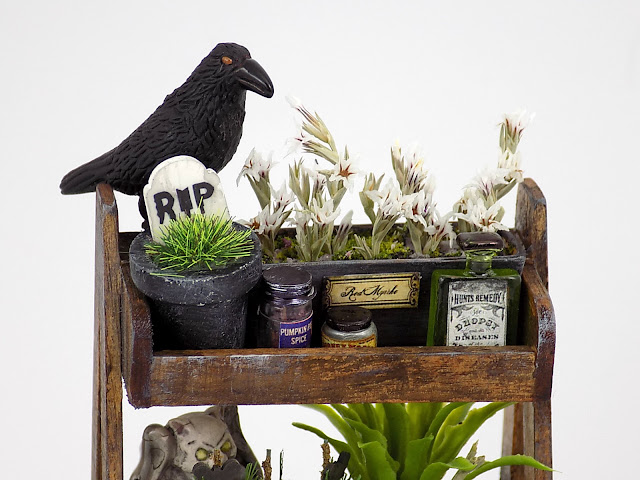
The first thing I did was give the plant stand a nice wash of diluted black acrylic paint, then a dry brushing of some metallic silver, eggshell, and dark brown paints in various spots. The same thing was done to all of the pots, baskets, and chipboard pieces. I used alcohol ink to cover the miniature planter with foliage (on the bottom shelf behind the skull plant). It's such a cute plant as is, but I ended up plucking the pink flowers it came with and replaced them with orange fall foliage.
Once everything was dry, it was just a matter of stuffing the painted planters with lichen, small brown path pebbles, moss, and all of the plants! They were arranged on the shelves along with a few bottles and Halloweenie beads.
I really love the opening drawer on this piece. Room for more stuff!
The bamboo house plant on the side was altered only a smidge: the basket was painted, path pebbles added, and polymer clay eyeball plants were stuck in. You can make the eyeball plants in about 5 minutes.
Grab some polymer clay, Eyeball Polymer Clay Halloween Slices, and a length of green florist wire.
Roll a small ball of polymer clay then smash an eyeball in the center. Push wire into the bottom.
Roll two tiny snakes of clay for the eyelids and put in place. Bake for a nanosecond. (Use your best judgment. Mine were baked 2 minutes.) Stick cooled eyeball plants into the basket and done!
I feel better now the wood plant stand is completed, and I'm eager for more Halloween crafting! It's been added to the To Do list (but not necessarily at the end). HERE is where you go to see all the fab things used for this project. Go make stuff!