Materials:
Heavyweight cardstock, watercolor paper, any thick paper will do
Mattress Fabric
Stuffing of any variety
Needle and thread
About an hour

Here is the template for the mattress. I posted how this is made yesterday. This will be inserted inside the mattress, making it rigid. Because I wanted a tufted mattress, I poked holes in the cardstock template so I could later sew through the fabric and the template. Mine aren't even but that's okay.

For the mattress stuffing I went with wool roving, mostly because I have a huge bin of it. Polyfil would work, or thin upholstery foam, or a bunch of unrolled cotton balls; dryer lint would be fine too. A few layers of wool were stacked together, the template was placed on top, and I cut around the template.

Trace around the template onto two pieces of fabric and cut out, leaving a 1/4" seam allowance. The strip of fabric with diagonal lines will be used to make piping around the top of the mattress and the other strip will go along the middle of the mattress. I did not measure these- it was a completely eyeballed project- but the piping strip is somewhere around 5/8" wide and about 16" long. The middle strip is 1" wide by 16" long. (so I guess I did measure them, huh?)

Fold the piping strip in half and sew close to raw edge. I considered placing a length of embroidery floss inside the fold, thinking it would replicate real piping a little better, but hey. It worked out okay without it.

Match raw edge of piping with raw edge of top piece and sew around with 1/4" seam. Turn under the raw edge of one end then place it over the other end to join.
 |
| Couldn't even be bothered to change out the thread. Lime green it is! |
Match raw edges of mattress side piece to raw edges of front, right sides together, clip corners, and sew around, 1/4" seam again. Don't forget to fold under the raw edge of the end!

Place back piece on top and sew around, leaving one long side open.

Insert stuffing and cardstock template inside.

Sew closed.

Now to make the tufts. Thread a needle and knot the ends together. From the back of the mattress, fish around until you find a hole in the template and poke the needle through. Pull thread almost all the way to the front, insert the needle a little below where it came out, then push it to the back. Insert needle between the threads and pull tight. It will dimple the fabric on the front.

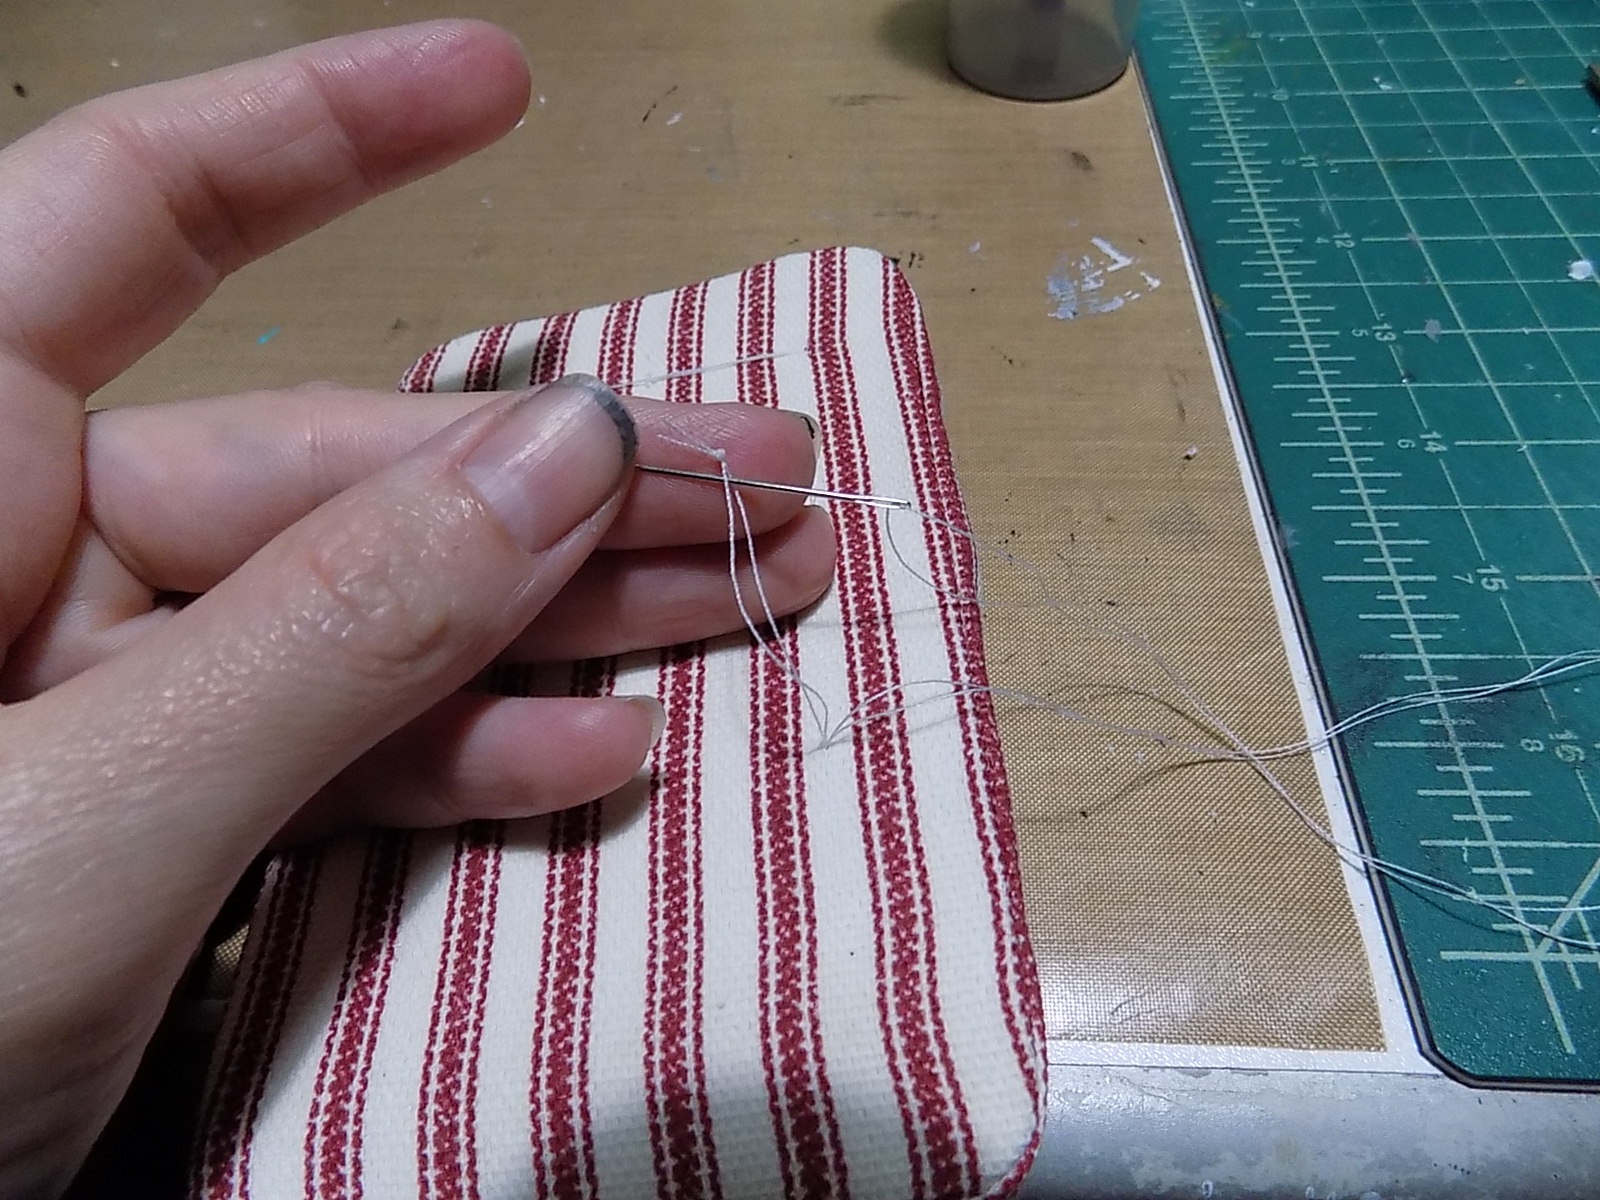
Then move to next hole, but when you come through to the back, slide the needle under the thread next to the hole, then under the loop. Pull tight and make another knot in the same way. You could be neater about it and just make all the tufts the same way the first one is made then snipping the thread and repeating.
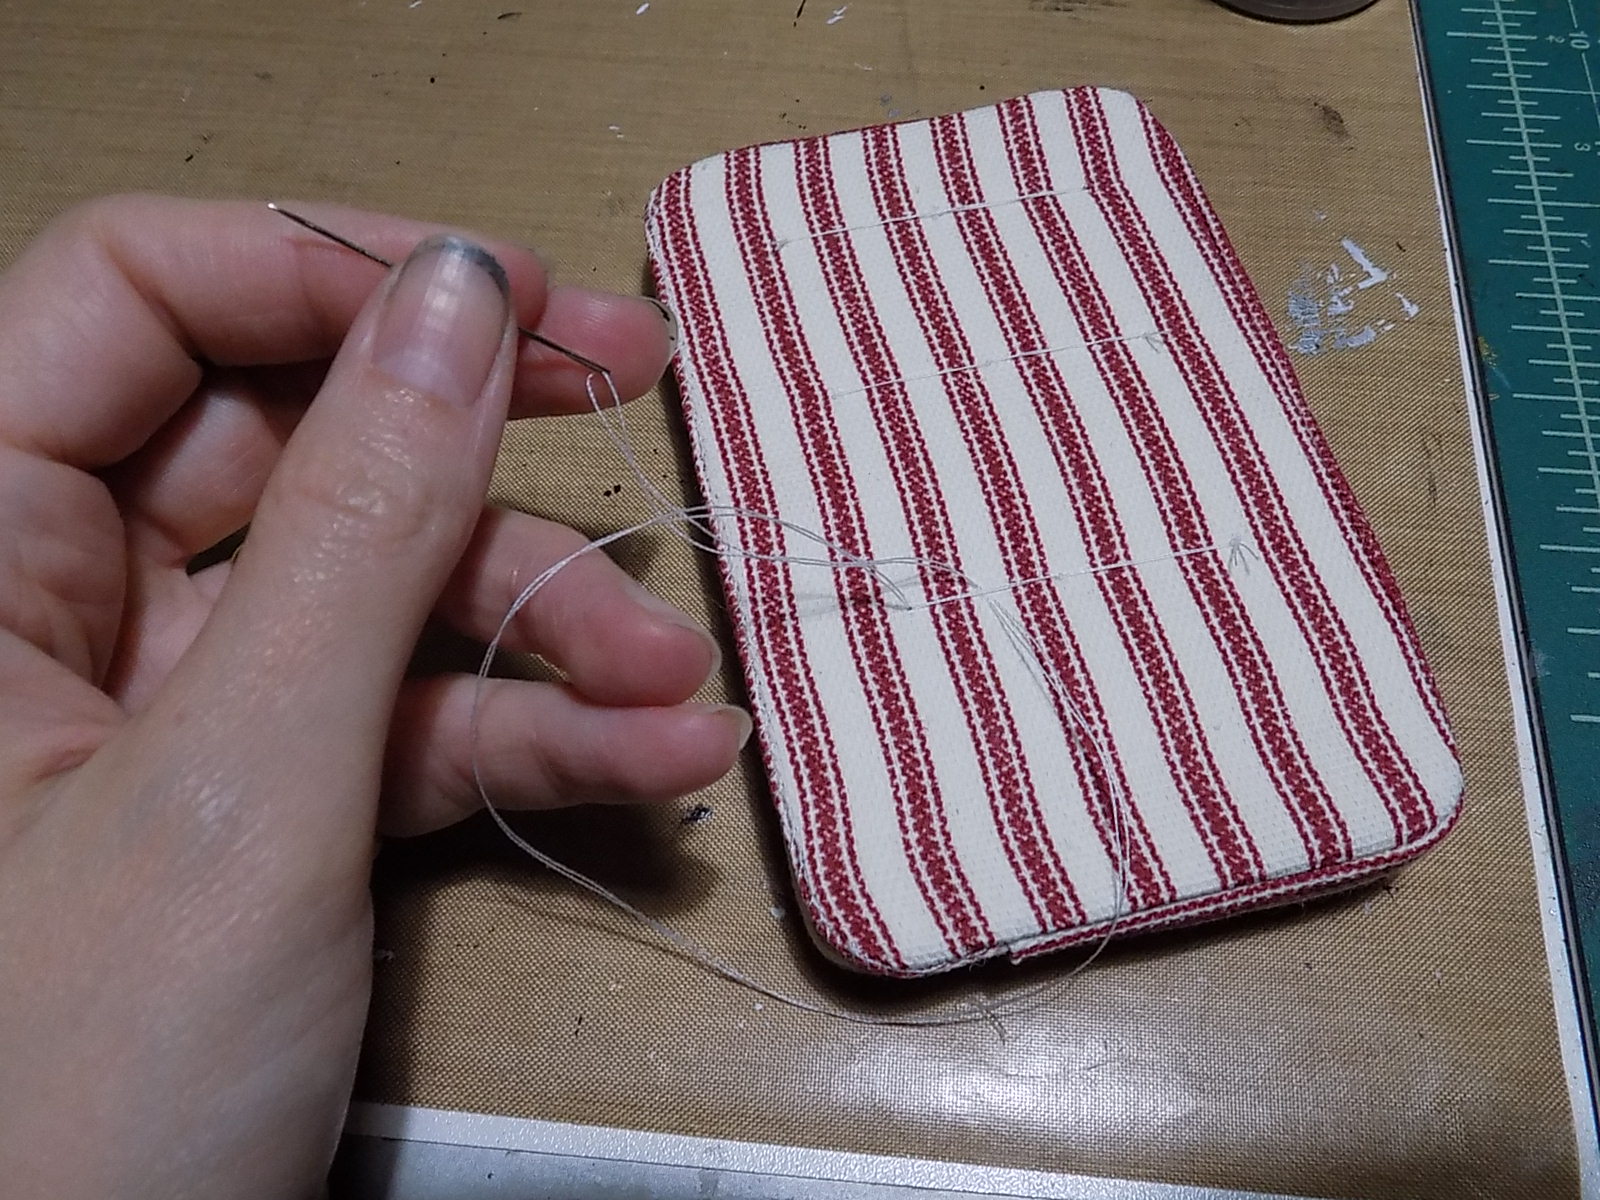
Turn your mattress over and be amazed at how cute it is!

It needed sheets, so I placed the mattress on my sheet fabric and cut around, leaving an inch on all sides. The corners were cut out then the edges were folded up (right sides together) and sewn along the straight edge. Repeat for all corners.

Sew a little casing around the raw edge, insert thin elastic in casing, tie ends of elastic together. Place on bed. All done!

Happy mattress making! :D
No comments:
Post a Comment