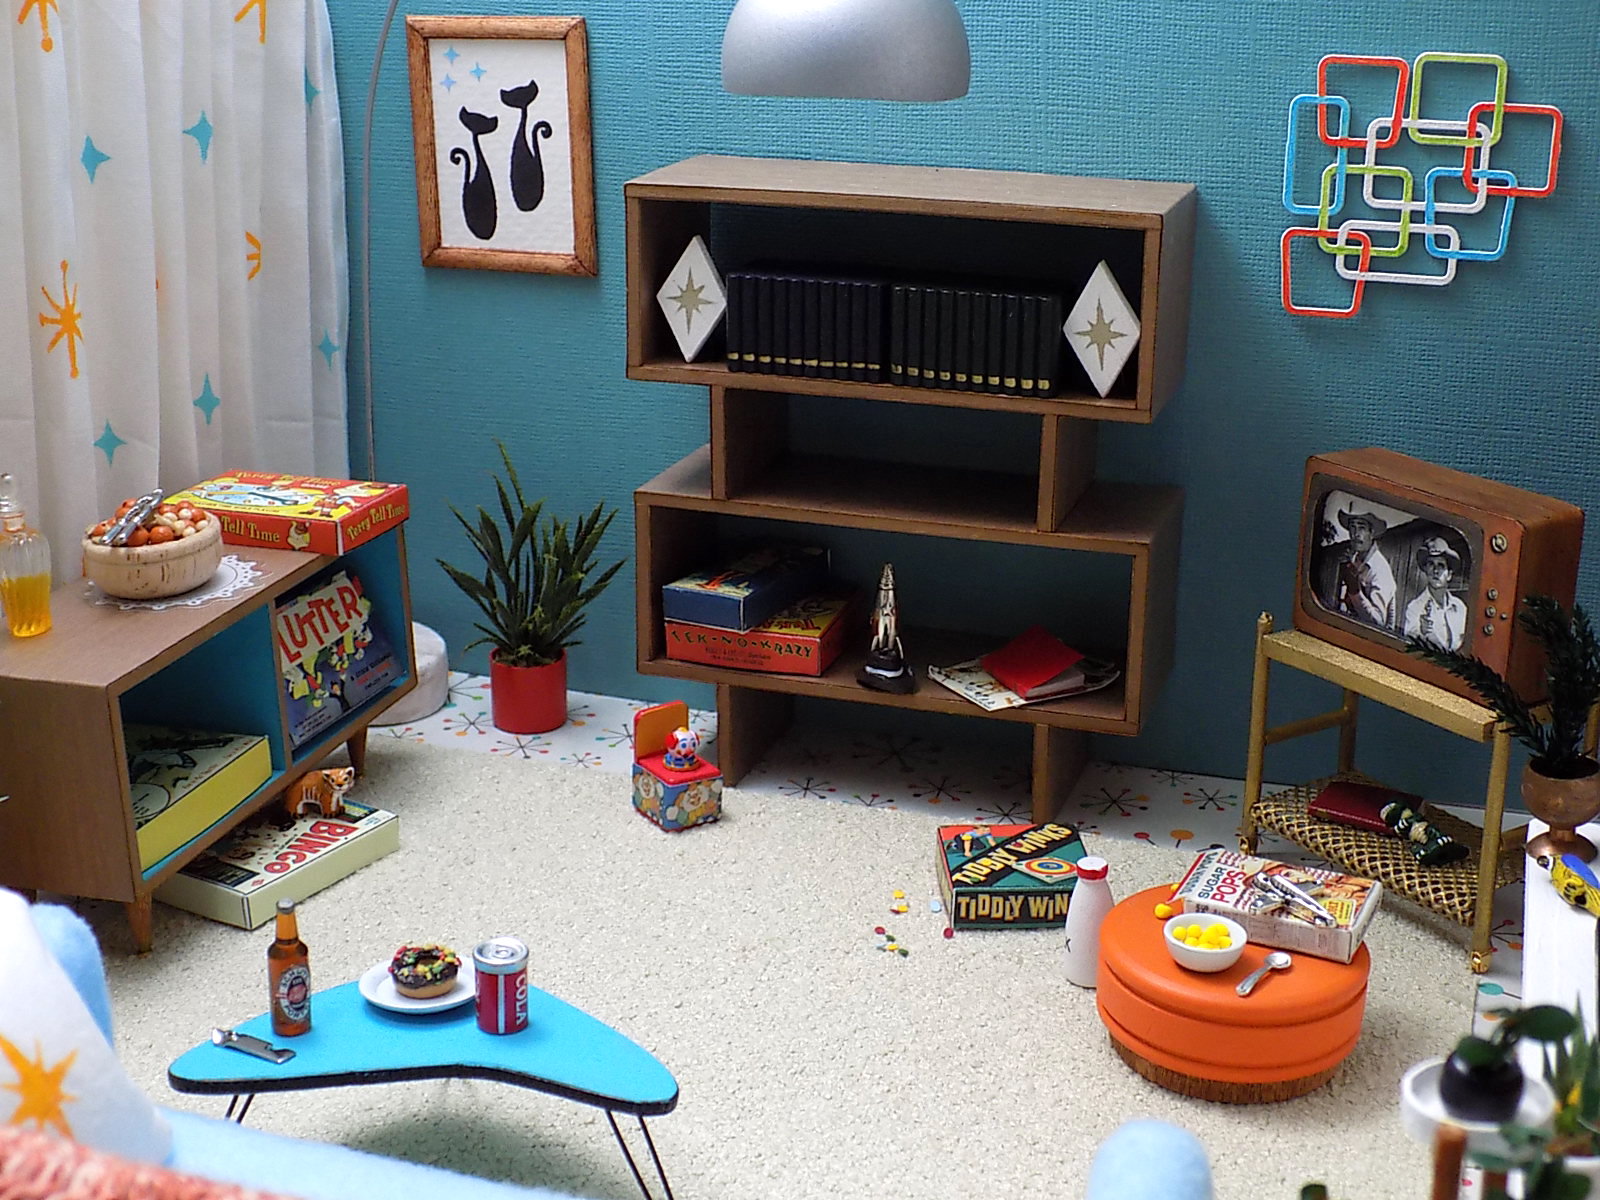
Well, one thing lead to another and after receiving some super rad retro coffee tables, I had somehow created an entire miniature mid-century room. Mom must be out and Dad is taking care of the kids because there is no way she'd allow cereal to be eaten on the hassock in front of the tv.


This tiny tv is so cute! I wanted to build the aforementioned precari-cart, so the legs of the tv were chopped off. I painted the front, glued a thin sheet of acetate followed by the perfect Western to the front, and then sandwiched all of the layers together. The knobs are from another collage sheet, can you believe it? Finally, I wrapped the tv in a strip of scrapbook paper. The cart is made from wooden skewers from the kitchen, a piece of needlepoint canvas, and the tiniest gold casters you've ever seen.


Originally, I had planned on a cart with two shelves but changed it up after discovering some ancient needlepoint canvas in the stash. See the itty bitty holes drilled in the bottom of the cart's legs? That's where those casters will go after painting the entire thing.

I glued the canvas around the bottom supports and spray painted it gold, then added the casters. Nearly instant Cart of Doom!

Two of the Retro Coffee Tables were stacked for this ultra mod shelving unit. It would work equally well as a room divider, but I already had one of those (shown later and made for good reason) so opted to use it against the wall. I added starburst book ends and kid stuff, like the rocket ship, to the shelves. There are several board games and a jack-in-the-box on the floor.
 |
| Uranium Rush, a classic |

The coffee table/room divider/shelving unit is a cinch to assemble. Glue the bits together, paint the all the edges, then cover with paper. I cut a long strip the width of the unit and wrapped it around.

A bone folder was used to crease the paper at the corners.

It was folded and glued around. The legs, center, and inside were covered with the same paper. Repeat!

The other Retro Coffee Table has a solid back and divider. It worked perfectly as another unit for games. I added (ahem) spindly legs to this one. They're made from wooden apple skewers and 3mm brass studs!

The legs started out longer and angled, but you get the idea.

I painted the ends of the legs gold before gluing on the "levelers" (3mm brass studs). The shorter legs looked better.

The cat print on the wall was made with the Retro Mini Stencil Set and a few Blue Iridescent Starburst Sequins. While I was at it, I stenciled some curtains, bookends, and a pillow, too. Too bad there isn't a life-sized version of that print; it would surely be hanging on my wall! I' wouldn't mind the wall decor either. The lamp is a ping pong ball on a piece of wire from a metal whisk that has been stuck into a disk of polymer clay. I made the planter on the right from toothpicks, coffee stirrers, and paper. Above the mantel is an atomic clock made from another piece from the Tiny Retro Shape Set. Moving on!
Have I mentioned my affinity for spindly legged furniture? Probably. I used a piece from the Retro Signage Chipboard Set to use as a boomerang table and added (you guessed it) spindly wire legs. Woohoo! To make the table a little more sturdy, I traced the chip shape onto a sheet of heavyweight cardboard and glued them together. Tiny holes were drilled on the bottom and the wire legs were added. The edge was covered with a thin strip of trim.

Here's another pic of the tiny tv because I love it so. Those kids better clean up before Mom gets home, jeez. What monsters.

And finally, the room divider that was built for a very practical purpose.
Meet Minicus Moo:
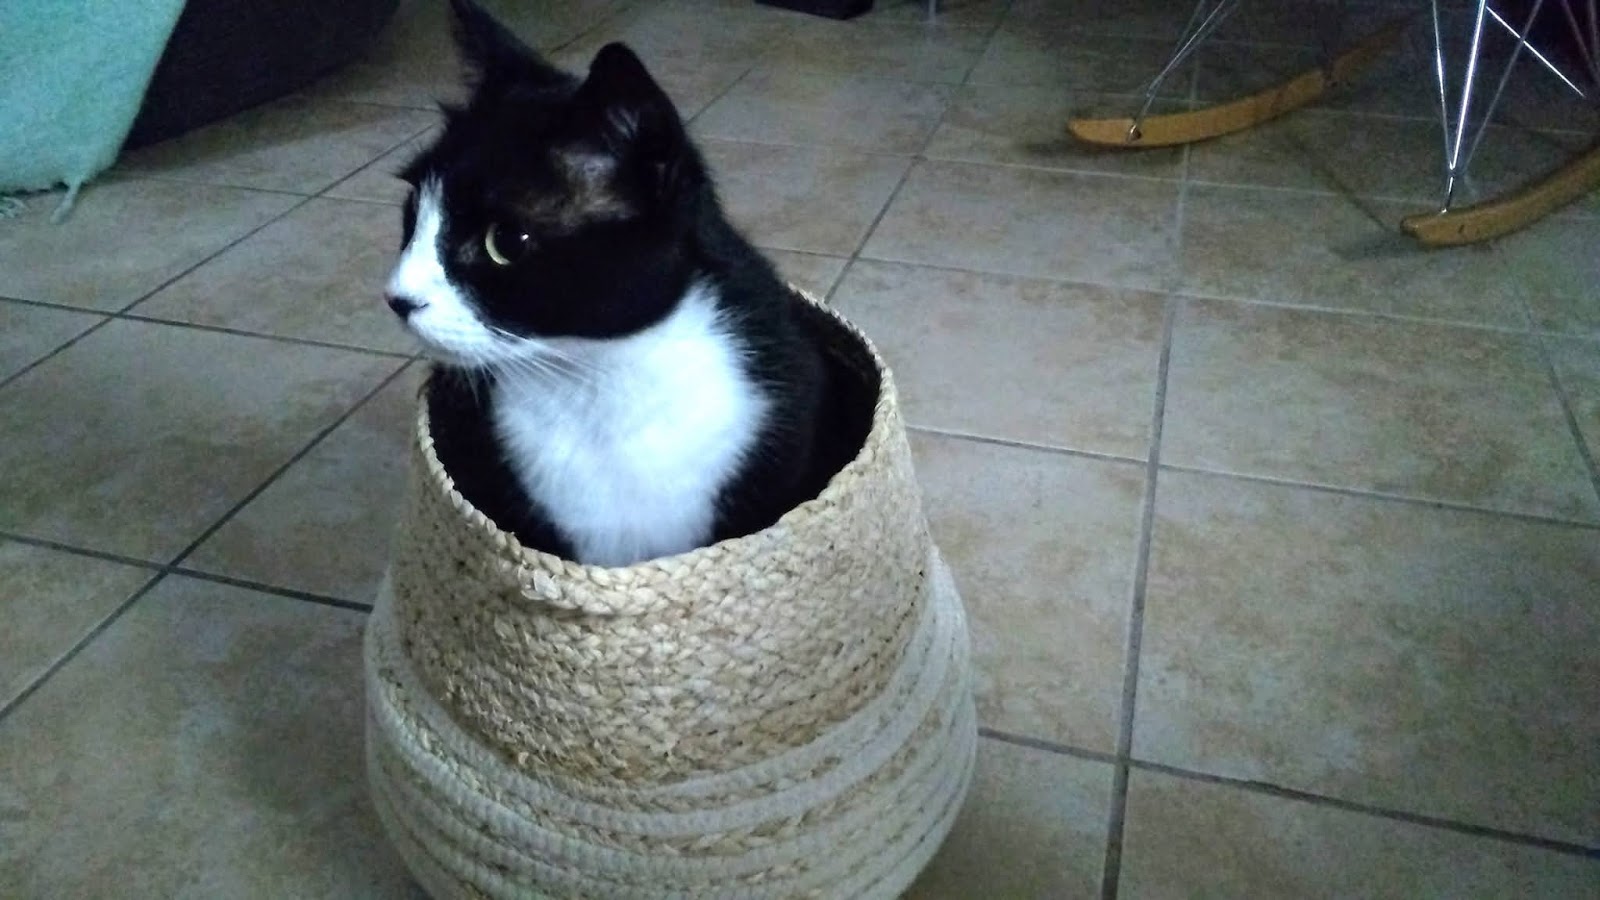
Destroyer of knitting baskets

family game night

all miniature projects

and even Christmas.
So, after two rebuilds of my mod room, the room divider (along with several other barricades) did its job and kept her from annihilating the finished project for a third time.
Whew! I hope you enjoyed this little slice of retro and all of its glorious spindly legs. I want to go to there.
Happy Saturday! Seems like a good day to watch Blast from the Past.
A list of supplies can be found RIGHT HERE.
Amazing! I love it!
ReplyDeleteI can see how much work went into this project, thanks to Minicus.
ReplyDeleteShe doesn't make it easy! But she is so cute.
Fabulous!! I especially like the arc lamp - I still have one!!
ReplyDeleteOh Shannon! Love, love, love all of it! It looks like my house!
ReplyDeleteA couple of questions; what gage wire did you use to make the hairpin legs on the boomerang table and what medium did you use to stencil the pattern on the curtains?
And, love to Miss Minicus Moo too!
Thanks, Kat
Hi Kat! I used 20 gauge black wire for the legs and regular craft acrylic for all of the stencil patterns. Easy stuff!
DeleteUn autre triomphe!
ReplyDeleteThanks, everyone!
ReplyDelete