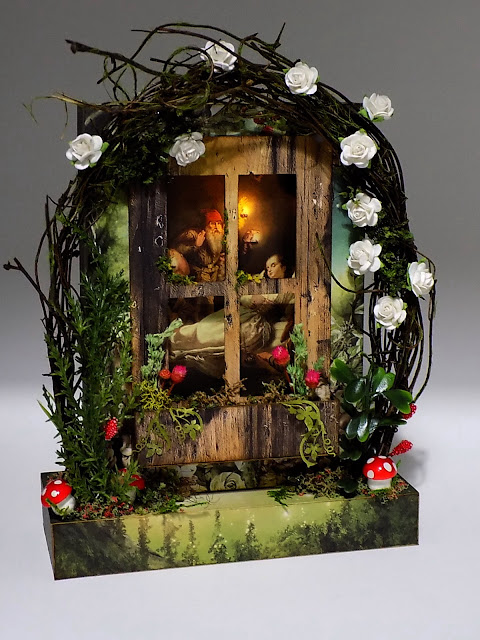
Life has been a bit crazy lately, but I managed a little art project for Alpha Stamps using the pretty Woodland Window Box Kit for April. I've been ready to make art for awhile now but found the days ending before my To Do list was completed. This kit made it possible to squeeze in some creativity which is exactly what I had been missing for so many weeks!
I decided to glue a bunch of bushy plants and mushrooms to mine, so went with the 5x2 Platform Base. An arch of twigs were also glued to the base and, as a bonus, I got to use more of the scrummy Woodland 6x6 Paper Pad. It's beautiful paper.
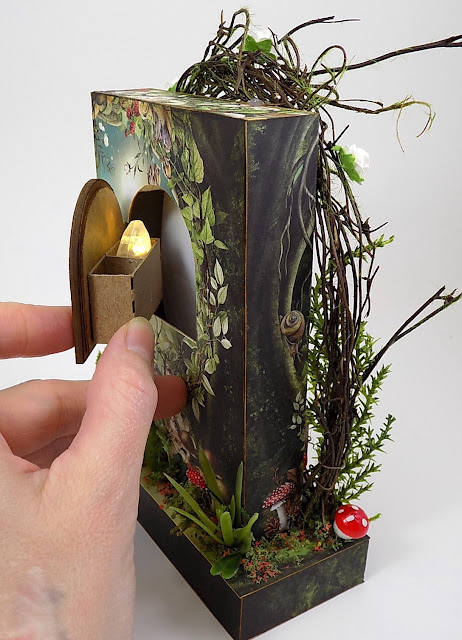
The back is fairly simple with more greenery. The window from the Decorative Windows Set 1:12 holds a surprise:
Ooooh, a light!
The Even Smaller Paper Theatre Boxes are 3/4" deep, so the wireless Single LED Light I used worked out nicely. It gave the lanterns on the collage image a warm light to shine on Snow White.
Here's a simple walk-thru if you want to add a light to your Woodland Window Box Kit:
1. Fold your Even Smaller Paper Theatre Box together. Trace around the window from the Decorative Windows Set 1:12. I used the curved window only and not the frame.
2. Cut inside the traced line along the bottom and around the curved top, approx. 1/16". Use a bone folder to score the box on the traced line on the uncut side for the hinge. Make a tiny cut from the curved cut to the scored line. Having that extra bit will allow the window to open properly.
3. Either fold your own, or cut a matchbox in sections like so, then glue them together so it is a solid box with no top. This will hold the Single LED Light.
4. Glue the Facade on the Even Smaller Paper Theatre Box, making sure the wider section of the facade is on the bottom. You can see the tabs of the facade just touch the cut marks for the window and the top tab is folded inward. I snipped off the point of that tab before gluing it in place. If you plan on papering your kit, remember to trace the Facade and the niche opening before gluing.
5. Cut a strip of paper to cover the inside edges of the niche. My strip is 7/8" wide x 12" long. Use double sided tape or glue.
6. To support the collage image inside the niche, add adhesive dots or foam to the corners. Glue in the box that holds the LED light. The foam dots should be the same height or a little taller.
Here is the inside of the niche showing the top of the LED box. I added a strip of cardboard in the center to keep the LED upright with its bulb extending beyond the box. The light shines through the cardstock collage image, illuminating the lanterns. I love it when things work out so perfectly.
Add your collage image to the foam dots then decorate! Yay!
Want to see all the fab goodies I used? Go right HERE!
Happy creating!


No comments:
Post a Comment