Saturday, August 15, 2020

All Things Lemon! Market Stall

Oh, August. I'm going to be honest with you. You're miserable. And hot. And buggy. And these daily afternoon downpours only make it worse. Doing anything outside (or even opening the door) is right out. So I thumb my nose at you, August! My curtains are closed, the lights are off, and my new Niche Shrine from Alpha Stamps arrived, so I don't even have to think about you.

This unbearable weather has me a little irritable, but luckily, creating a cute little market stall distracted me long enough to change my attitude. 


What better way to cool off than with a nice, tall glass of lemonade! Maybe have a lemon tart or two? 


I love, love all of the niche shrines. They are quick and super fun to make. Each new one instantly turns into my favorite, but this little Cabana House Niche Shrine with the Market Stall Niche Add-On? Be still my heart! And it is super tiny; an amazing 5 1/2" tall and 3" wide! The House Ornament Base that the market stall sits on is 4 1/2" square and couldn't have worked out more perfectly for the extra minis I added around the stall. 


I did add a top to the counter of the Add-On (more on that later) because I wanted a wee bit more space for the fancy Tiny Doilies - White - Set of 4, two plates of sweets, a glass of lemonade, a bowl of lemons, a few tiny jars of lemon curd, and, wait...is that it? There's more room up there! 

The cakes started out as Tiny Resin Cookie Cabochons that I dipped in Winter Snow Glitter Mix before adding half a slice of lemon and half of a Tiny Iridescent Four Leaf Clover Glitter to the top. I also repainted several cakes from the Tiny Resin Cakes Cabochon Mix to fit in with the lemon theme.


Here's a look at the inside of the market stall. I used the two shelves that are included with the Cabana House Niche Shrine to hold jars, bottles, more polymer clay slices (I love those things, too), and a metal baking pan which I stuffed with polymer clay and made a lemon loaf. Do you see the adorable lemon paper in the back?? Gah! It is included in the equally cute Summer Fruit Stand 12x12 Paper Set. 


The top shelf has a teapot and teacups (altered a tad with Sharpies) and another cake from the Tiny Resin Cakes Cabochon Mix.


I made the lemon tree from a portion of a Mini 3D Bare Tree and Leafy Green Underbrush. The ends of the branches were covered with glue and then stuck into the underbrush. You have to use a lot of glue and squeeze the green stuff a while but once it's dry, those leaves aren't going anywhere. The polymer clay lemons on the tree are the second set I made as the first were scorched beyond recognition after a scant 4 minutes in the oven. I painted a watering can and added more lemony goodness to the front before sticking the finished tree into it. To make it stand, I stuffed florist foam inside, stuck the tree in the foam, then glued Miniature Brown Path Pebbles on the top. While I was at it, I also made a simple plant using more leafy green underbrush but dusted the top of it with yellow pollen. You can see it in the second photo up there. ↑

The pot of sunflowers was created the same way as the polymer clay flowers used for the Tiny Tub of Whimsy. The sign board used to be a part of the Simple Wrought Iron Fence on the back of the market stall. After everything was glued down (yes, I actually attached ALL THE THINGS for once) I slathered the entire top of the base with glue and covered it in Green Turf Grass. Lemme tell you about this if you haven't already played around with it. It's amazing. A little goes a loooong way - I covered the surface and barely put a dent in the container it came in. Just don't sneeze when the lid is off.

Okay, so here's the "later" stuff: How to make a fun market stall and a sign board! 

I wanted to cover the open sides of the Cabana House Niche Shrine so chose to wrap the paper around the edges and glue it to the back portion of the shrine.


I covered the front of the shrine with paper, turned it over, and trimmed around the bottom and roof. I left some paper on the sides to fold around, and also cut out the center, leaving some paper along the inside edges to also fold around.


Here you can see the little flaps inside the shrine that were folded around to cover the edges. You could also paint the edges before papering it and skip this step. Do it your way!


What you see here in this delightfully blurry photo is the front of the shrine on the right and the back of the shrine on the left. I skipped the part of the tute where I assembled the niche portion, because it is sorta self-explanatory. Cover it in paper and glue over the hole. There. Done. 

With the niche glued on, it is easier (for me anyway) to measure where the folds need to be on the extra flaps.  The back of the shrine was papered, and again I left extra paper on the sides to fold over the edges. The top was left alone since it will be covered with a cute roof.


The niche and the extra flaps were glued to the back of the shrine. Half-way there!


The Market Stall Add-On is simple to assemble. It has a few parts - a platform, a front facade, a counter, and two supports for the top. I glued and papered the counter and then added paper to the front of the facade. The platform that goes between the Cabana House and the Add-On got a strip of paper down its center, and then the platform's tab was glued to the back of the facade. I covered the platform tab and the back of the facade with paper, glued on the counter, and finally (and this was a nice discovery) slid the Cabana House over the other platform tab and glued it in place. I also added a countertop, which is nothing more than a scrap of painted chipboard. The awning is a rectangle of a sweet print from the Summer Fruit Stand 12x12 Paper Set and two 3-3/4 Inch Wooden Posts along the sides finish it off. 

The sign board is leftover bits of fence. 


Cut out two sections. Trim bottoms so they're even. Cut out center slat.


Cut off tops and trim slats to desired height.


Cut a section from leftover slat and glue it to the top.


Paint, add paper to the backs, and add whatever you want. Glue tops together. Done!

Whew! Well, kudos to you if you've made it to the end. This is the good part anyway, where a link to all of the supplies are! It's RIGHT HERE.


Stay cool out there and don't forget to hydrate!

Saturday, July 18, 2020

Saturday Morning - a Mini Mod Delight

When Leslie shared with me Alpha Stamps's Retro TV Kit for June, I was happier than a kid on Saturday morning. The atomic television, vintage images on the new collage sheets, and the retro mini stencil sheets (eeee!) had me swooning. We discussed MCM, and spindly legs, and of course televisions that teetered precariously on skinny metal carts...yikes.

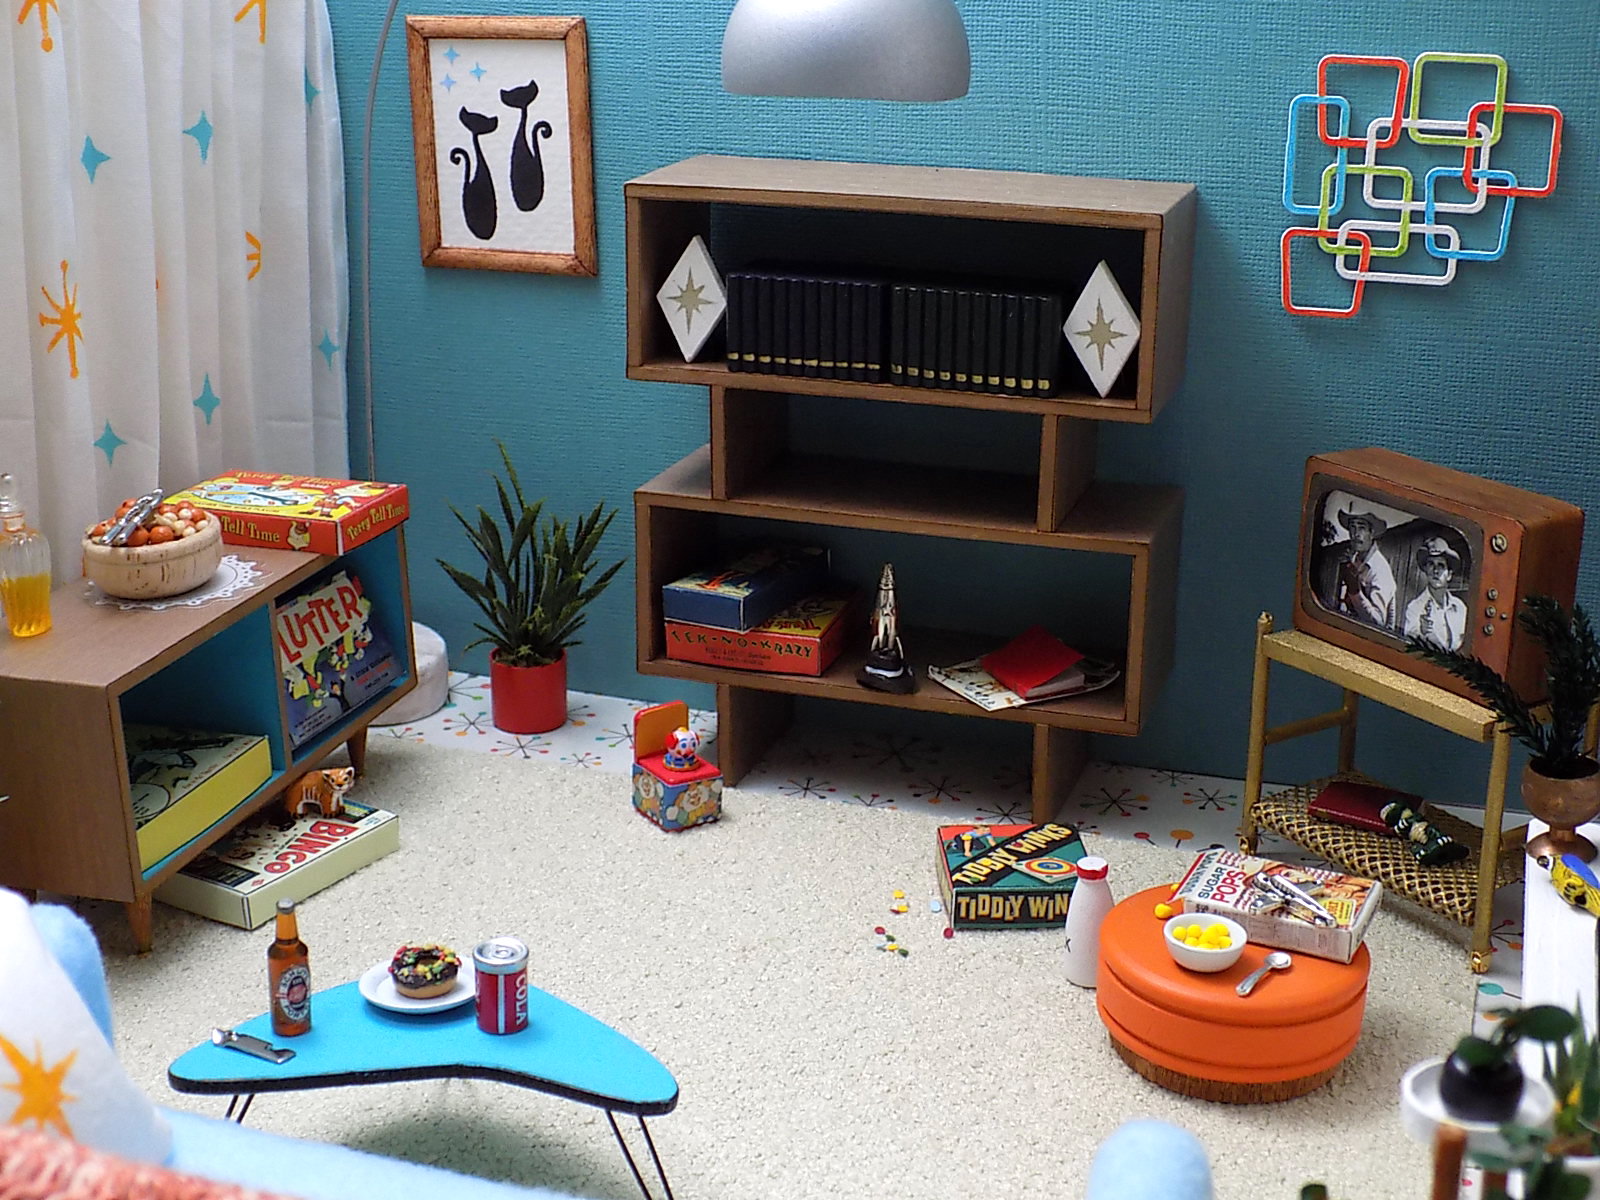
Well, one thing lead to another and after receiving some super rad retro coffee tables, I had somehow created an entire miniature mid-century room. Mom must be out and Dad is taking care of the kids because there is no way she'd allow cereal to be eaten on the hassock in front of the tv.


This tiny tv is so cute! I wanted to build the aforementioned precari-cart, so the legs of the tv were chopped off. I painted the front, glued a thin sheet of acetate followed by the perfect Western to the front, and then sandwiched all of the layers together. The knobs are from another collage sheet, can you believe it? Finally, I wrapped the tv in a strip of scrapbook paper. The cart is made from wooden skewers from the kitchen, a piece of needlepoint canvas, and the tiniest gold casters you've ever seen.


Originally, I had planned on a cart with two shelves but changed it up after discovering some ancient needlepoint canvas in the stash. See the itty bitty holes drilled in the bottom of the cart's legs? That's where those casters will go after painting the entire thing. 


I glued the canvas around the bottom supports and spray painted it gold, then added the casters. Nearly instant Cart of Doom!


Two of the Retro Coffee Tables were stacked for this ultra mod shelving unit. It would work equally well as a room divider, but I already had one of those (shown later and made for good reason) so opted to use it against the wall. I added starburst book ends and kid stuff, like the rocket ship, to the shelves. There are several board games and a jack-in-the-box on the floor.

Uranium Rush, a classic


The coffee table/room divider/shelving unit is a cinch to assemble. Glue the bits together, paint the all the edges, then cover with paper. I cut a long strip the width of the unit and wrapped it around.


A bone folder was used to crease the paper at the corners.


It was folded and glued around. The legs, center, and inside were covered with the same paper. Repeat!


The other Retro Coffee Table has a solid back and divider. It worked perfectly as another unit for games. I added (ahem) spindly legs to this one. They're made from wooden apple skewers and 3mm brass studs! 


The legs started out longer and angled, but you get the idea.


I painted the ends of the legs gold before gluing on the "levelers" (3mm brass studs). The shorter legs looked better.


The cat print on the wall was made with the Retro Mini Stencil Set and a few Blue Iridescent Starburst Sequins. While I was at it, I stenciled some curtains, bookends, and a pillow, too. Too bad there isn't a life-sized version of that print; it would surely be hanging on my wall! I' wouldn't mind the wall decor either. The lamp is a ping pong ball on a piece of wire from a metal whisk that has been stuck into a disk of polymer clay. I made the planter on the right from toothpicks, coffee stirrers, and paper. Above the mantel is an atomic clock made from another piece from the Tiny Retro Shape Set. Moving on!


Have I mentioned my affinity for spindly legged furniture? Probably. I used a piece from the Retro Signage Chipboard Set to use as a boomerang table and added (you guessed it) spindly wire legs. Woohoo! To make the table a little more sturdy, I traced the chip shape onto a sheet of heavyweight cardboard and glued them together. Tiny holes were drilled on the bottom and the wire legs were added. The edge was covered with a thin strip of trim.


Here's another pic of the tiny tv because I love it so. Those kids better clean up before Mom gets home, jeez. What monsters.


And finally, the room divider that was built for a very practical purpose. 

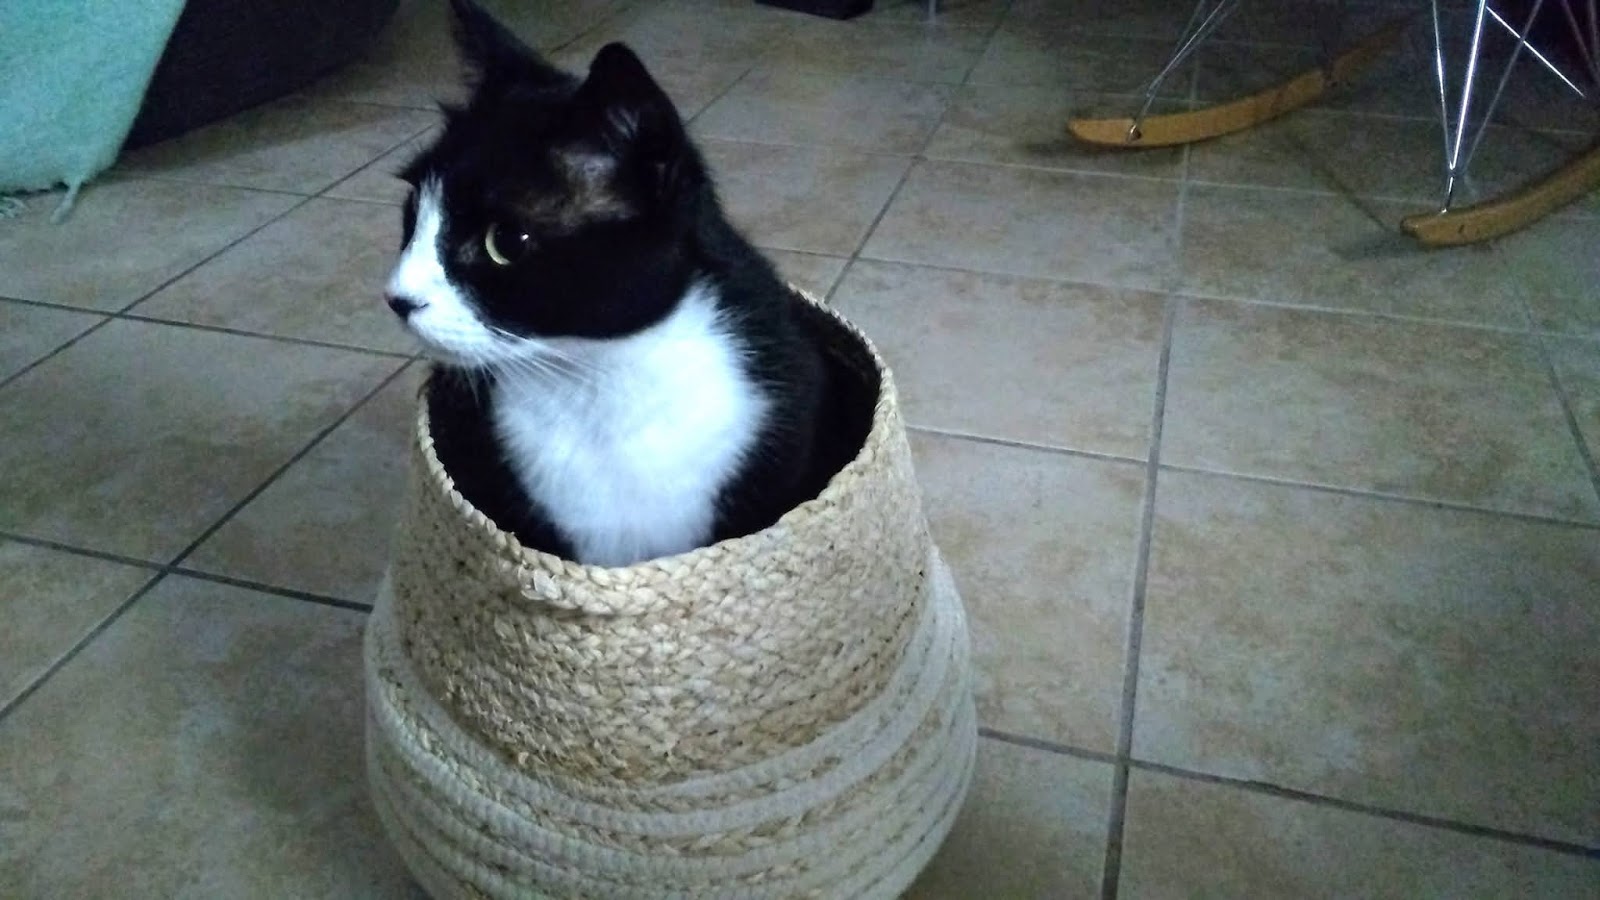
Meet Minicus Moo:


Destroyer of knitting baskets


family game night


all miniature projects


and even Christmas.

So, after two rebuilds of my mod room, the room divider (along with several other barricades) did its job and kept her from annihilating the finished project for a third time. 

Whew! I hope you enjoyed this little slice of retro and all of its glorious spindly legs. I want to go to there.

Happy Saturday! Seems like a good day to watch Blast from the Past.

A list of supplies can be found RIGHT HERE.  


Wednesday, June 17, 2020

A Tiny Tub of Whimsy!

A few days ago I got my hands on some adorable ceramic beads and a wee metal tub from Alpha Stamps - just what I needed for a super quick project. My kids and I have spent the last week tie dyeing everything, so I squeaked this in while their masterpieces were washing. 


How fun is that? A tiny tub of whimsy would brighten anyone's day, maybe even a Monday! The metal tub happened to be the perfect size for the beads I wanted to use, and the rest was filled in with loads of flowers and a petite path. 


What's up, squirrel?

Can you believe the squirrel, birdhouse, falcon, and gnome are ceramic beads?! Adorable! I think I said that already, but they truly are. The holes in the beads were really convenient; I pushed trimmed toothpicks in the holes before sticking them in the grass. 


I gathered some stuff that worked with what I was going for, like mini leaf punches, Bright Flowers Polymer Clay slice mix, green turf grass, florist foam (which I cut to fit inside the tub), and a handful of those cute ceramic beads. You can see where I stuck a toothpick through the bottom and then out the top of the birdhouse bead before placing the falcon on the bit of toothpick sticking out the top. A tiny fence along the front of the tub would be cute. Or painting the tub red with white polka dots. Or maybe line the inside rim of the tub with the plastic grass that comes with your grocery store sushi before adding the foam. I have lots of sushi grass...


I didn't do any of those things. What I did do (after cutting out a disk of floral foam for the inside of the tub) was cut several stems of florist wire, bent over the very end, then glued the polymer clay flowers on the stems. Leaves from the Ash Leaf Mini Punch were added to the stem, too. The floral foam was covered in glue and grass turf was sprinkled over the top. When it was dry, I stuffed the grassy foam inside the tub before adding the birdhouse, squirrel, and gnome beads. Then the flowers were stuck in here and there. Finally, the teeny rock path was added. And done! 


The supply list for this tiny 2" tub is RIGHT HERE.

Hope you are finding time to create as well! Tie dyeing is super fun...


Wednesday, June 3, 2020

Humpty Dumpty's Afternoon

Alpha Stamps new Secret Garden kit for May couldn't have come at a better time. Starting a garden this spring was simply out of the question for most people, so having the opportunity to make a teeny tiny one was a nice substitute. Another plus: no pollen.

I knew I wanted to use the Ivy Corner Insert and Mini Green Leaves from the kit, and after gathering a handful of other greenery, it reminded me of vines that grow over walls and up the sides of houses. So, I built a tiny brick wall for the inside of the blank tin which happened to be the perfect spot for Humpty Dumpty.


Humpty is spending his afternoon perched with his book in a quiet, shady spot, enjoying the fresh air. 


Making the wall for the inside was a cinch. I traced around the bottom of the Ivy Corner Insert onto cardboard and cut it out,


trimmed a piece of balsa wood the same length as the top of the wall,


then painted the balsa wood and papered the cardboard with an image from the China Cabinet House Wallpapers Collage Sheet. After lining the inside of the tin, I added a bit of foam to the back of the new wall and glued it inside, followed by the painted balsa wood. This mimicked the wall Humpty originally sat upon in the image found on the Humpty Dumpty #2 collage sheet. You can also see that once the Ivy Corner Insert was painted, I inked some ivy leaves that were snipped from Mini Trailing Ivy Borders, then glued them over some of the leaves on the insert. 


Pretty certain I used all of the laser-cut leaves in the stash on this project! A couple of tissue paper roses made from Heart and Star Mini Punches were glued on randomly, mostly to add a bit of something to break up all of that green. I added the Ivy Corner Insert to the outside of the tin (vs under the lip on the inside) and covered the seam with brownish embroidery floss. Oh, and if you are wondering, the curly brown "sticks" are just several lengths of covered florist wire coiled around the spool base, then wrapped up the side of the tin.


Hope you enjoyed this silly little tin! I'm going to put down my tacky glue and head outside for some sunshine.

You can find the list of supplies used RIGHT HERE.