Wednesday, April 22, 2020

Wonderland is Better

I've expressed my love for all of the niche shrines from Alpha Stamps before, but I'm going to repeat myself. I love those things! I've gotten my hands on quite a few of them, and the newest one is just as enjoyable. Especially if it's Alice or Hallowe'en themed! Both of those ideas would work well with the potion bottle shape of the new niche shrine. I went with Alice and am saving Hallowe'en for another project.


The shrine was covered with Alice Herself Scrapbook Paper and the images are from the new Drink Me collage sheet. I love that collage sheet as much as all of the niche shrines; choosing an Alice for the inside was nearly impossible. 


I decided to squish Alice inside the niche and added the White Rabbit to the outside. Alice has stacked adhesive pop dots behind her to place her a bit closer, and there is also a small sliver of pop dot behind the Rabbit's fan. On the uncut image of Alice and the Rabbit, the fan is drawn over Alice's hair, so I used a duplicate of the same image to cut out the fan and put it where I wanted. 


Another great thing about this shrine is the separate shaped chipboard blanks in case you want to have the shrine stand alone vs using the included hanger. I papered the bottle shape and glued it to the back of the niche portion of the shrine. I had considered using another bottle blank and hinge it to the front like a book, so you could open it to reveal a little scene inside. Maybe next time!

The tree (which I failed to take pictures of during construction) is made from four cloth covered florist stems that were twisted together for the trunk and separated at the top to create branches. Brown crepe paper was twisted around the wires and glued together with watered down Tacky Glue. The blossoms were punched from pink tissue paper using a Bellflower Mini Punch and glued on to the tree. 


Not too much was done to the back - a simple Altoids Insert Vignette frames another Alice from the Drink Me collage sheet, and the hearts were punched from a Heart Mini Punch. Now to work on that Hallowe'en project...

Happy crafting!

Supply List can be found RIGHT HERE!

Saturday, April 11, 2020

Out in the Garden

It would be pretty sweet if I were a gardener capable of growing beautiful flowers and plants for bees and butterflies to enjoy, but alas! most everything I've planted has kicked the bucket. Relying on Mother Nature to water everything during the whole of allergy season probably plays into that, but really, the black thumbs are the problem. Instead of killing more flowers, I decided a pollen-free miniature paper garden was a suitable alternative.


This garden project started with an Unfinished Kitchen Cabinet from Alpha Stamps. A wash of antiquing fluid was all that was needed to finish it. The two doors and drawer open for storing empty flower pots or tools. Functional miniature furniture is fantastic, isn't it?


I used several different containers for the plants and flowers made for the mini garden, like an Oval Wicker Fruit Basket with Handle, a Mini Wooden Toolbox, and a Set of Miscellaneous Flower Pots. There are even plants in kitchen canisters!


The wild fern in the back, the colorful puffball plants, and the razor plant in the red canister are pre-made and simply stuck right into a planter.


There's a very nice fern stand next to the cabinet, and on top of it is...a fern. What else?? I tucked another of those adorable "puffball" plants into a thimble for a bit of variety, and made flowers for a few other pots.


Quite a few plants were set into a Rustic Wheelbarrow on the right. Also inside is a white canister with a paper snake plant and ivy leaves glued inside. In front of the wheelbarrow are a crate of tiny flowers, a planter of pink hydrangeas, and a pot of elephant ears. Both the hydrangeas and the elephant ear plant were made using punches, and I'll show you how to do that in a bit. In fact, I used punches for nearly every flower and leaf in the garden. It's easy stuff.


Here are those cute puffball plants blooming from a wooden toolbox. They are too much!


Let's make some hydrangeas, shall we?

Materials:

Set of 3 Hydrangeas Mini Punch
Heart Mini Punch
Tissue Paper
Green cardstock
Green floral wire, paddle wire, or green stem wire
Styrofoam 
Glue 
Tweezers
Ball stylus
Foam mat


1. Punch out several tissue paper hydrangeas. I stacked a few layers of tissue paper on top of a sheet of copy paper before punching out the shapes to make it easier. Use tweezers to separate the layers.


 2. Cut the floral wire into short segments for the stems, and trim off little balls of styrofoam from whatever styrofoam you use. Glue the styrofoam to the end of the wire.


3. "Cup" the petals by rolling a ball stylus in the center of each punched shape until it curls up. I did this on a scrap of sheet foam.


4. Cover the styrofoam on the stem with glue and attach the petals using tweezers. Nearly there!


5. Punch out leaves from the green cardstock using the Mini Heart Punch. Add veins to the heart shapes with the ball stylus. Dip the leaves into glue and attach to the wire stem. Now make thirty more because they're fun!


The elephant ear plant was made in a similar way.

Materials:
Small Heart Punch
Cardstock
Floral wire, paddle wire, or stem wire
Scissors
Ball Stylus
Glue
Craft paint (optional)


1. Paint both sides of the cardstock with a few shades of green. This is optional; they look great without this step too. Punch out the leaves using the Heart punch.


2. Trim off a sliver of the heart on both sides to shape the leaf.


3. Create veins with the ball stylus on the back of the leaf. Turn the leaf over and dry brush the front with a light green or yellow craft paint.


4. Bend over an end of the wire...


and glue it to the back of the leaf. Repeat. Enjoy your tiny masterpiece!


Some of the other flowers made with punches include:

the red geraniums (using a tiny circular hole punch for the flower and a Mini Clover Paper Punch for the leaves. I punched the leaves from cardstock and snipped off the stem of the clover before gluing it to the wire stem)

the light blue flowers in the back (using the Bellflower Mini Punch for the flower and Heart Mini Punch for the leaves. There's also ivy in that pot made from the Ivy Leaf Mini Punch)

and the pink flowers in front (also the Bellflower Mini Punch).


This tiny tree was made by disassembling a Miniature Rustic Broom, dipping the ends in glue, then attaching Leafy Green Underbrush and Clump Foliage to the branches. 


Even though I can't get "out in the garden" without severe repercussions, creating this miniature temporarily fulfilled the want to be outside, and not a single flower bit the dust. Until...


Sigh. Good thing she's cute.

Happy gardening to you, however you decide to do it!

A list of supplies can be found RIGHT HERE.

(oh, did you spy the garden gnome?)


Wednesday, March 25, 2020

Springtime Shadowbox

Can you believe it? It's already spring! The beginning of spring probably means more to people living where there are actual seasons, like autumn, or winter, or any season other than summer, really. There's one season, summer, and two temperatures here: hot and unbearable. Azaleas bloom in January, grass never dies, and only a handful of trees go naked for a few weeks. I do not own a coat. The unbearable time of year is quickly approaching, so I thought making a fast and fun little shadowbox would be a nice way to celebrate the tolerable part of the year.

I started my spring project with Alpha Stamps's  Shadowbox with Square Cubbies - 6x6 and used the beautiful Farm Meadow 6x6 Paper Pad to cover the inside of the cubbies and around the outside of the box. The paper pad has 40 (!) sheets of double-sided quality paper. It is printed with flowers, rabbits, butterflies, baskets, chickens, hay bales, even garden boots. Some of the paper has a pearlescent sheen to them...it is a lovely pad.


It is a simple enough project that can be quickly made, then used to showcase tiny treasures. Normally I cover ALL of the horizontal surfaces with miniatures, cramming as many as will fit, but covering the paper would've been a real shame. 


After assembling the shadowbox, painting it white, then gluing in the paper, all that was left was to set my pieces inside. To make the wreath for one of the cubbies, I added a bit of glue to the bottom of a 1 Inch Grapevine wreath, dipped it into some chopped up green underbrush and yellow foliage, then added a bow. 


A very sweet white wicker fruit basket filled with peachy roses and ivy for the center. Above that is a Black & Yellow Finch wooden button glued to chipboard grass, then placed in the cubby. Did I mention this project was lightning fast?


The potting soil bag and seed packets are from the Miniature Garden Supplies collage sheet. They are the cutest things ever!


Sometimes assembling chipboard kits gets a little confusing, especially when there are multiple parts that look a lot alike. I snapped a few shots of the construction of this shadowbox for anyone that might need it.

1. Prepare your parts. Take everything out of the plastic bag and wipe the edges with a paper towel or cotton swabs. I'm using swabs since all paper products have been stripped from store shelves faster than a Tickle Me Elmo in 1996. 

2. Identify your parts. There's a back and 4 slightly different pieces for the center that make up the cubbies. Make sure you glue the 2 pieces with the slots facing upward first, like so.


3. Moving on...match the slots and glue the other 2 pieces to center.


4. Finally, glue the frame around the shadowbox, taking note of the position of each piece. 


All that's left is to paint it, add some paper to it if you'd like (maybe the Farm Meadow paper because it is just so scrumptious?), drop in your doodads or tchotchkes, then go outside (alone or with appropriate social distancing, of course) to enjoy whatever kind of spring you have. 

Go HERE to see the supplies used! 

Wednesday, March 11, 2020

The Egg Artist's Workshop

The March kit from Alpha Stamps, adorably named Mr. Bunny's Egg House, is (so far) my personal favorite of the many niche shrines available. After one look I pretty much knew what it was going to be, but quickly realized the potential for this little egg. Turn it on its side, add mini grapevine wreath wheels, and make a springtime egg car? Sure. What about having rocket thrusters on the bottom and bunny astronauts inside? I can see it. How about decorating six tiny shrines in different papers to make them look like decorated eggs and spelling EASTER inside the eggs? Add a string and hang it on the mantel or wall! So many ideas!

I loved the idea of Mr. Bunny's Egg House from the outset and went with creating a workshop where Mr. B paints all of the eggs for spring.


Cute Niche Shutters were added to the front along with a scalloped-edge roof and wee flower box. The flower box is simply a few strips of heavy cardstock glued together (and I promise it is, in fact, under all of those flowers). 


The smallest size of the Bunny and Egg Borders came in handy for the top of the window. It's so cute! To make the workshop inside the niche, I built a tiny table from toothpicks and basswood, then painted it white. On top of the table are the itty bittiest of mini eggs I "decorated", then glued atop a gold earring back, which, in my head, looks like an egg stand. There's also a couple of paintbrushes in a mason jar, and a bit of paint in another jar.


The roof is nothing more than a cardboard triangle with strips of scalloped shingles glued to it; when the strips were dry, I turned over the roof and trimmed off the excess. I wanted Mr. B's workshop to stand, so the picket fence was added to the front. The fence spent a day or two wrapped around a pint of paint with a giant rubber band to hold it in place, and even after painting, it kept its curved shape. 

A quick DIY egg roof:

Cut a triangle shape you like. Mine is 2 1/2" wide x 1 1/4" tall.


Glue strips of scalloped shingles to the triangle.


Snip off excess.


Ta-da!


Now that Mr. Bunny's Egg Workshop is complete, I can't help but think of the other niche shrines I haven't yet made. Then again, a rocket egg with space bunnies sounds pretty great.

Happy spring to you!

HERE is where you'll find all of the supplies used for Mr. B's workshop. 

Saturday, February 22, 2020

A Few Alice Shrines

I've been thinking about Alice, wondering what kind of project to do, when two very Wonderland-like niche shrines from Alpha Stamps arrived in my mailbox!

The first, called Little Niche Shrine - Pocket Watch, reminded me of Alice's encounter with the White Rabbit, so of course that's what I turned it into. The shrine was painted black and gold, and I stamped a bunch of numbers onto Aged Parchment Scrapbook Paper before gluing it to the front. Details were added with a Micron or gold paint pen. It was finished off with a few collage sheet images, paper roses, and a chipboard flourish. 


The second niche shrine is shaped like a top hat (is it a magician's? a ringmaster's? some dapper dancing dude's? Could be anyone's!) With Alice on the brain, I made the Mad Hatter's chapeau with a little surprise inside. I used the Niche Shrine - Top Hat but added a Chipboard Top Hat Blank to the front. The outside is a tad boring, but when the flap is folded down, a scene appears inside. 


Inside the shrine is the sleeping Dormouse, the Cheshire Cat, a stack of teacups, and a pouring teapot. (Psst, the "tea" is hot glue colored with a brown marker.)


The fun parts are the two pop-ups of Alice and the Mad Hatter. Pop-ups like these are incredibly simple to create. Here's how I made the Pop-Up Tea Time shrine.


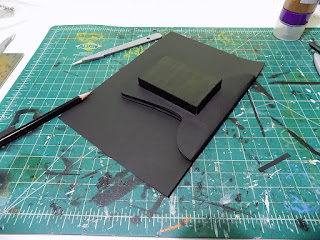
Paint the shrine front and Chipboard Top Hat Blank. Trace around one of the pieces onto black cardstock, then fold the piece over and trace around again. Cut out. Trace around just the shrine front on a second piece of cardstock. This will later be used as the outside cover.


With a pencil, mark the center where the fold will be.


Mark two lines for each pop-up. I wanted the Hatter to be further away from the shrine, so made longer lines on the right side.


Trace over the fold line with a bone folder, but skip over the pop-up lines. Erase the pencil line.


Cut the pop-up lines, then fold the card in half. You'll have to pull out the pop-ups as you fold. Crease the fold with the bone folder.


Cut a rectangle of cardstock to cover the opening of the pop-ups, fold it in half, and glue to back of piece.


Glue a magnet along the top of each chipboard hat piece, then glue the pieces to the matching sides of the cardstock, sandwiching the magnets between the paper and chipboard. I forgot to take a photo of that, whoops. Thin magnets would work just fine, but all I had were chonky ones, resulting in the paper wrinkling where it covered the magnets.


Remember that second hat you traced around? Good. Cut out the shape like so, leaving the bottom of the paper attached. Glue the niche to the back of the shrine.


Slide the paper over the niche and glue in place.


Flip the entire thing over, then fold the entire thing onto the other side of the cardstock. Trace around the hat again. So much tracing.


Cut around the shape and glue in place. I glued baker's twine around the edges of the hat to cover the layers, but it really isn't necessary. And done!


Happy that I managed to complete a few Alice projects, and now it's time for a cup of tea.

Go HERE to see the supply list for the I'm Late! project and HERE for the Pop-Up Tea Time supply list.