The first, called Little Niche Shrine - Pocket Watch, reminded me of Alice's encounter with the White Rabbit, so of course that's what I turned it into. The shrine was painted black and gold, and I stamped a bunch of numbers onto Aged Parchment Scrapbook Paper before gluing it to the front. Details were added with a Micron or gold paint pen. It was finished off with a few collage sheet images, paper roses, and a chipboard flourish.


The second niche shrine is shaped like a top hat (is it a magician's? a ringmaster's? some dapper dancing dude's? Could be anyone's!) With Alice on the brain, I made the Mad Hatter's chapeau with a little surprise inside. I used the Niche Shrine - Top Hat but added a Chipboard Top Hat Blank to the front. The outside is a tad boring, but when the flap is folded down, a scene appears inside.


Inside the shrine is the sleeping Dormouse, the Cheshire Cat, a stack of teacups, and a pouring teapot. (Psst, the "tea" is hot glue colored with a brown marker.)

The fun parts are the two pop-ups of Alice and the Mad Hatter. Pop-ups like these are incredibly simple to create. Here's how I made the Pop-Up Tea Time shrine.
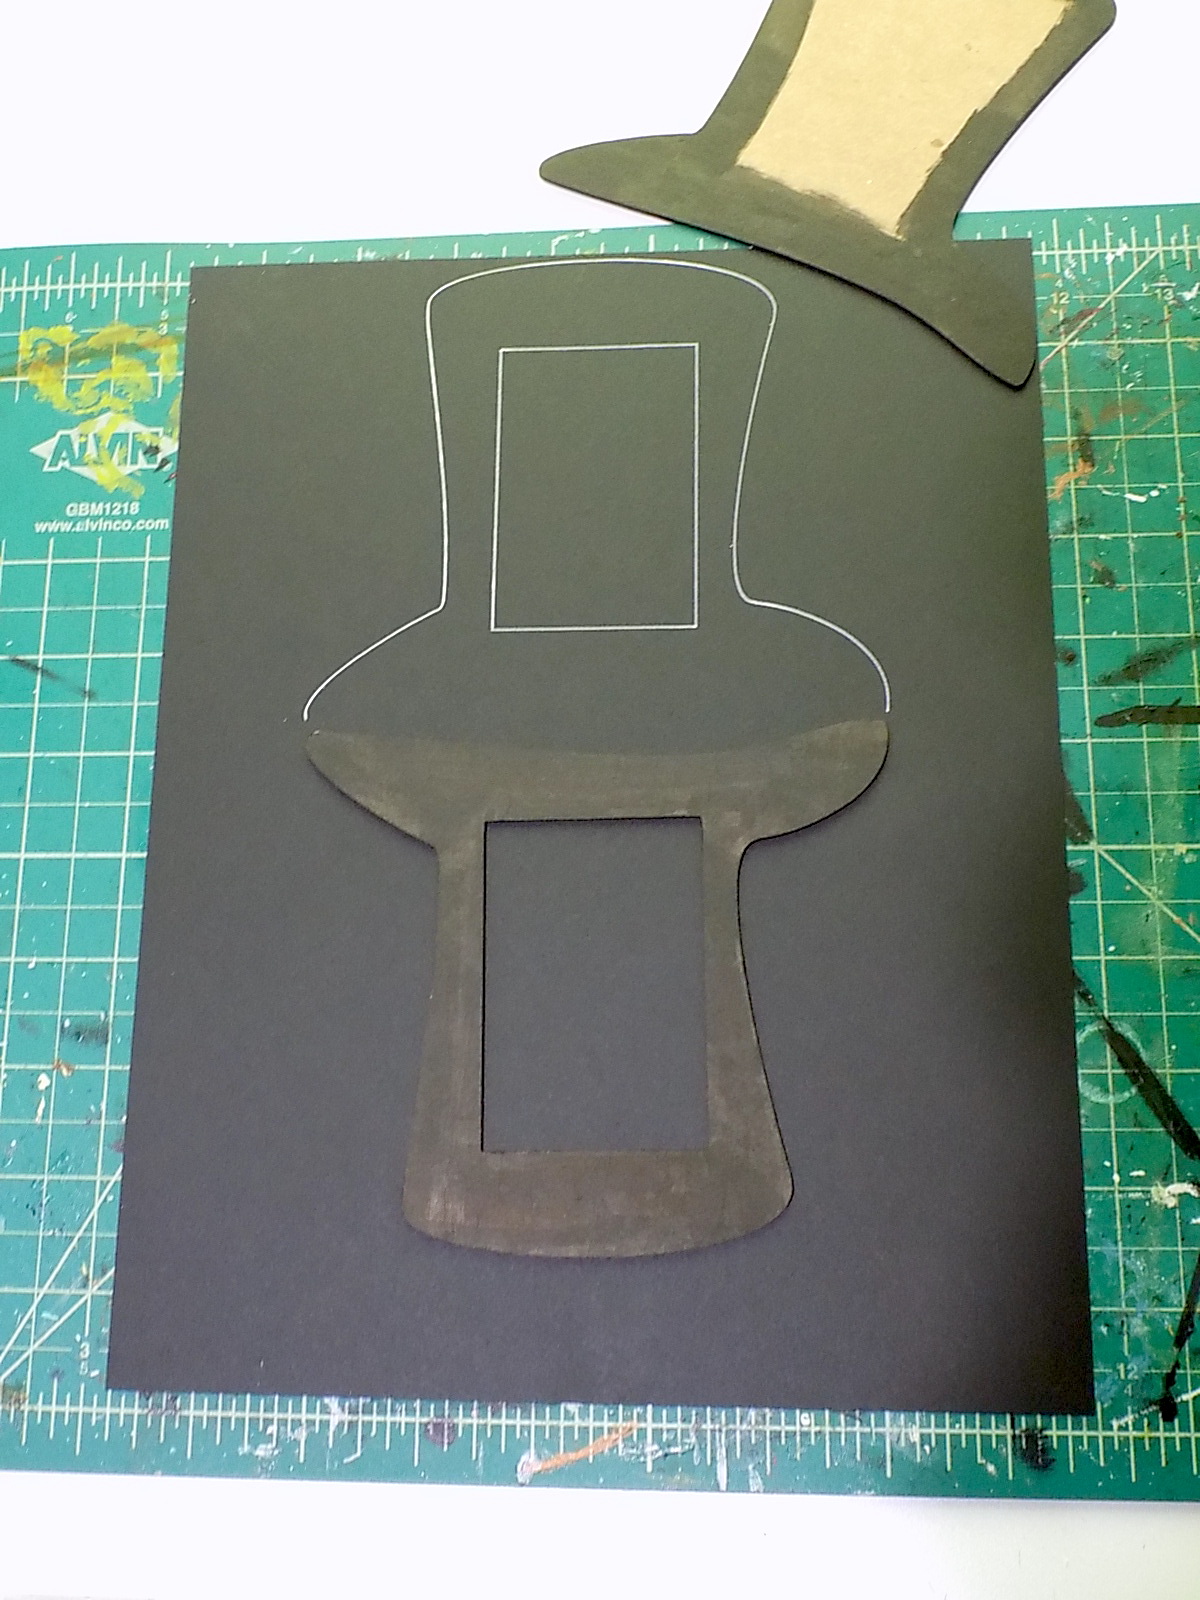
Paint the shrine front and Chipboard Top Hat Blank. Trace around one of the pieces onto black cardstock, then fold the piece over and trace around again. Cut out. Trace around just the shrine front on a second piece of cardstock. This will later be used as the outside cover.


With a pencil, mark the center where the fold will be.

Mark two lines for each pop-up. I wanted the Hatter to be further away from the shrine, so made longer lines on the right side.

Trace over the fold line with a bone folder, but skip over the pop-up lines. Erase the pencil line.

Cut the pop-up lines, then fold the card in half. You'll have to pull out the pop-ups as you fold. Crease the fold with the bone folder.


Cut a rectangle of cardstock to cover the opening of the pop-ups, fold it in half, and glue to back of piece.

Glue a magnet along the top of each chipboard hat piece, then glue the pieces to the matching sides of the cardstock, sandwiching the magnets between the paper and chipboard. I forgot to take a photo of that, whoops. Thin magnets would work just fine, but all I had were chonky ones, resulting in the paper wrinkling where it covered the magnets.

Remember that second hat you traced around? Good. Cut out the shape like so, leaving the bottom of the paper attached. Glue the niche to the back of the shrine.

Slide the paper over the niche and glue in place.

Flip the entire thing over, then fold the entire thing onto the other side of the cardstock. Trace around the hat again. So much tracing.

Cut around the shape and glue in place. I glued baker's twine around the edges of the hat to cover the layers, but it really isn't necessary. And done!


Happy that I managed to complete a few Alice projects, and now it's time for a cup of tea.
I am an "Alice Fanatic" and these are wonderful!!!
ReplyDeleteI just love both of these ! Have been in love with Alice for 40+ years and love her still!
ReplyDelete