Wednesday, October 14, 2020

Happy Halloween Ornaments

This is my favorite time to craft, especially with miniatures, because a bunch of new spooky stuff is available at Alpha Stamps and I am itching to get my hands on it. There's quite a few partially begun Hallowe'en projects littering my craft table, but lately the days have run into one another and before I knew it, the month was half gone! Eeek! 

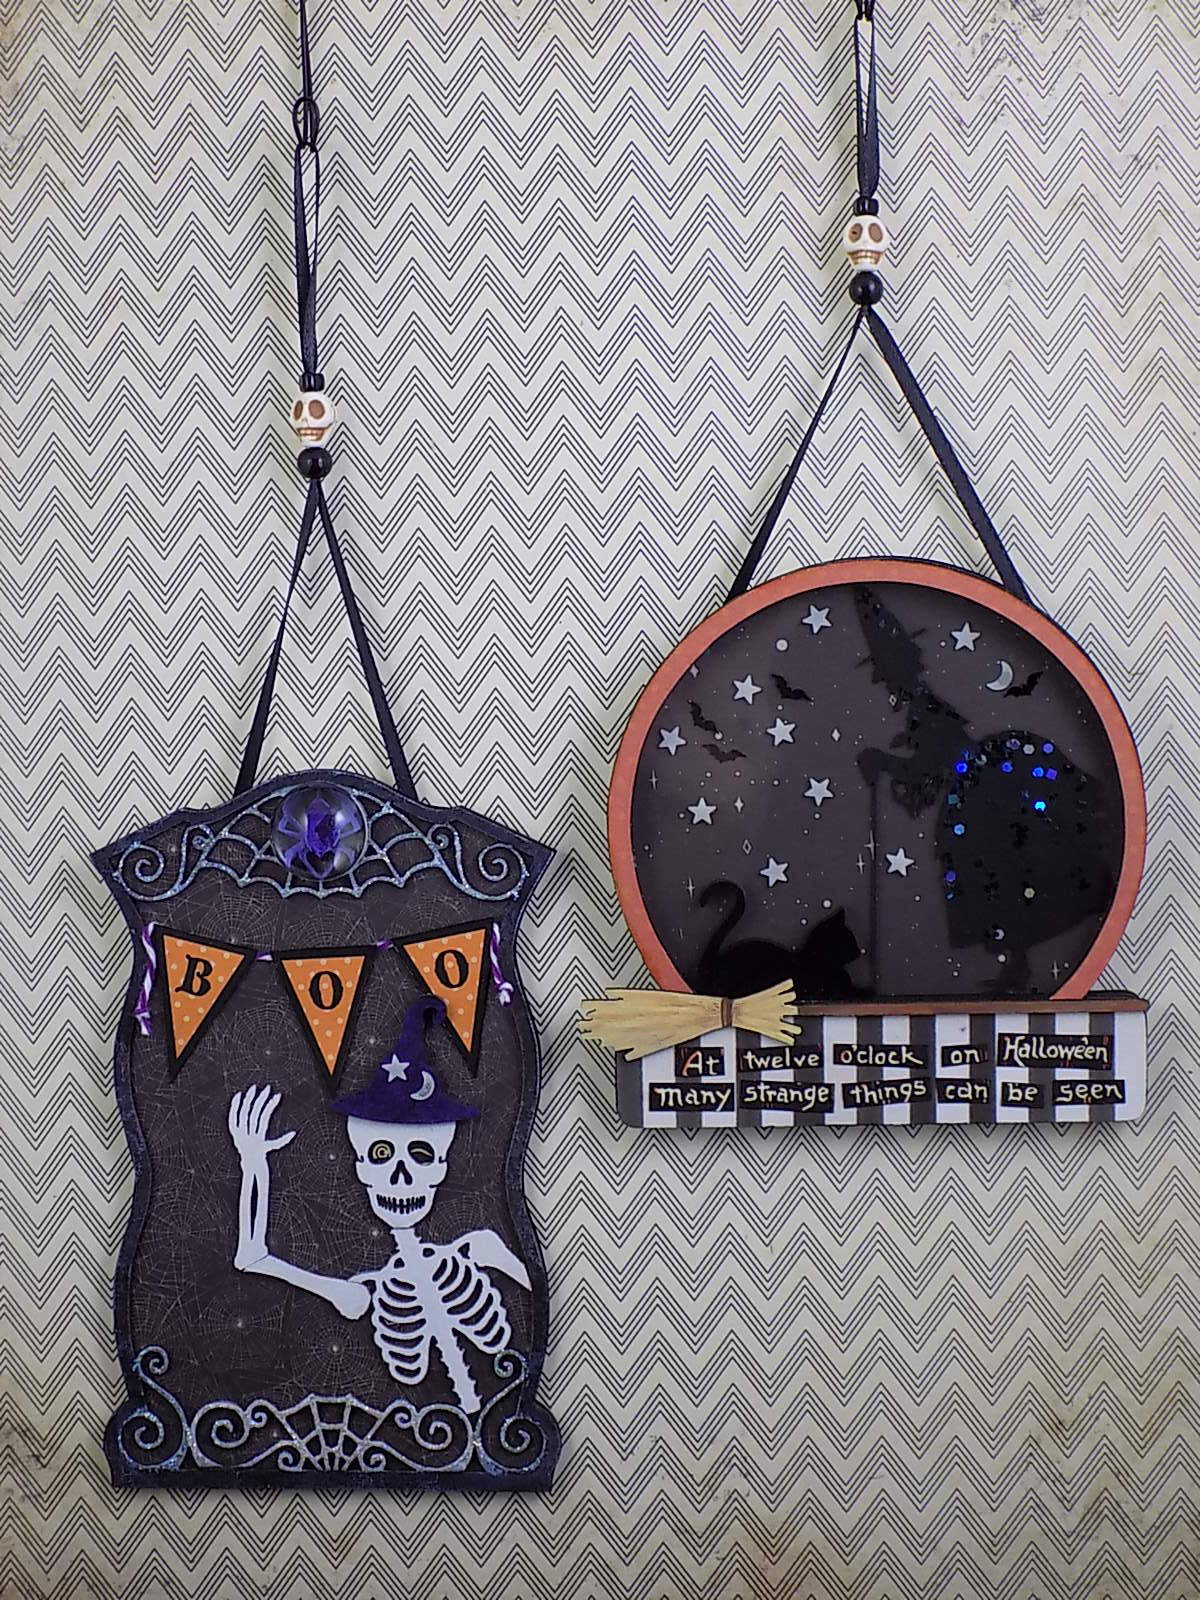
I couldn't let another day slip by without making something, so I grabbed a few things, snipped some bits, and glued stuff to stuff and after only a tiny while had two small hanging ornaments. 


Originally, the plans for the Large Spider Web Mirror Frame were a tad more elaborate than what it turned into, but using it for this project means I will have to get more stuff from Alpha Stamps. I am not broken up about that. :D


Before telling you how these ornaments were made (which is scary easy), I first must say how impossible it is to photograph shiny, glittery, reflective things. It's the pits. For instance, the spider web in the first ornament was painted with a silver guilding paste (so shiny) before being covered with Stickles glitter glue (more shinies). I used Silks shimmer acrylic paint on the spider but alas! All of the sparkle is lost in the picture. 

Anyway, to make the ornament, all I did was paint and paper the Large Spider Web Mirror Frame, dismember and reassemble a skeleton, add some eyeballs (or at least one...I think he's winking), a witch hat from the Mini Witchy Shape Set, and a BOO banner. There's a glass cabochon over the spider which looks really nice. You'll have to trust me on that one.


The other ornament is made from a Snow Globe Shaker, a really neat item that I also had other plans for, but those plans went out the window once I realized the Black Acrylic Lying Cat and a broom from the Mini Witchy Set fit so nicely on it. The Witch Shaker Ornament was painted black, papered on the front and inside, the cat and a "witch" from the Cinderella Silhouettes Set were glued in, as well as a sprinkling of Glow in the Dark Moon and Stars Slice Mix and Black Iridescent Mini Bats. Yes, I glued the stars and bats in place so, technically, this isn't a shaker at all. Sometimes crafting in an hour leads to forgetting to add the thing that makes it a thing. Oh well. It is still fun. Did I mention it glows in the dark?? 


It is not my week for photography...


So there you have it. Two very quick, very Halloweenie ornaments to hang on the wall or, if you go all out, on your ghastly black tree. Be bootiful, folks!

GO HERE to see the list of supplies for these easy ornaments!


Saturday, October 3, 2020

Tricks and Treats Shadowbox

 Hooray, October has arrived! I have been collecting all of my Halloween goodies from Alpha Stamps for weeks and finally sat at the craft table to make a little thing.


It is a sweet 3" x 4 1/2" shadowbox with a notched lid that's stuffed with spooky treats! Inside the shadowbox is a Retro Bottle Brush Tree decorated with Polymer Clay Halloween Slice Mix, a cute Mini Halloween Cake, an altered jack-o-lantern gumball machine, a treat bag loaded with mounds of candy, some ghastly sodas, and a plate of tiny candies. Oh, and an apple!


The gumball machine started out with a red base and a clear globe, but it didn't quite work with the paper from the Halloween Market and Masquerade pads. I very, very carefully broke the clear globe off (wear protective eyewear and gloves if you do this!), discarded the glass, and saved the gumballs. To remove the bits of glass from the inside, I used a heat gun to melt the glue before picking out the glass with tweezers. Once it was clean, the base was spray painted black, and I added some stripes with an orange paint pen. The new glass globe was colored with orange and black Sharpies. I filled the inside with only the yellow gumballs before gluing the new jack-o-lantern globe to the base. The witch hat is made from polymer clay.


I also built a small heavy cardboard shelf inside the shadowbox:


I had leftover candy that didn't make it in the shadowbox, so I pulled out some 1" sytrofoam balls and air dry clay to make a couple of pumpkin pails. Can't let anything go to waste! But before we get into the making of the pumpkin pails, can we talk about the super rad Mini Creepy Sign Post? How cool is that?! The post has signs galore, plus the creepy crows are fab! 

Okay, let's peek at those pumpkin pails:


Hee, hee! They're kinda cute. All you need to make them are a few teensy styrofoam balls, air dry clay (a quality brand, please), acrylic craft paint, wire, and optional shaping tools.


Chop a little off the top of the styrofoam ball, like so:


Smash air dry clay over the ball:


Smooth the outside, then cut off excess clay from the top of the ball and slightly flatten the bottom.


Using a ball stylus or other tool, carve a kooky face, then add the rim of the pail with a strip of clay.


Poke holes for the handle!


Eat Count Chocula while it dries.


Paint!


Attach a wire handle...


Squish your candy inside, and just like that, a treat-filled pumpkin pail!


Happy October to you! Hope you are having a scream creating your own Halloween things, whatever they may be!

And GO RIGHT HERE to see everything used in both the Tricks and Treats Shadowbox and mini pumpkin pails.

Wednesday, September 16, 2020

A Home Fit for Several Gnomes

I know it is September (aka Spooktember, when all the Halloween crafting happens) but an exception was made after receiving a Mushroom Niche Shrine with Arched Door and collage sheets filled with tiny gnomes from Alpha Stamps. I might have squealed a tiny bit. 


I say this every time a new Niche Shrine is announced, and it is always true, that this one is my absolute favorite. Mushrooms, gnomes, and shrines? Yes, please!


Shall we give a knock and see who's in? (I love that bitty door handle.)


What is going on in there?! Is this the party mushroom? 


Looks like Kerfoot is only interested in prepping potatoes for future batches of whatever's gotten the rest of them so happy.

Now, how exactly did eleventy-thousand gnomes cram into one mushroom house?


Oh-ho! The mushroom is a tunnel book! (A tiny one, but one nonetheless.) I have had an idea for a gnomish tunnel book for a while, so when the Mushroom Niche Shrine arrived it just seemed like the perfect opportunity to create it. 

Let's make a gnome home! 

What you see here are the front and back parts of the Mushroom Niche Shrine and the tunnel panels of the 4x4 Arch Tunnel Book. I placed the first tunnel panel on top of the mushroom front and traced around the opening to create a new doorway:


The top right is the mushroom front with the new door cut out. The mushroom front was placed on top of each of the tunnel panels, and I traced the curves of the stem along the top corners. Those got chopped off:


Next, paint the backs of the tunnel panels black (optional) then paper the fronts. I used the paper in the Mushroom House Kit; it's very gnome-y.


Next, cut two strips of paper  2 1/2" x 5 1/2". Make marks at 1" intervals on the long side. Flip paper over and make marks 1" apart beginning at 1/2". Using a bone folder, crease the paper at each mark, then flip the paper over again and crease those marks, too. Accordion fold the paper strip. Repeat for the other strip of paper. (Or use a scoreboard if you have one of those.) Cut the accordion piece at 3 1/2" then cut the remaining 2" section in half. Repeat with the other accordion piece. You will have two 3 1/2" accordion sections and four 1" pieces with folds. We'll call those shorter pieces "flaps".

In the above photo, I have added strips of double sided tape to the 1" flaps and attached them to the backs of the first and second tunnel panel. Ignore the other 1" flaps in that photo- those were spares.


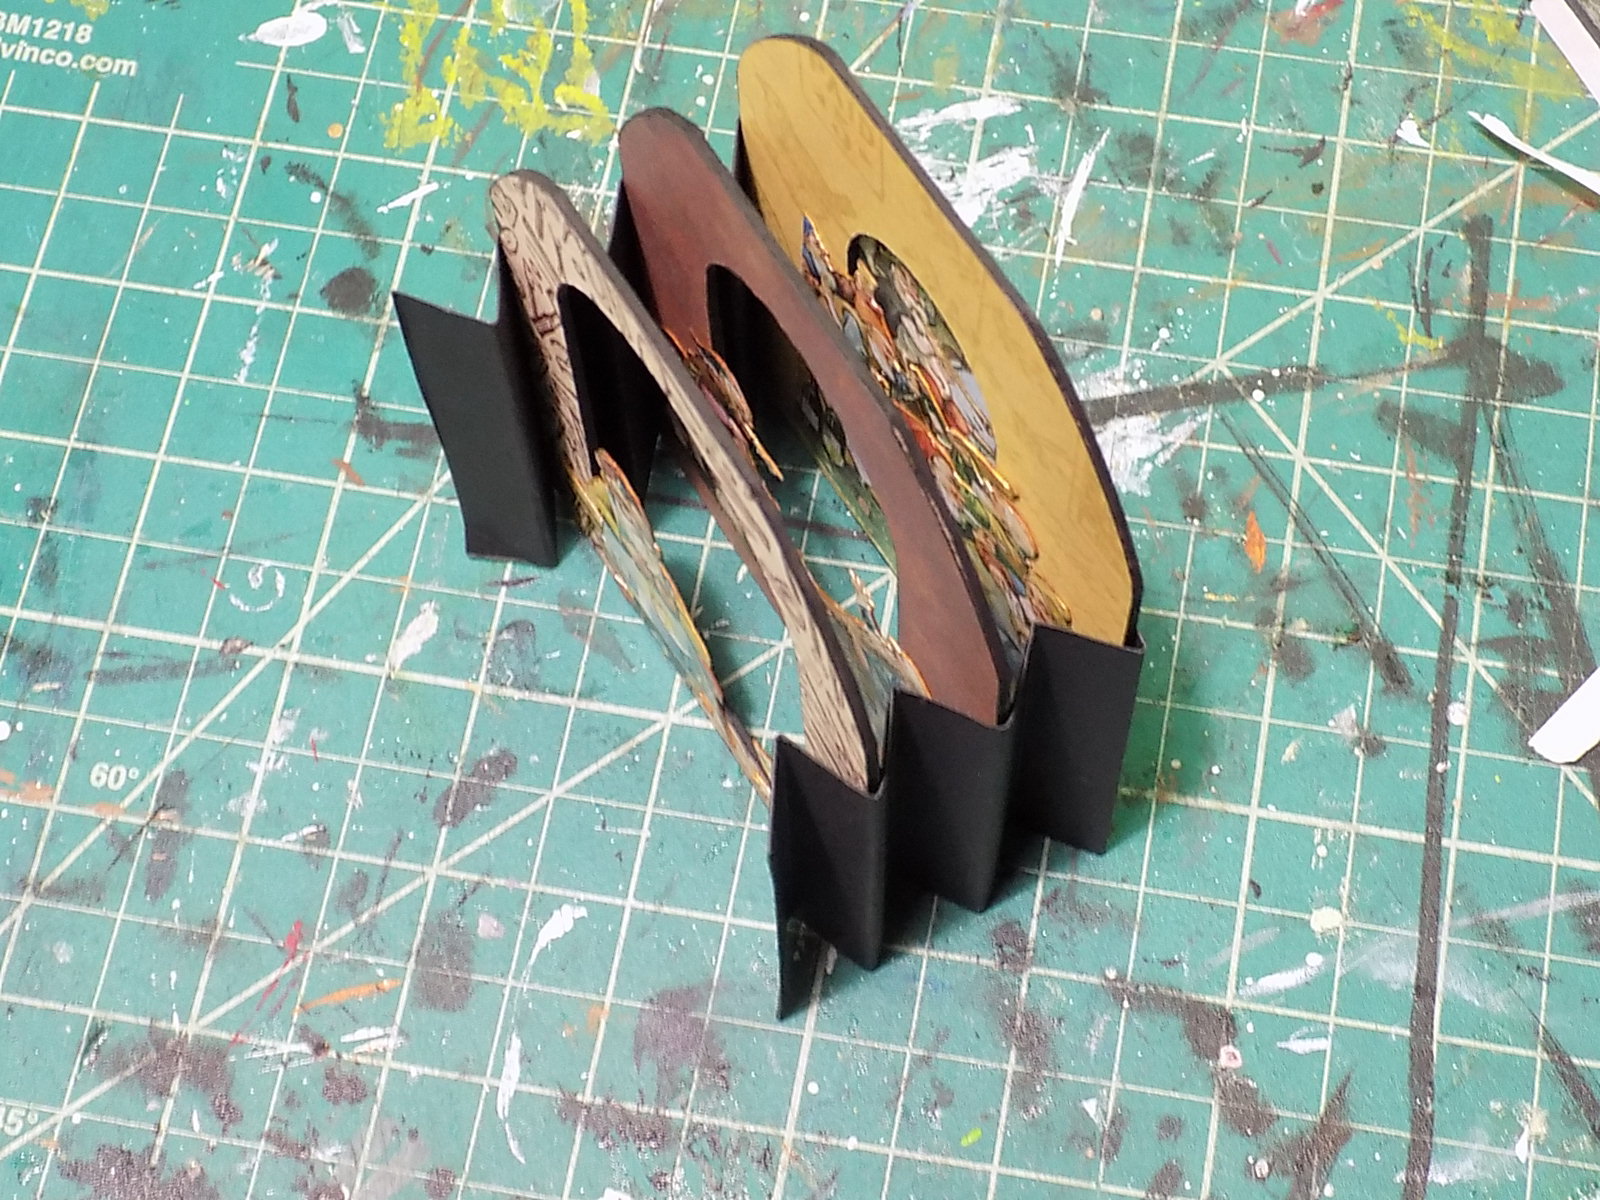
Time to attach the two tunnel panels to the accordion folds - exciting! Remove the backing from the tape and attach the flap to the 3rd fold of the accordion. Here's another delightfully fuzzy photo for you so you can see exactly where those flaps go...


This photo is a bit better. Sort of. Well, the idea is the very first fold of the accordion will be glued to the back of the Mushroom front, the next fold has the first tunnel panel, followed by the second tunnel panel. The last fold will be attached to the third tunnel panel before the entire panel is glued to the Mushroom Shrine back. Since the third tunnel panel is glued to the mushroom back, no flaps were used on it.


Using the flaps to attach the panels makes tunnel book making so much easier in my opinion. The book can easily fold together if you choose to create a book that closes.


Moving on to the mushroom front! This part is super duper easy. I wanted a 3D effect and chose to use Creative Paperclay. To make certain the clay would stay put and not separate from the chipboard, I covered the mushroom with gesso followed by two coats of tacky glue. There was a slight amount of warping as the clay dried, but it was minimal. 


And we're shaping, la, la, la...


Done! It dried for two days before I painted it with acrylic paints. I also painted the back mushroom piece. 

For the door, I traced around the opening of the mushroom onto the brown paper. An additional 1/8" was added around the perimeter, the paper template was cut out, then traced onto a thin sheet of basswood. Cut out the shape and there's your door! Paint and decorate as desired.


To attach the door, first glue the hinges on the door. Place the door over the opening and apply more more paperclay around the sides and over the part of the hinge that's touching the mushroom. Let dry. Touch up the paint. 


And there you have it, a wee mushroom house fit for (at least) 10 gnomes.


Don't forget to make a tiny lawn for your new gnome home, complete with autumnal shrubs and a teensy planter! Oh, and see the light wood planters on both sides of the lawn? They're beads!


Cute!


Now it's time for more Hallowe'en crafting...yay! GO HERE to see a list of supplies used. Have fun!
Saturday, September 5, 2020

A Clutter of Cats in Cottages

Anyone else excited about August ending? Sure, September is still hot, insects continue to buzz around, and if I were so inclined, I could shave my legs and go to the beach (on a Tuesday when no one is there). However, September means the beginning of all things Hallowe'en and what could be better? 

Um, nothing. 

Okay, cats are up there.


So what did I make? It's a Hallowe'en village for cats. 😸Mostly black cats, but a grey one snuck in somewhere.


I've been wanting to make something with the Cabana Row House Mini Set from Alpha Stamps for a really long time. Along comes the Masquerade Paper...well, that is all it took! It is my new best friend.
The tiny doors and windows from the Mini House Doors & Windows and House Ornament Window Trims fit exactly right on the mini houses. So cute.


Can we talk rickety fence for a sec? I snapped up the new chipboard Tiny Rickety Fence Set and used them EVERYWHERE. Couldn't get enough of those teensy, wonky things! I also chopped one up (gasp) and made a signpost. 


A few Mini 3D Bare Trees were cut apart and painted black before adding them here and there, and I glued scraps of Dresden along the roofs. Some of the houses also have a pretty Dresden star at the peak. 


I couldn't resist the Hocus Pocus banner and found two wooden kitties to hold either end. And there you have it. One Hallowe'en plus cats decoration done! 


I didn't make a tutorial for several reasons. Firstly, this project is nothing more than gluing things together and papering bits. Anyone can do it. I also had a nanosecond of free time this week, so took advantage of that by creating something and not waste time trying to remember where the heck I put the batteries for the camera. (They were behind the craft table, btw, because my craft table cat buddy, Minicus Moo, loves nothing more than to push all the things off the edge.) Lastly, I thought I'd talk tools. Those things that we use for everything and don't think much about? Maybe someone will find my list useful. Or not!

1. Aleene's Tacky Glue. I personally use the Original formula only since I like knowing there is a few seconds to adjust or shift things around before the glue sticks. Wiggle room is nice. Especially in pants.

2. Disposable scalpels. An indispensable tool that was introduced to me many moons ago by my two favorite paper artists. You know who you are! I cut out all collage images with scalpels because the blade is bendy and extremely sharp. They are also cheap.

3. Sandpaper block. Good for removing a bit of paper hanging off the edge of whatever it's glued to, sanding off any metal on a charm after removing the hanging ring, and the obvious; cleaning up any miniatures that I build. Also handy when you've broken a nail, snipped it off with the only pair of scissors you allow other people to use, and it needs shaping. 

4.  15 mm Posca markers in various colors, mostly black ones though. They cover chipboard like a dream and can do it with a few strokes. Dries fast, too.

Hope you are still with me, because here's the best part. The SUPPLY LIST LINK.

Now go get your Hallowe'en crafting on!