Saturday, March 6, 2021

The Twinkle Tinkerer's Workshop

 This project idea came to me after I had been chatting with Leslie about the long list of fictitious art I had designs for, and Leslie, being the patient and polite person she is, let me go on and on with these grand plans like they'd all actually come to fruition in the near future. Leslie (a.k.a. the Voice of Reason) offhandedly mentioned it being March, to which I had a moment of panic and quickly decided to merge a few projects together. 

The Twinkle Tinkerer's Workshop started with the glorious Lucky Star 8x8 Paper Pack and the Lucky Star Kit from Alpha Stamps. Oh, how I love these two! All of the shiny pretties in the kit are absolutely swoonworthy. I scooped those up along with a cute Workshop Table - 1:12 plus a whole lotta tools and in about 5 hours had a finished project. 


The idea is a bit of a quirky one. It's a workshop for a someone that mends stars (and maybe collects all of the dreams and wishes, too). Let's take a little tour, shall we? 


Here is where the magic happens! The workbench is covered with shimmery dusts, paints, powders, and every kind of tool.

[painted and stamped workshop table and stool, with a collage sheet image for the top of the stool]


There's a mallet, hand saw, nails, a wrench...


hammers, another saw, a hand drill, pliers, and I think perhaps there's a woodworker's plane somewhere in the tool box.

[toolbox was painted, sanded, stamped a few times, then glittered]


Above the table is a celestial mobile hanging from a metal swivel plant hanger.

[made from thin wire colored with alcohol ink and bent around a few charms then hung]


Got to have a place to store all of those dreams and wishes before they come true:

[painted mini wooden oil drums with text from the Fairy Dust collage sheet]


Another quick peek at the workbench...can you find the nails?

[re-painted can of paint with glitter, tiny glass globes with tulle or glitter stuffed inside then glued to a bead cap, metal canisters and jars painted with a gold paint pen, layered rosettes to serve as a bowl for stardust sequins, glass jar filled with "magic" wool roving]


Under the table are several jars, bottles, and containers.

[filled with stuff like pearl beads, teensy starsbasket filler, glass glitter, sequins, etc.]


Finally, on the walls are images from collage sheets and a quote that I found in the Lucky Star paper pack. I cut a simple frame from dollhouse moulding and glued it on. A few tufts of wool roving clouds placed here and there, and then it was done!


With two project ideas knocked out in one go, I can cross them off the list and move on. Or think of twelve other things I'd like to create. Whichever.

Go HERE to see all of the splendorific supplies used. Go and make some magic of your own!

Saturday, February 13, 2021

Eat A Cake - A Mini Recipe Book Project

I'd like to say I have managed to complete my To Do list for the week and then had time to make some art. Well, the To Do list is only half-way finished and I scrapped the rest so I could get to the making art part. It's not like the laundry is going anywhere.

Spending an afternoon creating something is a great stress-reliever. I can focus on a project, even for an hour or two, and I'm happier afterward. When I decide to ditch the dishes and craft a little thing, I am grateful to have a stash of monthly kits from Alpha Stamps. I know I can pick one up and have it finished before too long, feel like I've accomplished something rewarding, and still have time to feed people. But who cares about all of that, let's see some art!


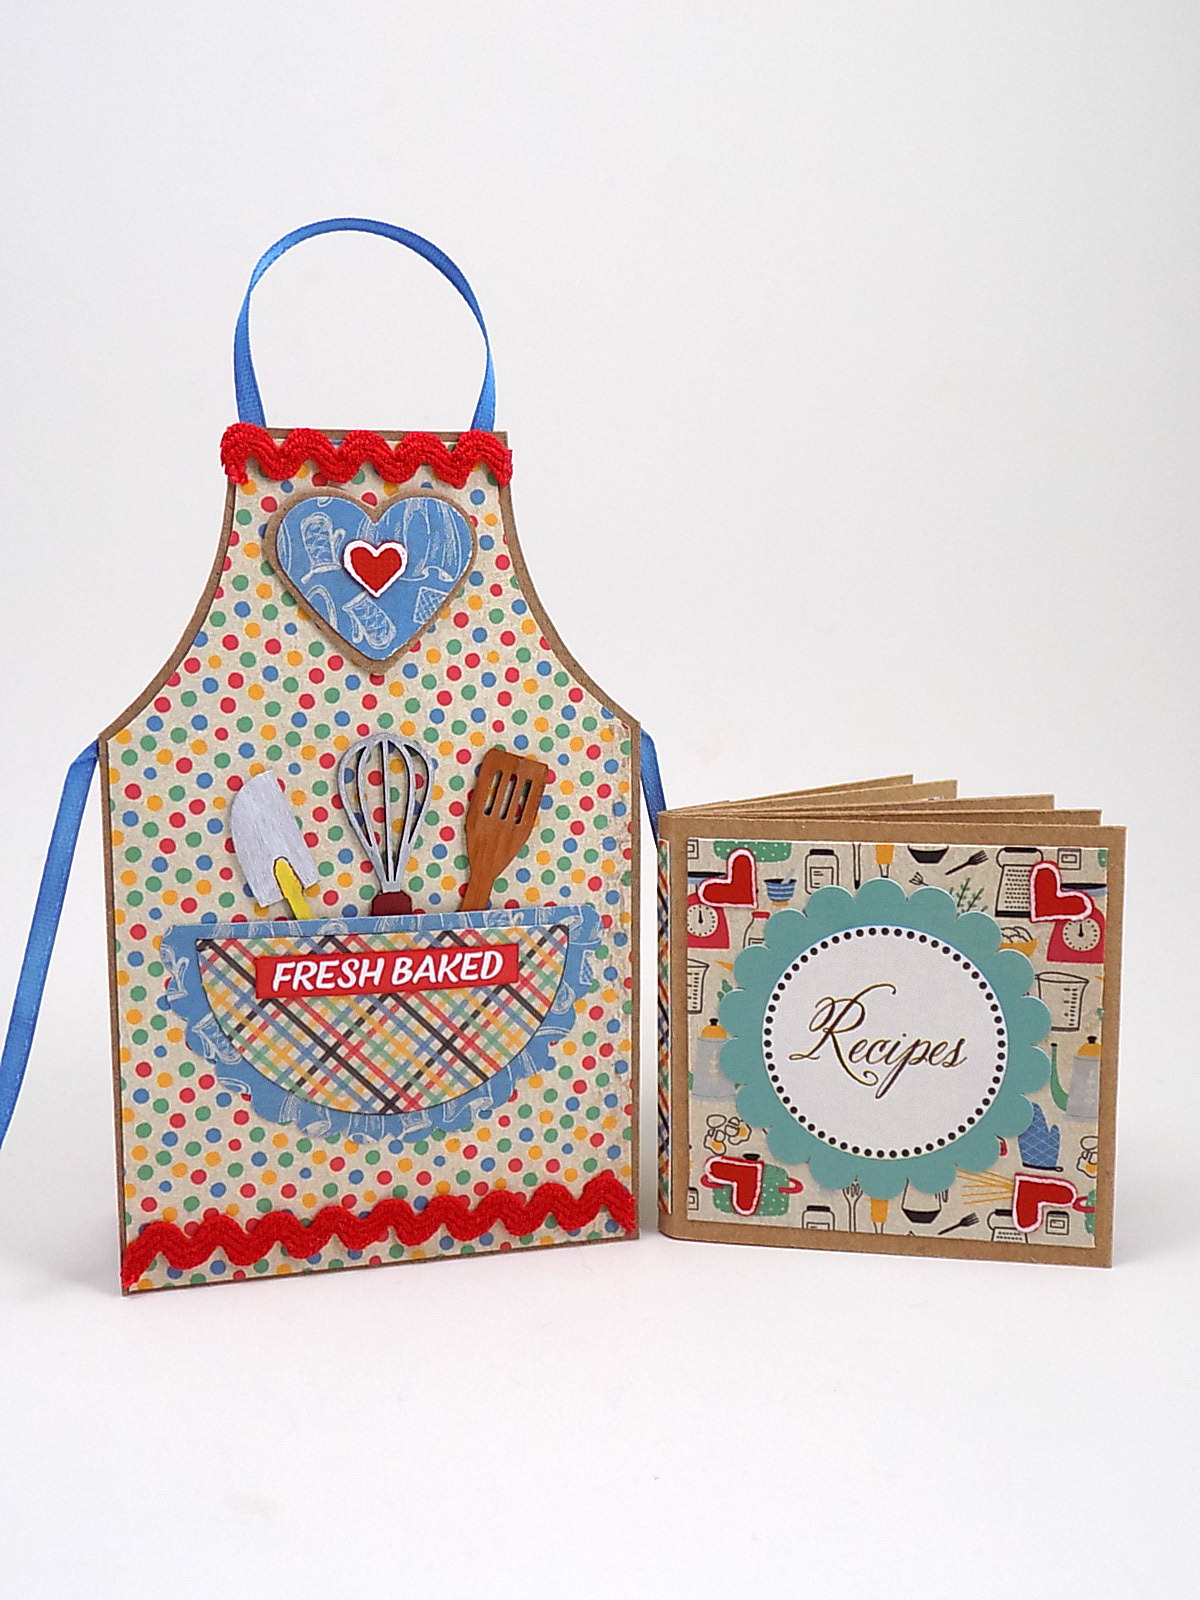
I'm still having fun with the Tiny Retro Bakery Box Kit from January and all of its parts. For such a teensy kit, it has loads of things to play around with! I turned my kit into a mini apron box with an itty bitty recipe book tucked inside.


Another great thing about small projects - you only need |this| much paper! (I love the Delicious Scrapbook papers and bought more anyway. It sparks joy.)


The 2.5 x 2.5 Kraft Folding Box from the kit has a window but since I covered over it on the front, I added a humorous image to the inside. Do this part first if you plan on a solid front. 


Inside the box is a wee 2 1/4" x 2 1/4" book with more collage sheet images and tiny removable papers for recipes, notes, or general silliness. 


Here's how to make the book:

Materials - 

12x12 Kraft paper for the book

Scrapbook papers for the pages and pockets

Collage sheets

Stickers, embellishments, double-sided tape or glue

1. Cut two lengths of kraft paper 2 1/4" x 12. Score paper every 2 1/4" along the length of the strip. Repeat for the other strip. There will be a small flap left at the end; score 1/4" from the previous score mark on both small flaps.

2. Cut (6) 2" squares for the left-side pages of the book, the front cover, and back cover.

3. Cut (4) 2" x 3" rectangles for the right-side pages. Score at 2" and fold. This will make a pocket to hold the recipe card. Trim the top of the pocket with decorative scissors. 

4. Cut out collage sheet images.

5. Don't count the number of pockets and squares in the photo because it lies.


6. Accordion fold the two strips of kraft paper and slide the two pages without the small flaps over one another. Use double sided tape to hold the pages together. I also added tape inside each page, but it isn't necessary. 


7. Add double sided tape to one small flap, wrap it around the book pages, and adhere it to the cover.


8. Originally, I had planned on using the other small flap as a way to keep the book completely closed. You can do this by gluing additional pieces of kraft or scrapbook paper to the flap to make it a tad longer, then add tiny magnets to the flap and book cover. I chose to chop off the extra flap because the cat was demanding dinner and did not care about the aesthetics of my book.

9. Add the pockets, page covers, and whatever else you want to your new book. Don't forget the ric rac!


Now I feel ready to knock out that To Do list (with a smile on my face). Happy crafting!


GO HERE to see the supplies used and HERE if you are in need of a quick happy project.

Wednesday, January 27, 2021

You've Got Mail

 "In transit". Those are the words you like to read when you are tracking a package. They bring a bit of excitement to the day. A little while later you check again, because you are anxiously awaiting those Great British Baking Show oven mitts, only to see the same message. Days later, still no change. Sigh. I'm almost expecting random photos of my mitts in different locales to show up in my mailbox. This does not deserve a Paul Hollywood handshake folks.

That being said, I can tell you that I spend a great deal of time in my local post offices and have gotten to know a few employees fairly well. They (well, one postal clerk in particular) have told me of the employee shortages, the influx of holiday mail they are still delivering, plus some crazy weather that's happened in certain areas, which explained my perpetual "in transit" message. I have seen the teetering stacks of packages behind the counter. It makes me wish I had left my mail carrier a better Christmas gift tied to the mailbox. 

So instead of refreshing the USPS Tracking page over and over like a madwoman, I decided to make some art. 


Guess those GBBS mitts are still on the mind. Hm.


I used one of the kraft boxes from Alpha Stamps for a tiny project. This one is the 3x3 Kraft Folding Box with Sliding Lid with a cellophane window. I cut out a bunch of mail-themed collage images then glued them all over the box. A few words were printed, inked, and glued on. I added a header made from an oval in the Bakery Box Banners chipboard set and a Symmetrical Bronze Flourish.


The inside is pretty plain; I made four envelopes from black cardstock, added a stamp from the 4 Heart Icons Rubber Stamp Set, and called it a day. In case you're wondering, any envelope smaller than 2 1/2" square would fit. 


And here's a tutorial on how to fold the box:


fold along all the creases toward the inside except for the notched bits (those are folded the opposite way)

roll each side with the notched bits to the inside

and then join them

like so

tuck in the short tabs


and finally, roll the last two sides over to the middle. you can either use double sided tape or glue to hold the flaps in place.


Well that didn't take too long. Maybe the mitts are Out for Delivery now...

Thanks for checking out this little project, and I hope whatever you might be waiting on arrives soon!

Don't forget to GO HERE to see the supply list!


Wednesday, January 13, 2021

Let's Bake!

 I know a lot of people have decided to pass the time in the kitchen baking cookies, pastries, cakes, and bread. My daughter has perfected the cheesecake with zero cracks. Truly amazing. Since I do not bake anymore, I did the next best thing - miniature "baking"!

The Tiny Retro Bakery Box Kit from Alpha Stamps started me on this path, with its delightful kitchen themed buttons, new collage sheets, a tiny mixing bowl...ack! It is too much! So, naturally, I took that stuff along with some other bits and bobs and crammed it in a 7x7 Corner Room Box. Yay!


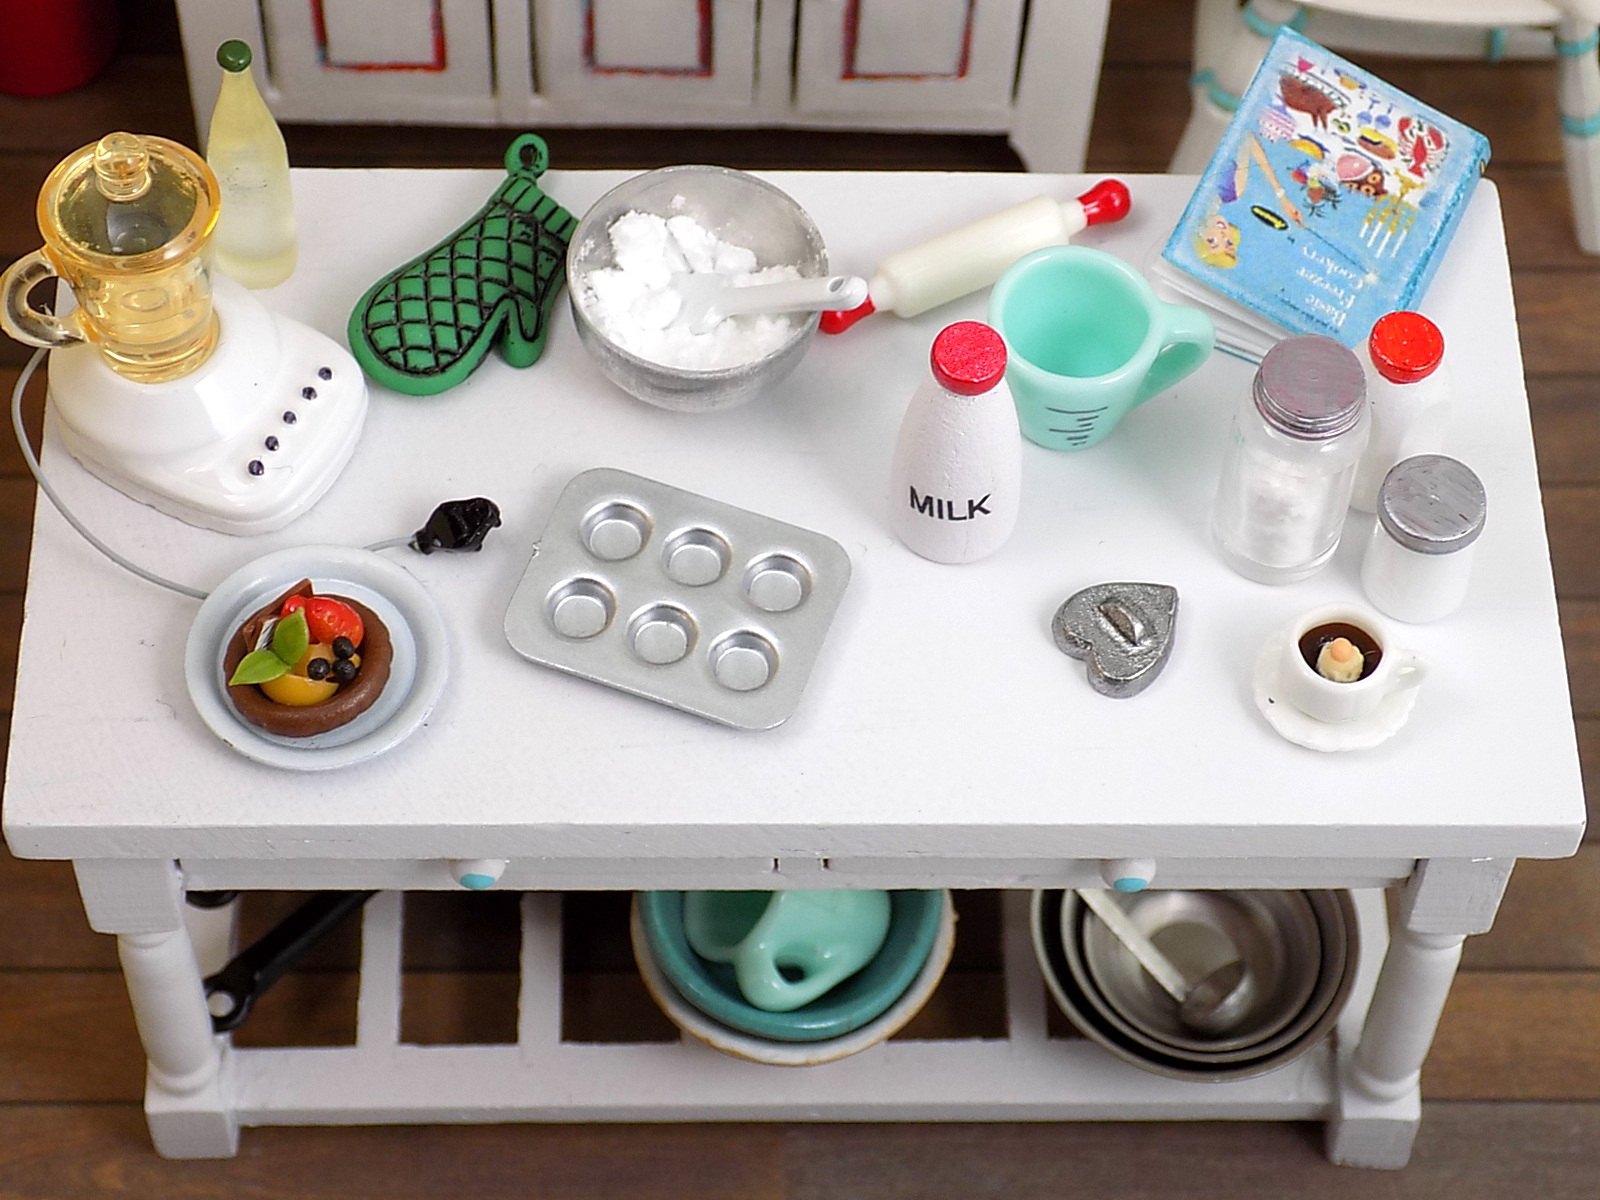
There's a work table in the center that holds pots, pans, and bowls, plus all of the baking accoutrements on the top: kitchen blender (eeek, there's a plug!), blue measuring cup (technically a coffee cup in a gorgeous retro color but a few swipes with a Sharpie turned it into a measuring cup), milk, muffin pan, rolling pin, cookie cutter, spatula, items from the kit, and a smattering of jars. 


A bit of paint has been added to the cutting board before being hung on the wall. I think it adds a nice touch, plus I really like that button. The shank was snipped off the back so it lays flat. The same was done to all of the buttons used, but I have a second set to sew onto something later. :)


The hutch in the back has tons of things on its shelves and inside the opening doors on the bottom, like a grater (another button!), honey jar, little lemon cakes, red canisters, more jars and containers, a rooster, and a canister for spoons and a whisk. (It is really a painted flower pot...)


Miniature baking can be just as enjoyable as real-life baking, just not as delicious. Not to mention a real disappointment to kids. Oh well!


Hope you have found some happiness in your day. Keep on crafting!

You can GO HERE to see all the fun bits used in this little scene. 


Wednesday, December 9, 2020

Two Projects Finished: A Christmas Miracle

 It has been some time since I've glued things to things and decided to clean off the craft table and make something. Two somethings, actually. Thanks for being patient, Leslie!

The first project is very quick to finish and would be a fun gift if, like me, you've waited until the last minute to do anything holiday related and need a present for a bestie. I removed the lids from two Small Sliding Tins from Alpha Stamps and made snarky fridge magnets! Who doesn't like a little snark, right?


Okay, so maybe this gift would only be appreciated by mothers, because we all know what needs to happen for a holiday to be awesome:


And Dads?


Well, at least there's wine.


To make your own magnet gifts, first remove the lid from the Mini Slider Tin and spray paint the bottom half. This is optional. I chose to paint the inside and edge white because it was quicker than fiddling with a teensy strip of paper for the inside. Add paper inside, on the back. Glue in a fussy cut image, like yawning Dad there... I also found the Tiny Cardstock Icicles & Christmas Ornaments fit nicely. Glitter some things, add optional snarky text, then glue trim around the edge, like the Miniature Red Tinsel Garland. Stick an Iridescent Snowflake Sequin on the tin, add an Adhesive-Back Magnet Strips to the back, and done! 


While waiting for the spray painted tins to dry, I dug around in my bin of Things That Should Be Used to find a super cute resin wheelbarrow and thought, "I wonder how much stuff can be crammed in there?" 


Quite a lot, as it turns out! Gingerbread house, donuts, red & white lollipops, star cookies, a gumball machine, canisters of candy, a cookie sheet of tiny gingerbread people, even an itty bitty tree! All I really did was paint the wheelbarrow, put a bit of floral foam in the bottom, add ALL THE THINGS, then fill in with white pom poms. 


I also discovered an unfinished wooden tool box and stuffed it with goodies, too. 


After painting the wooden toolbox, I added little bits of polymer clay inside, put easter basket grass on top of that, then stuck red and white candy canes, green, red, and white candy canes, and more lollipops into the clay. The snow people are from the Christmas Cookies Large Polymer Clay Slice Mix (and are adorable!).


And there you have it! Paint. Fill. Done!


You can GO HERE to see the supplies used for the Classic Christmas Tin Magnets

And GO RIGHT HERE for the Sweet Treats for the Holidays supply list.

Now I really, really do need to finish knitting socks...what day is it?