Wednesday, February 15, 2017

Cat Tales ATC Book

Paper toys delight me like nothing else. Airplanes, pop-ups, the "cootie catcher" every kid in grade school folded and played with, jumping jacks, and paper dolls...I love all of that. When I saw the new Wain Cat Paper Doll collage sheet at Alpha Stamps, I knew I had to get my paws on them! The sheet I used features Cinderella, Aladdin, the Princess, and the Magician, and Robin Hood, but there is also More Wain Cat Paper Dolls of Beauty and the Beast, Little Red Riding Hood, and Dick Whittington. Louis Wain's illustrations of anthropomorphic cats are fun all by themselves, but then to have the added pleasure of dressing and accessorizing these big-eyed kitties? Well, that's the cat's pajamas!


As soon as I had cut out all of the bits and pieces, clothed everycat in their appropriate attire, and reenacted a few scenes, I wondered how to store the paper dolls and keep them all together. What about a book? An ATC sized book that can be slipped into a pocket and carried along? 


Inside the book are three envelopes, one for each story, and in the back are two removable backgrounds that can be unfolded. The backgrounds are also reversible for maximum playability.  Here is the middle envelope opened up with Aladdin and the Princess ready to entertain. The tuxedo kitty on the front is attached with a brad so her head can be swiveled inside the book's cover.


Poor Cinderella, always sweeping, and her only friends are the mice.


Ho, ho! What's this? She's found the purrfect Prince! You better pounce home, Cinderella, because your time is up!


Aladdin and his pre- and post Genie outfits:


And my favorite one, Robin Hood, with all of his accoutrements. Maybe Aladdin and Cinderella will stand in for Little John and Maid Marian.


Finis!

If you want to make your own ATC sized envelope, here is how you do it:

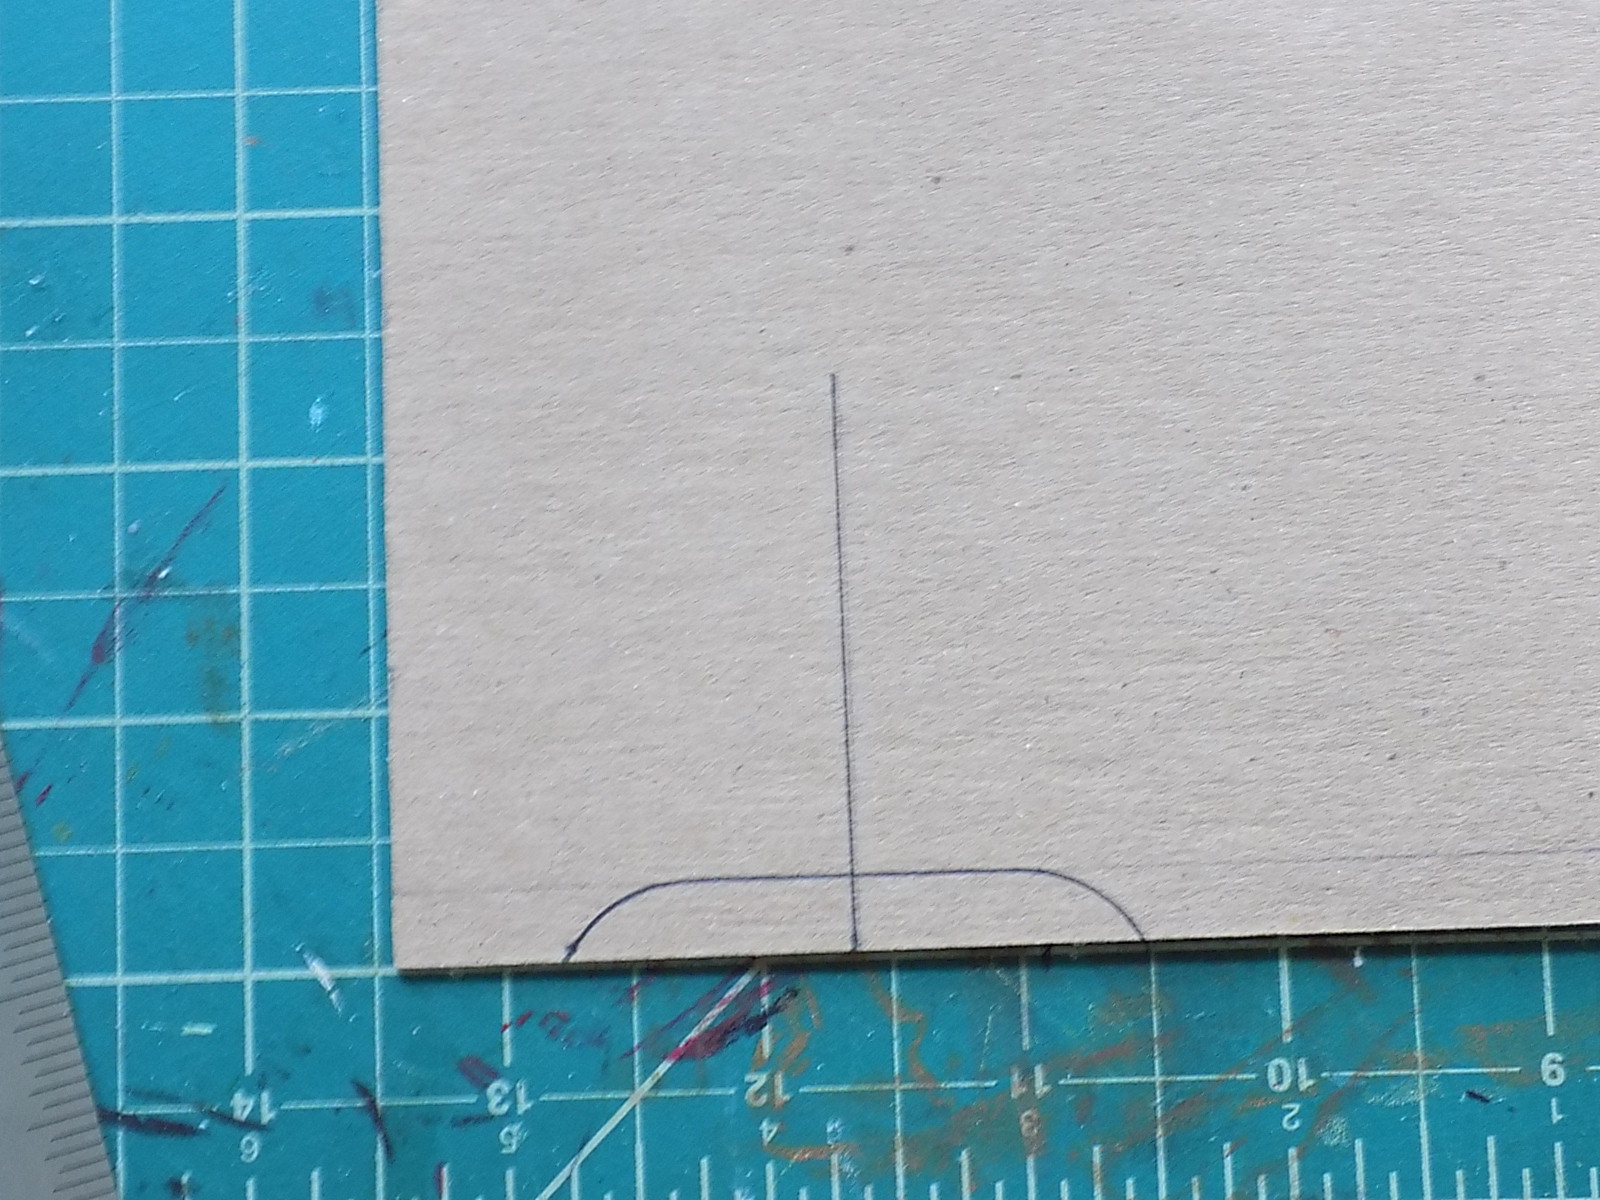
Cut a 5" square from cardstock. Place your square on an envelope maker and score a line at 1 3/4" on opposite sides. Turn and score a mark at 2 1/4" on opposite sides. Or measure the same distance from the corners and score if you don't have an envelope scoreboard.


Using a corner rounder, punch the corners on the long sides. Snip off tiny triangles where the score lines meet. 


On one long side, mark and cut a slit to hold the top flap of the envelope.


Fold over the sides and apply glue (or use a tape runner) to edges, then fold up the bottom. Stuff it full of paper cats!


Happy Crafting!

All of the supplies I used (it's all paper!) can be found HERE.

Plus a few stash items:

Sizzlits Tim Holtz Alphabetical Die
Small Brad (for the swiveling head of the cat on the front)
Cardboard

Tuesday, February 14, 2017

Love You Like No Otter

It is Valentine's Day and I stink at card making. Can't do it. They drive me crazy. So I made a tiny otter to send to Kid 1 instead.


He's a little derpy looking, but it is kind of endearing.


I think she'll like it nonetheless.


Hope your Valentine's Day was like no otter!

Monday, January 23, 2017

Valentine Shrine

There wasn't much going on yesterday, other than the pouring down rain and tornado watches, so why not make some art? I pulled out this tiny house shrine from Alpha Stamps and a fun image of a goggle-wearing pooch to make a silly Valentine.


Unfortunately, there were only three of those hinges in the stash. I would have preferred a fourth, because it would look better that way, but hey. You work with what ya got.


Haha! That face is priceless.

Supply List:

House Shrine with Doors- Tiny
Funny Pets Collage Sheet
3mm Brass Flat-Back Studs
Tiny Curved Hinges
5/8 inch White Zig-Zag Cotton Lace
Victorian Drawer Pulls
Amour 6x6 Paper Pad

Wednesday, January 4, 2017

The Dwarfs' Cottage Altered Tin

Alpha Stamps is ringing in the new year with a sweet Snow White kit that includes Fairy Tale Frames Inserts for Altoid tins. I fell in love with the scalloped insert frames from earlier this year, erm...last year, and was excited to see more. 

I used an image from the Snow White with the Dwarves collage sheet and the blank tin from the kit to construct the Dwarfs' wee cottage, which has to be a much more pleasant place than a Prince's boring old castle. Plus, tiny houses are the way to go. 


The entire cottage is made from just three things: the tin, cardboard, and Creative Paperclay. The stones and wood beams are sculpted from the paper clay and the roof pieces and tiles are cut from cardboard. Super easy! 


You can see here how the roof is cut, but I'll show you how to do it in a sec. Adding clump foliage in the spaces between the stones adds a bit of charm.


There's a plume of smoke coming from the chimney, which is simply a tuft of wool roving stuffed in the top. I wonder what those two dwarfs see?


Want to build your own cottage? Let's get to it! For the roof, all you need is a blank Altoid tin, and both heavyweight and lightweight cardboard. 

Trace around the top of the tin onto the heavyweight cardboard. 


Mark the center of the tracing and make a straight line upward, like this.


Measure an equal distance from either side of the curved mark. Draw a diagonal line from that point to the vertical line and repeat for the other side. Did that make sense? I think it's better to say, "Trace around the tin's top part and make a triangle." Do this twice and those will be the gables.


Cut out. Obviously.


For the stones you will need Creative Paperclay, a toothbrush, and a pointy tool of some sort. Also your tin. I wasn't sure if the paper clay would stay put after it dried on the tin, so I covered the tin in paper first, then sanded the paper a little, and the added tacky glue to the paper before sticking the stones on the sides. That is most likely over-doing it, but I didn't want to put all this work in only to have all the stones fall off. I can tell you that mine are stuck tight!


To make the stones, roll bits of clay into ball shapes and smash them on the paper-covered, glue-slathered tin. Use the tool to shape the clay, and then pounce the toothbrush over the stones to add texture. The tool can also be used to crease lines on the stones. I left a space at the top of the tin to accommodate the gable and roof pieces. When the clay dries, outline all of the stones with white paint, smooshing paint between the crevices to cover the paper underneath. 


After painting the stones, fill in the space at the back of the tin with more clay stones, and while the clay is still wet, push a gable into it. Glue the other gable piece to front of house and let the whole thing dry. (Not that it is necessary, but I glued a skinny dowel in between the two gable pieces at the peak for added stability)


Measure the length and width of one side of your gable and cut two pieces for the roof from heavyweight cardboard. Cut the ends off at an angle so they'll fit snugly together. Glue in place. Almost there!


The disaster that is my creative space. Is that a half sewn Niffler back there???


To make the roof tiles, cut strips from lightweight cardboard. Make them slightly wider than your roof. Cut each strip into three sections and distress the edges. Glue to roof. Paint when dry. 


I added the Fairy Tale Frame insert, covered the edges of the tin in more paper clay, then sculpted it to resemble wooden beams. Everything was painted, a cute little window was glued in place, and finally clump foliage was glued in the cracks of some of the stones. 


Hope your 2017 is a crafty one!

GO HERE to see the supplies used!


Saturday, December 17, 2016

Naughty or Nice Shaker Ornaments

Alpha Stamps has these great chipboard ornaments with a shallow plastic dome over the front so you can easily create shaker bauble. Fill them with microbeads, sequins, confetti, or any other thin decoration, add a paper image to the back, paint the front, and then you have a quick, lovely Christmas present for someone special. 


Because I like to remind my children of the importance of being nice, my ornaments are adorned with the jolly St. Nick on one side and the child-gobbling Krampus on the other. If my kids happen to forget their manners, I have them turn one of the St. Nick ornies over to reveal Krampus, and they really do not like that side. The utensils in one of the ornaments probably has something to do with that.


Luckily, they are mostly well-behaved and we get to enjoy the merry side more often. 


Hope your holidays are joyous!

My supply list is HERE!

Sunday, December 4, 2016

Anything From the Trolley, Dears?

I participated in a Harry Potter Holidays Swap over on Craftster and after rummaging through my stash, I came across an ancient tea cart kit that screamed Honeydukes Trolley. Researching the different kinds of sweets that were going to go on the cart lead me to an amazing Honeydukes Trolley on 19th Day Miniatures. The artist, Tara, had used the very same tea cart I had, and because I wasn't capable of envisioning a better version, I chose to replicate her paint job for my cart. I love those colors!


Most of the candies are made from polymer clay, like the chocolate frogs, pumpkin pasties, cauldron cakes, swirly lollipops, fizzing whizbees, chocolate wands, gummy snakes, Bertie Bott's beans, sherbet lemon drops, licorice wands, and white chocolate owls. The heart shaped and pink swirled candies were cut from pre-made polymer clay canes, and the sugar quills and Drooble's gum are plastic beads. All of the jars, bottles, and pots are from Alpha Stamps, and you can find the tea cart there, too! 


Look at the doofy chocolate frogs! They must have had a newly employed wizard at the chocolate factory the day those were made! However, it looks much better than my attempt at hand sculpting one, which turned out looking more like a rabbit pellet with eyeballs. I used some EasyMold Silicone Putty and a Lego toad to make a mold, and was satisfied (mostly) with the results. The white chocolate owls were made the same way, and I liked how they came out much better.


Hope your holidays are magical!

Saturday, December 3, 2016

Mini Silhouette House

Alpha Stamps has a new House Room Box with four tiny rooms to decorate. How cool is that? The best part is it the deer silhouette that fits over the top portion of the house. You can glue a snippet of tissue paper or vellum between the silhouette and the spacer piece then add an LED tealight to the attic of the house. Everything is better when it glows.


 My brain couldn't get passed "silhouette" so I continued the theme and chopped several of the Ornament Layers away from the frames, painted them black, then glued them in the rooms of the house. The little girl on the stairs is my favorite because she is shadowed behind the lit tree. Creating the tree is as easy as pie, and it took about 5 minutes. After painting my tree black, I cut out a section of thin plastic (mine is toy packaging) and glued it to the back of the tree. I colored the ornaments and tinsel with Sharpies. That's it. 


Taking pictures this week has not made me jolly at all, but here's my attempt at showing how the silhouette cut outs are glued in the cubbies.


Fuzzy Santa

To keep the Deer Silhouette in place, I trimmed two dowels, turned the house on its back, then placed the dowels in the bottom corners of the attic. Place a dab of glue on the ends of the dowels and then set the deer silhouette in place, pressing it into the glue a little. Let dry. That was my lazy solution for attaching the attic. 


This Mini House would look really cute all decked out for Christmas. Happy crafting!

Supply List: Mini House Room Box w/4 Cubbies
Deer Attic Silhouette 
Christmas Delivery 6x6 Paper Pad
White Suede Paper
Dimensional Snow Writer
Diamond Stickles
Fairy Candle Ornament Layers
Flying Sleigh Ornament Layers
Ice Skaters Ornament Layers
Stairs Christmas Morning Ornament Layers
Mini String of Fairy Lights
Tea Light